Schwälmer Weißstickerei – Was ist das und wie geht das?
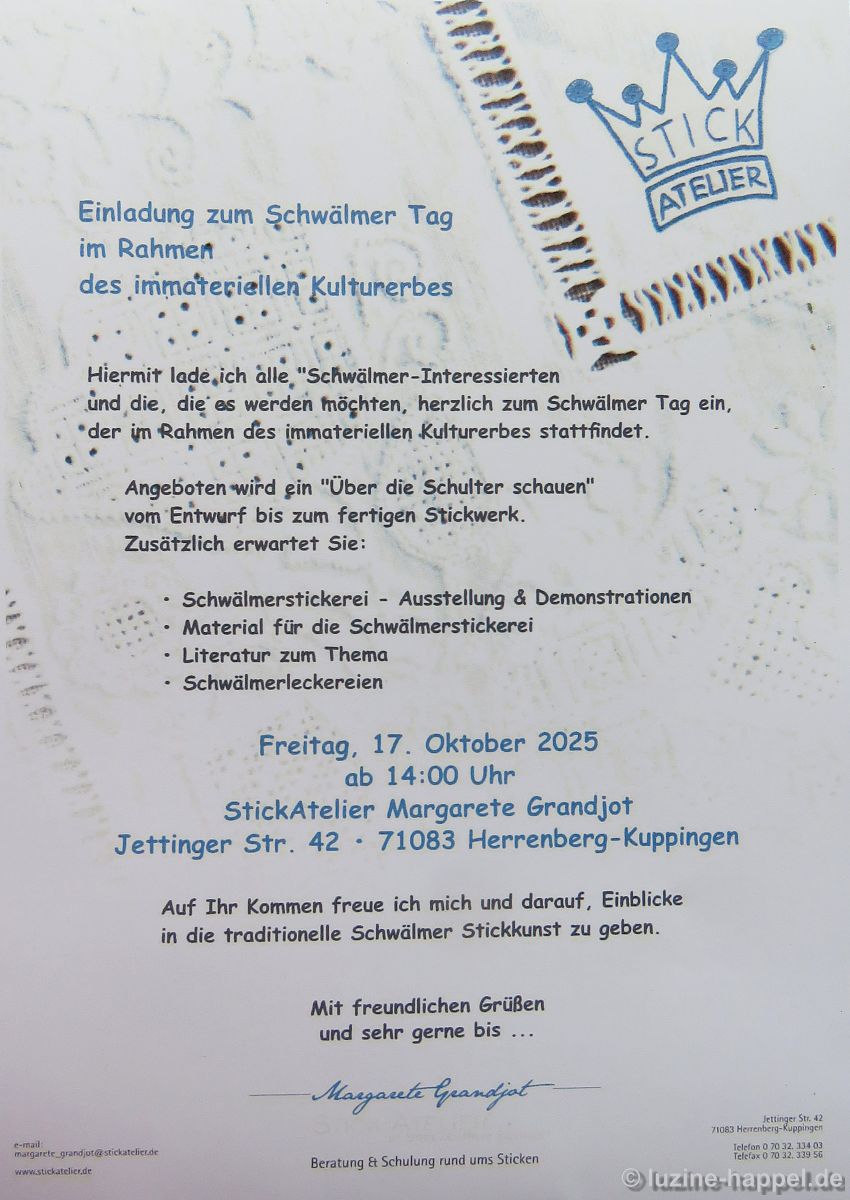
Der 17. Oktober ist der internationale Tag des Immateriellen Kulturerbes. Die Trägerschaften sind aufgerufen, diesen Tag für die Vorstellung ihrer jeweiligen Kulturform zu nutzen.
Daher soll interessierten Besuchern in diesem Blogbeitrag kurz erklärt werden, worum es sich bei der Schwälmer Weißstickerei/Hessenstickerei handelt, wie sie ausgeführt wird und welch riesige Möglichkeiten der individuellen Gestaltung sie bietet.
Die Stickerei erhielt ihren Namen, weil sie sich in dem kleinen Landstrich der Schwalm in Hessen/Deutschland zu ganz besonderer Blüte entwickelte und dort auch die Jahrhunderte überdauerte. Um Stickerinnen auch außerhalb der Schwalm die Möglichkeit zu geben, sich mit der Technik zu identifizieren, wurde sie in den 1960er Jahren auch „Hessenstickerei“ genannt.
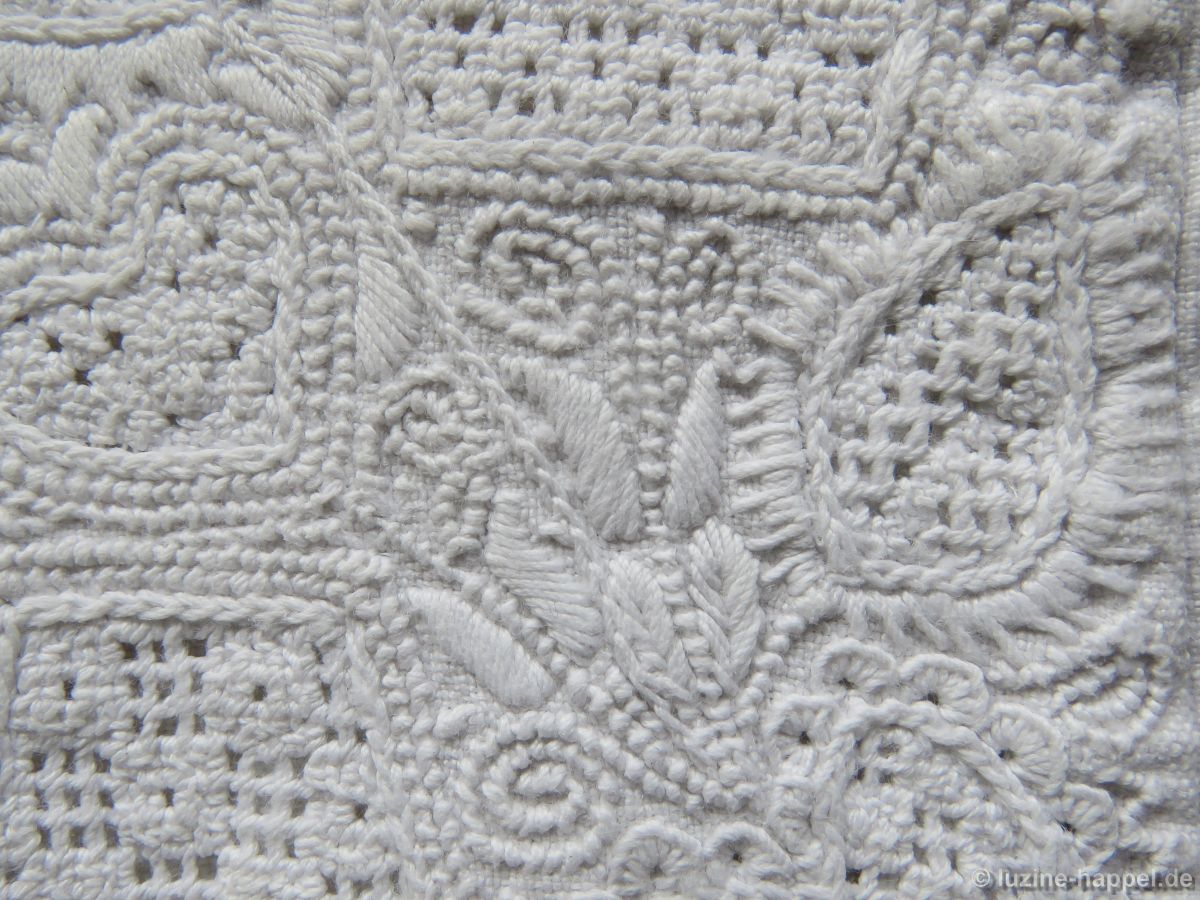
Schwälmer Weißstickerei wird mit weißem Garn auf weißem Leinen gearbeitet. Maschinell ist sie bis heute nicht herstellbar. Es handelt sich bei ihr um eine Kombination unterschiedlicher Techniken.
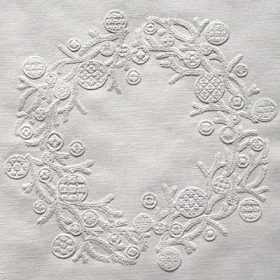
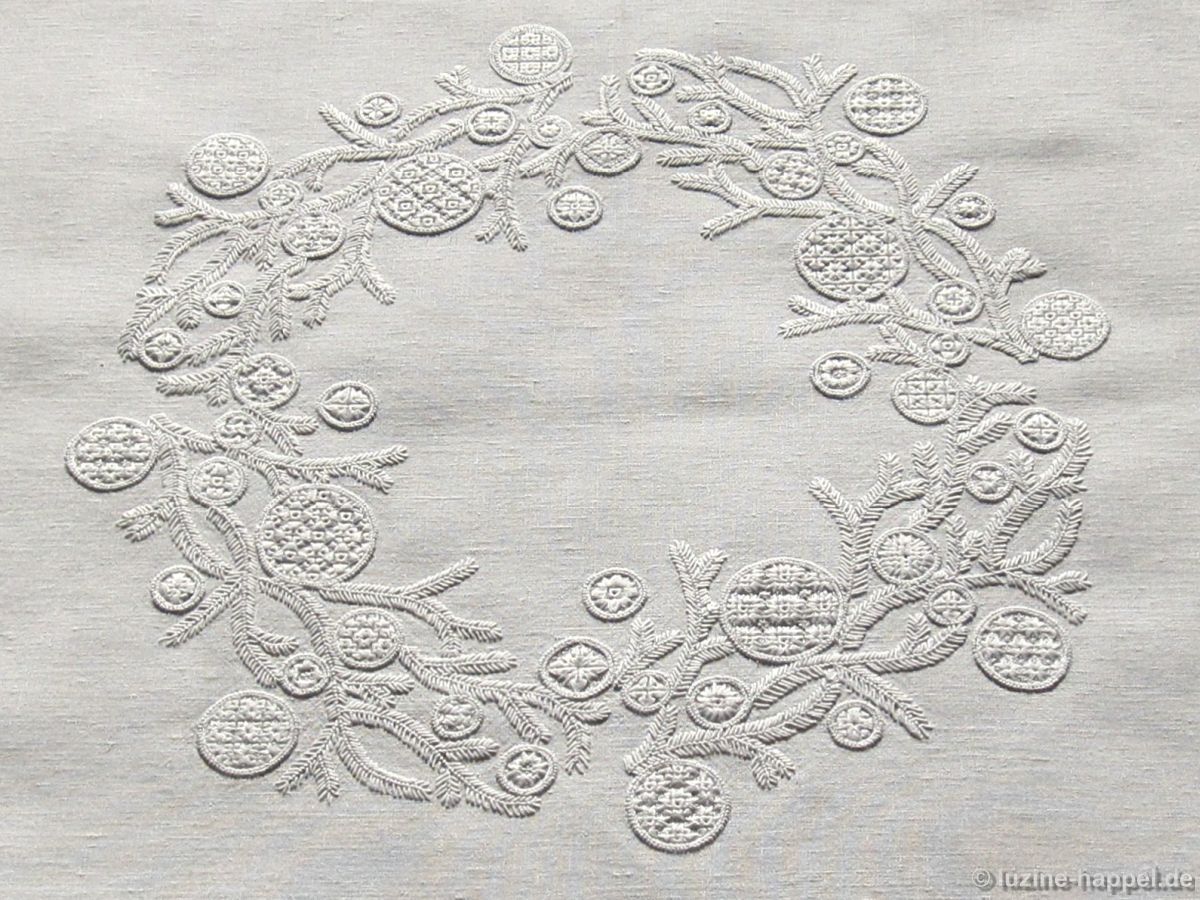
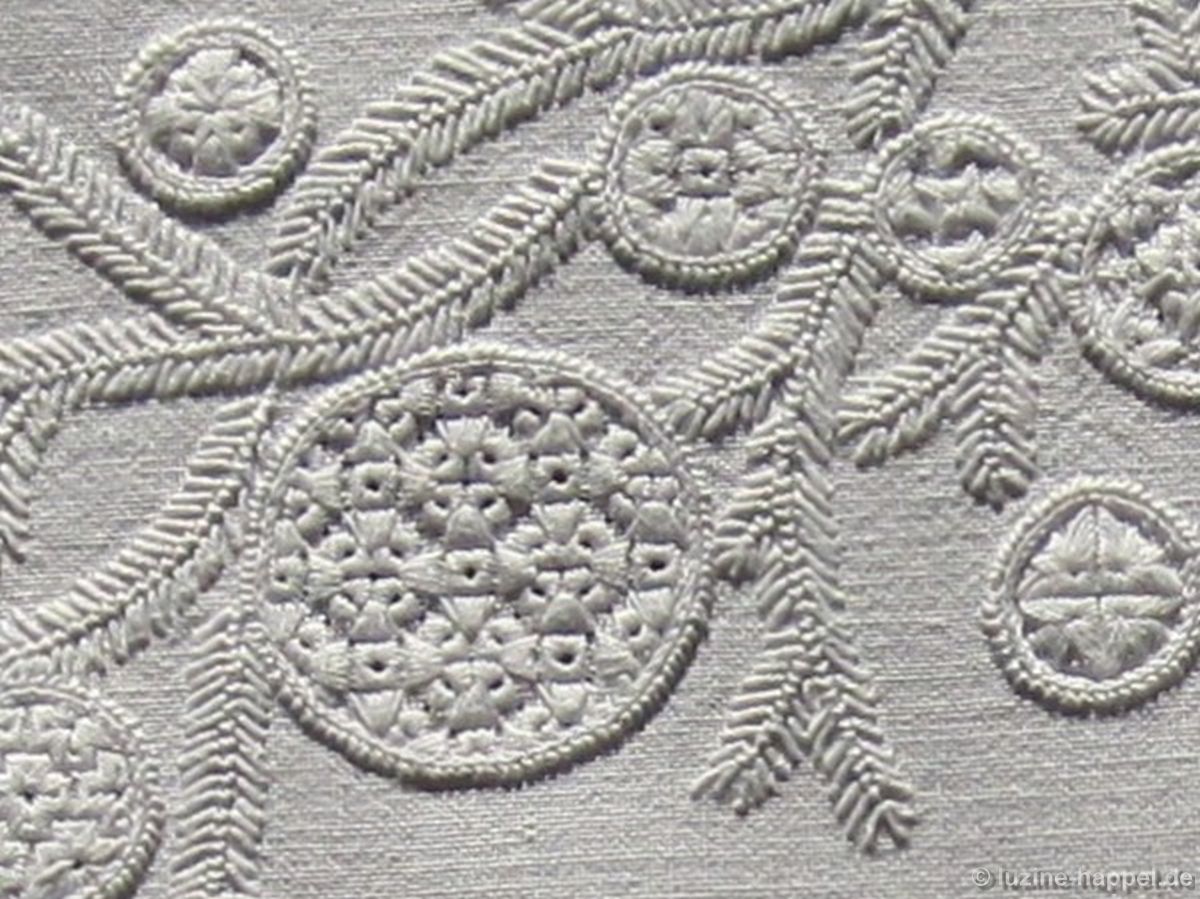
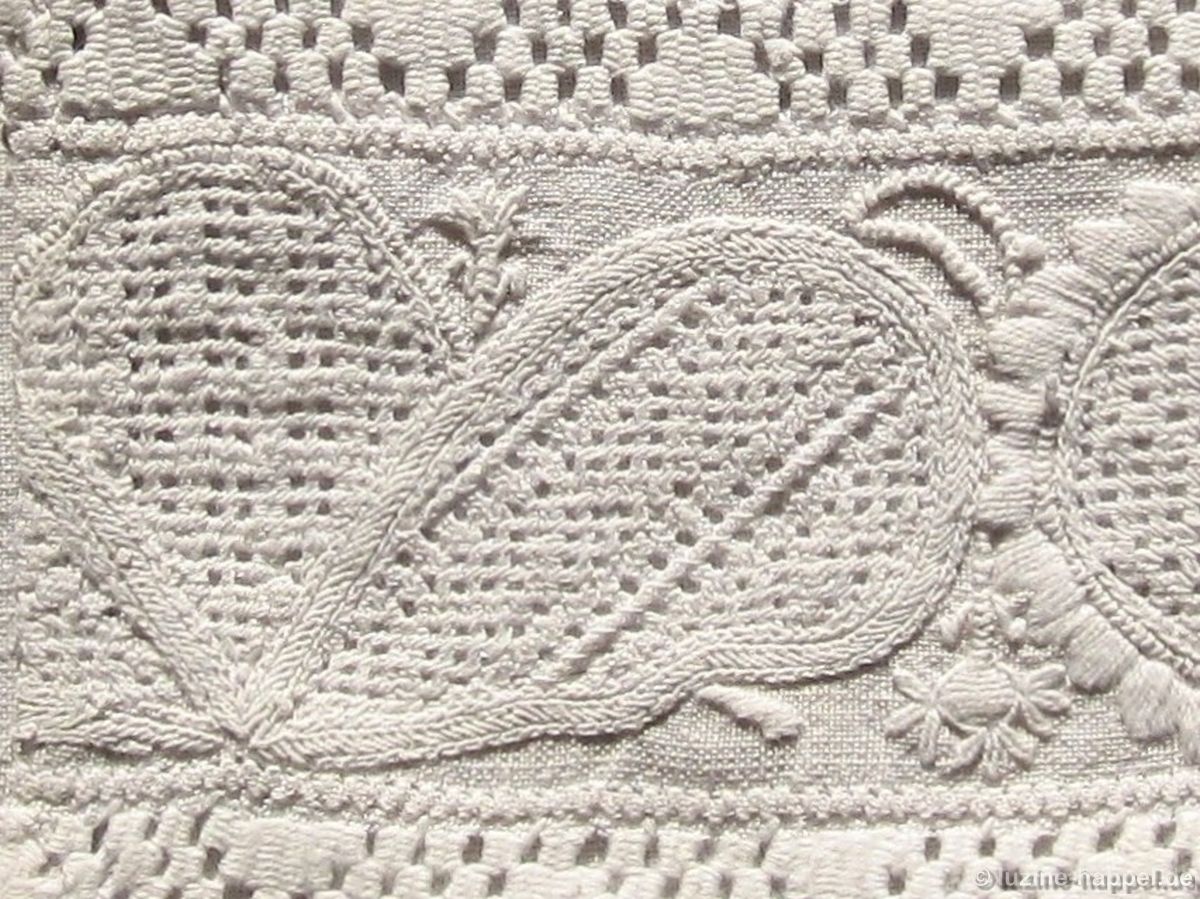
Um die Stickerei ausführen zu können, benötigt man zuerst ein Konturenmuster. Es besteht aus großen Motiven einfacher Formen und kleinen Elementen in den Zwischenräumen.
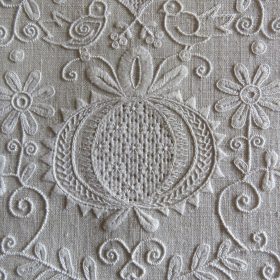
Im Bereich der Zwischenräume bleibt das Gewebe unbeschädigt. Es wird mit Zierstichen überdeckt – so genannter Oberflächenstickerei.
Innerhalb der Motive werden dem Gewebe Fäden entnommen. Die Anzahl ist abhängig vom vorgesehenen Muster, das in das entstandene Gitter gestickt wird. Diese Technik nennt man Durchbruchstickerei.
Die dritte Technik, die zur Anwendung kommt, ist die Ausschnittstickerei. Hier wird das Gewebe innerhalb der Motive vollständig weggeschnitten und durch Stickstiche – so genannter Nadelspitze – ersetzt.
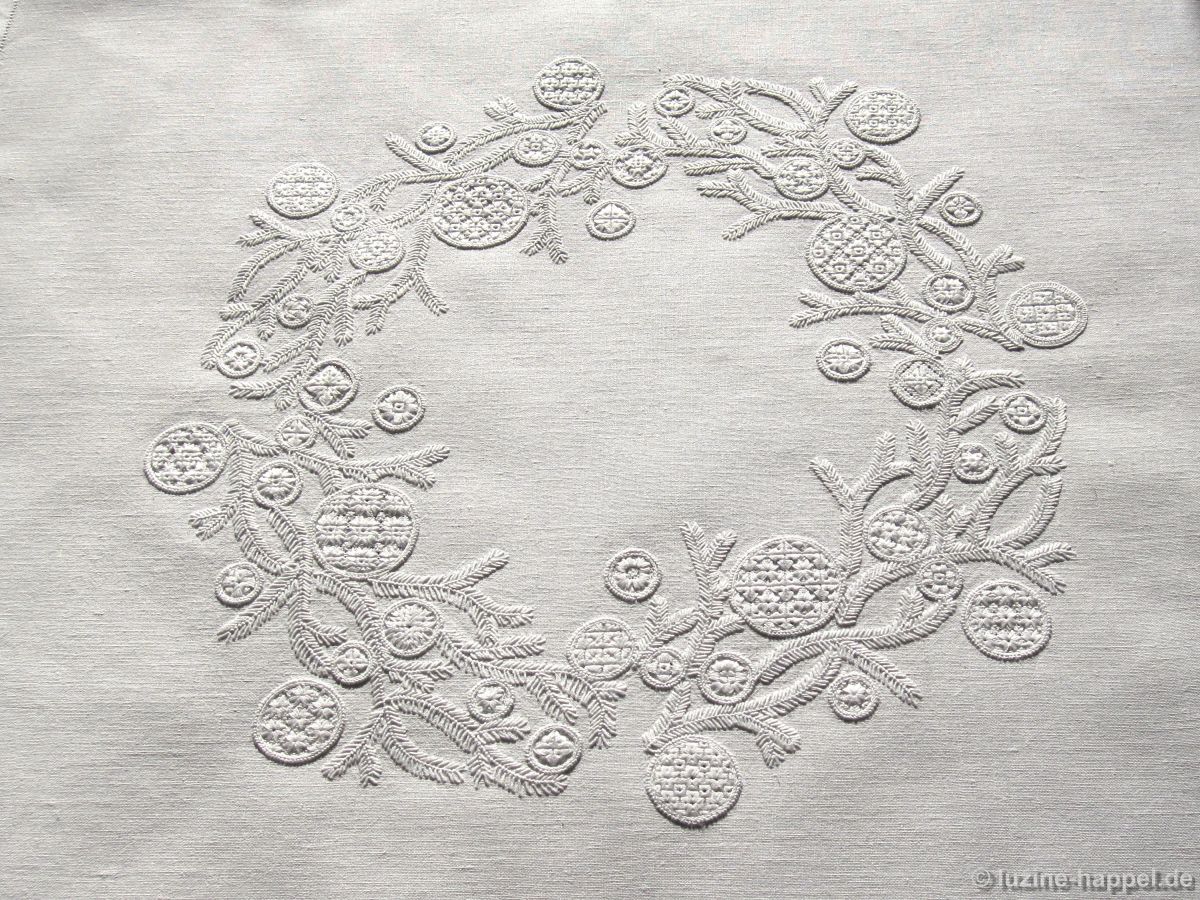
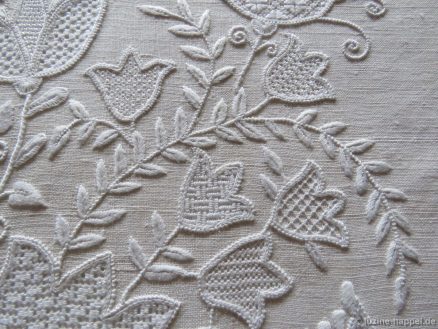
Man muss nur 13 unterschiedliche Stiche beherrschen, um die Schwälmer Weißstickerei ausführen zu können. Durch die Kombination dieser Stiche aber kann man auf einen Schatz von ca. 1000 Mustern zurückgreifen. Diese enorme Vielfalt in Verbindung mit den unendlich abwandelbaren Konturenmustern macht die Stickerei so abwechslungsreich und überaus interessant.
Je nach Lust und Laune kann man Kleinigkeiten besticken, etwas größere Projekte in Angriff nehmen, herausragende Stickereien entstehen lassen oder sogar Gemeinschaftsprojekte realisieren.
Der Werdegang der Durchbruch-Motivstickerei, die notwendigen Stiche und der Unterschied zwischen den Flächenfüllmuster-Kategorien
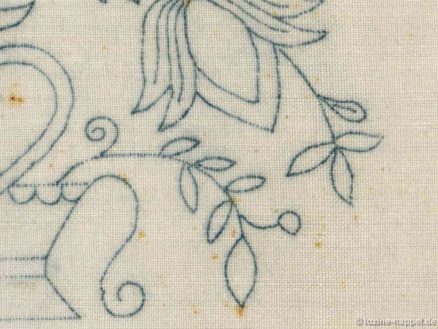
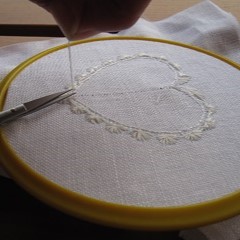
Zuerst müssen die Konturen des gewünschten Motivs auf den Stoff übertragen werden.
Dazu gibt es verschiedene Möglichkeiten:
• Aufbügeln mit Hilfe eines Bügelmusterstiftes
• Aufzeichnen mit Hilfe einer Lichtunterlage (z.B. Light-Pad oder Fenster) und eines wasser– oder hitzelöslichen Stiftes
• Durchpausen oder Durchstechen mit blauem Durchschreibepapier
• Aufdrucken mittels Schablone
(Siehe auch: Schwälmer Band (1) Musterübertragung )
Man überdeckt zunächst alle Linien mit Stichen, denn es kann vorkommen, dass sie im Laufe der Zeit verblassen oder ganz verschwinden.
Man verwendet Vierfachstickgarn und arbeitet mit drei, manchmal auch vier verschiedenen Garnstärken, abhängig von der Feinheit des Gewebes.
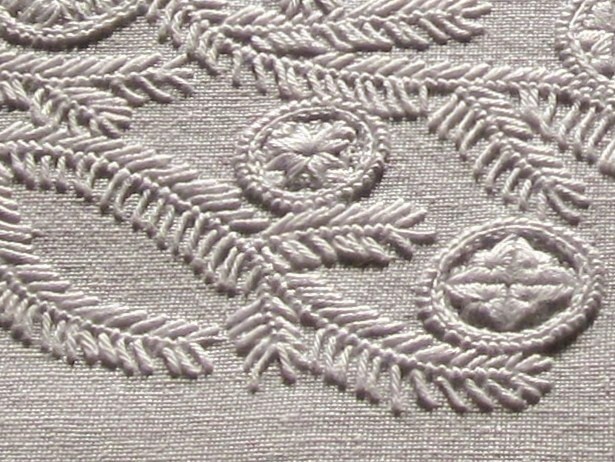
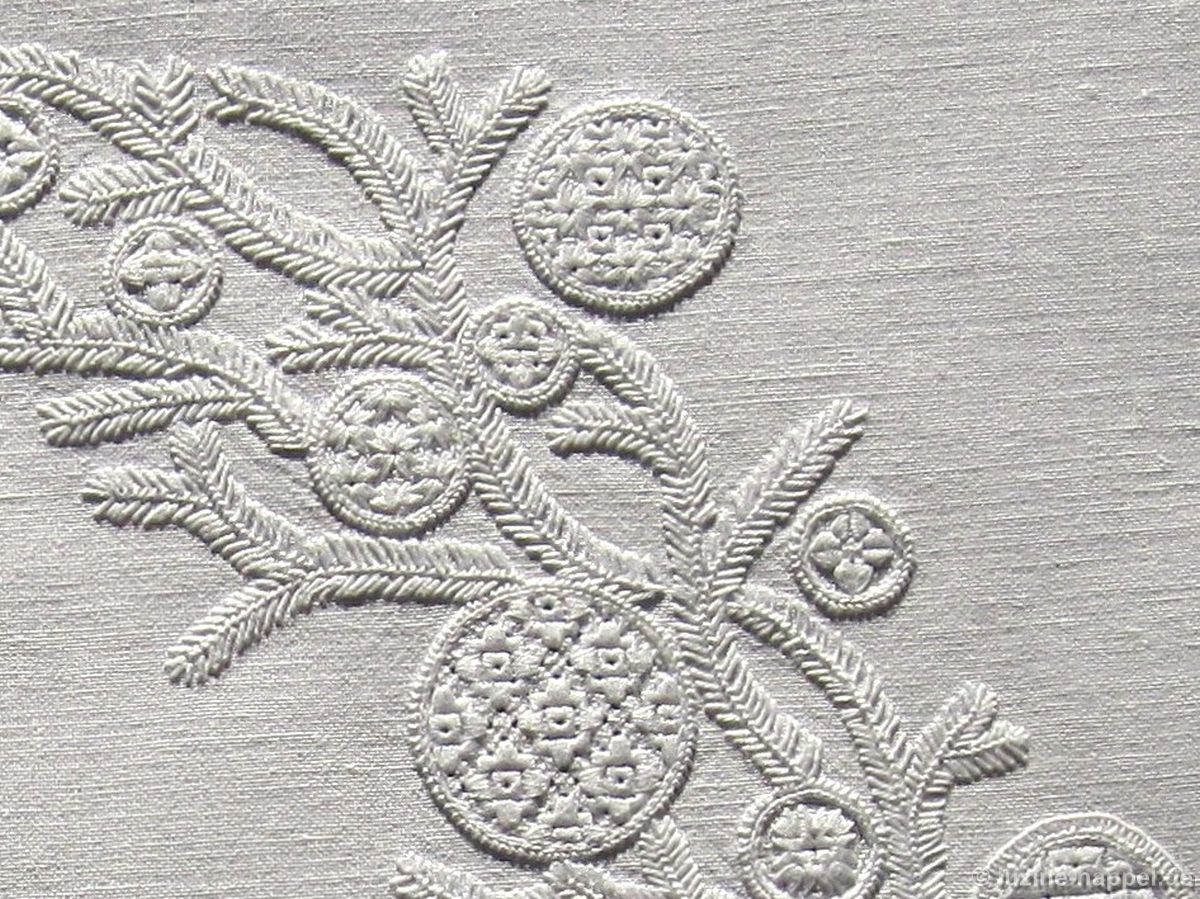
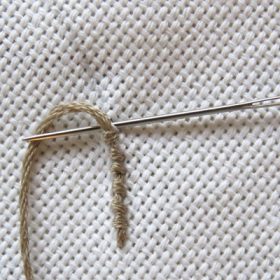
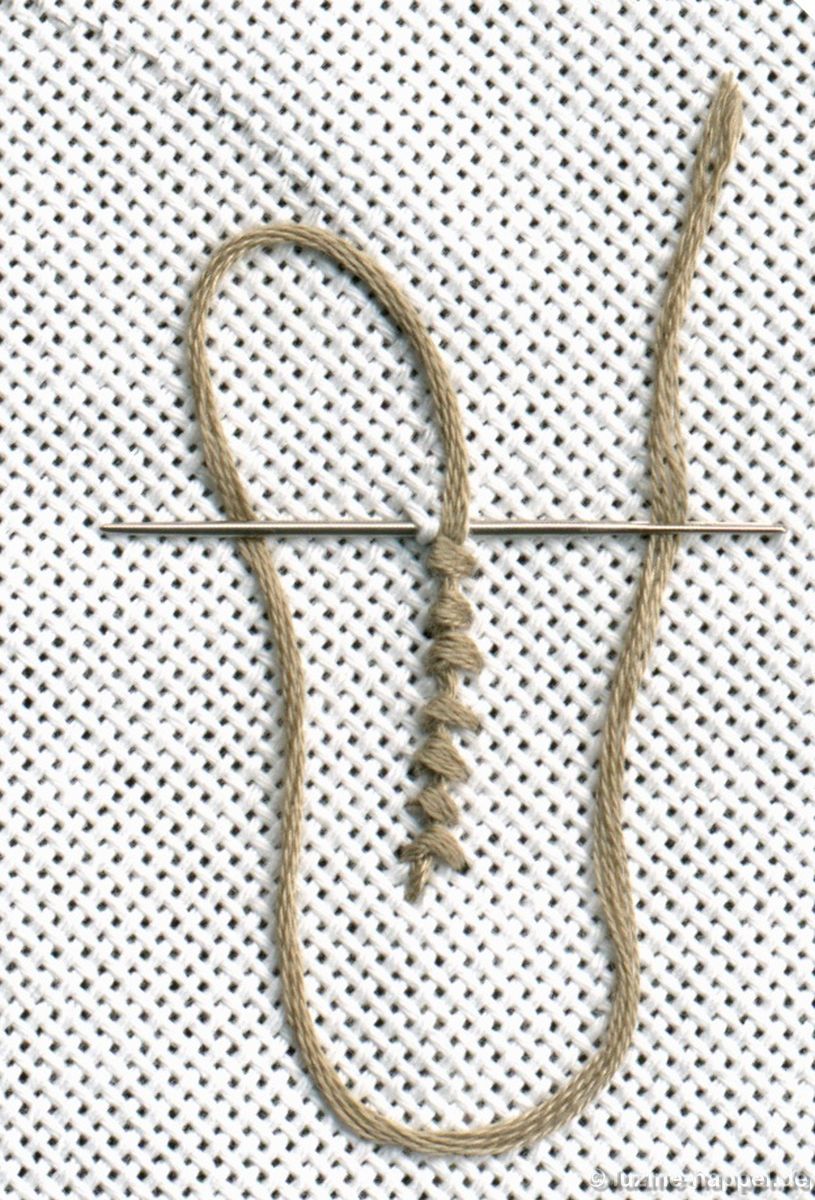
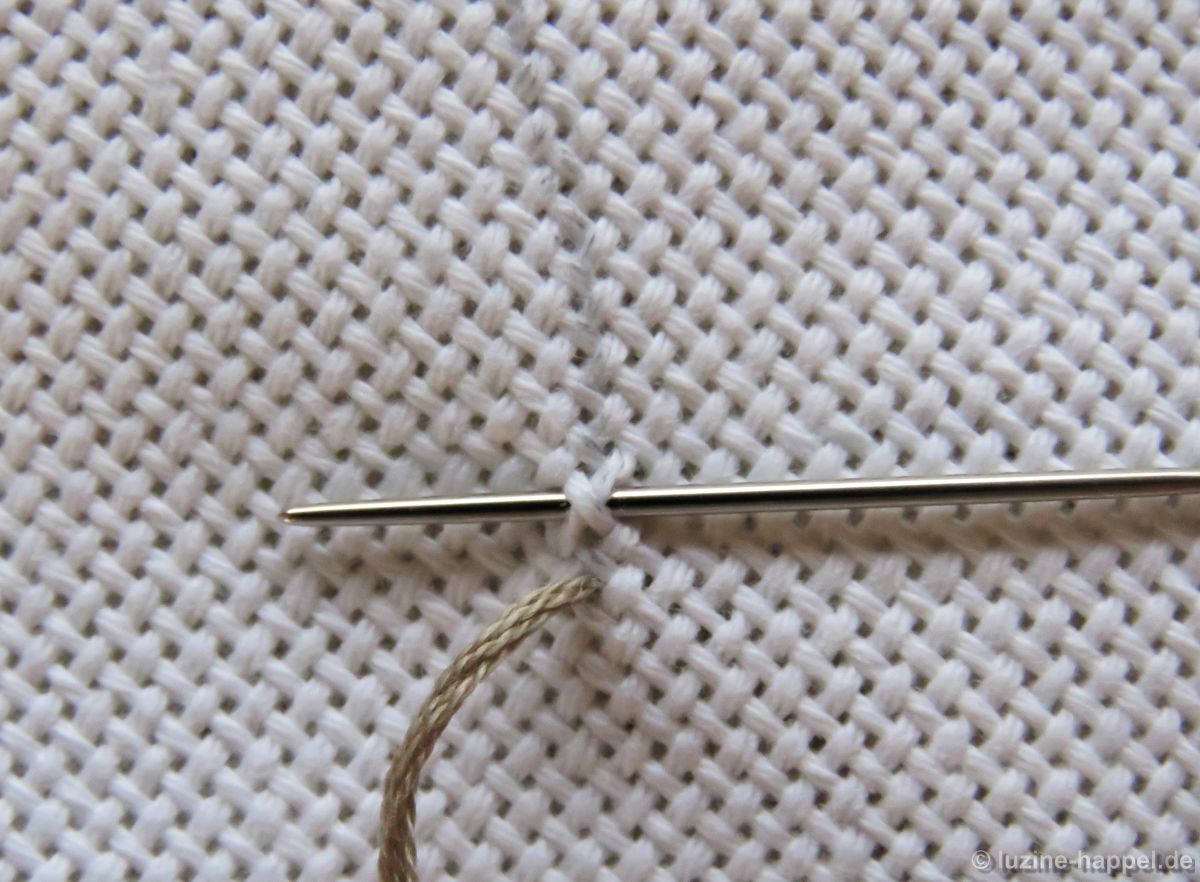
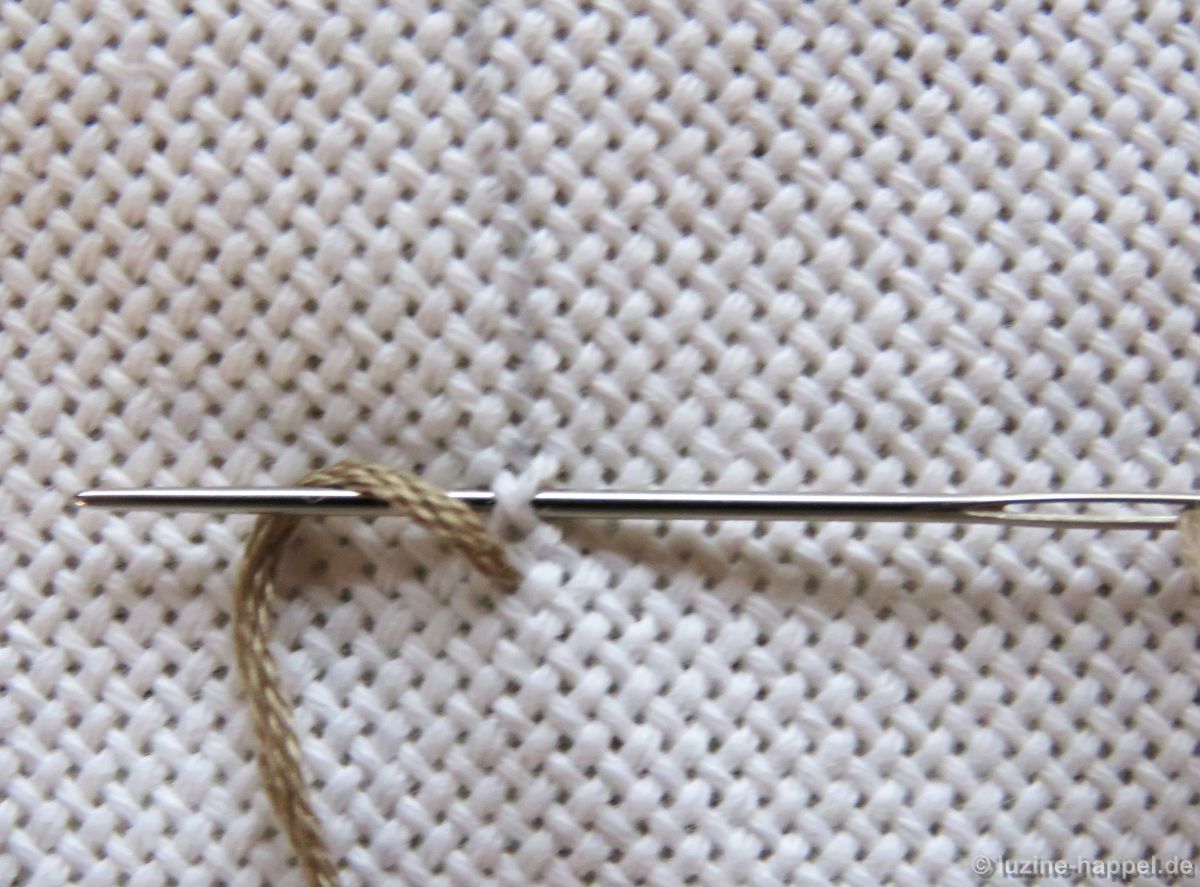
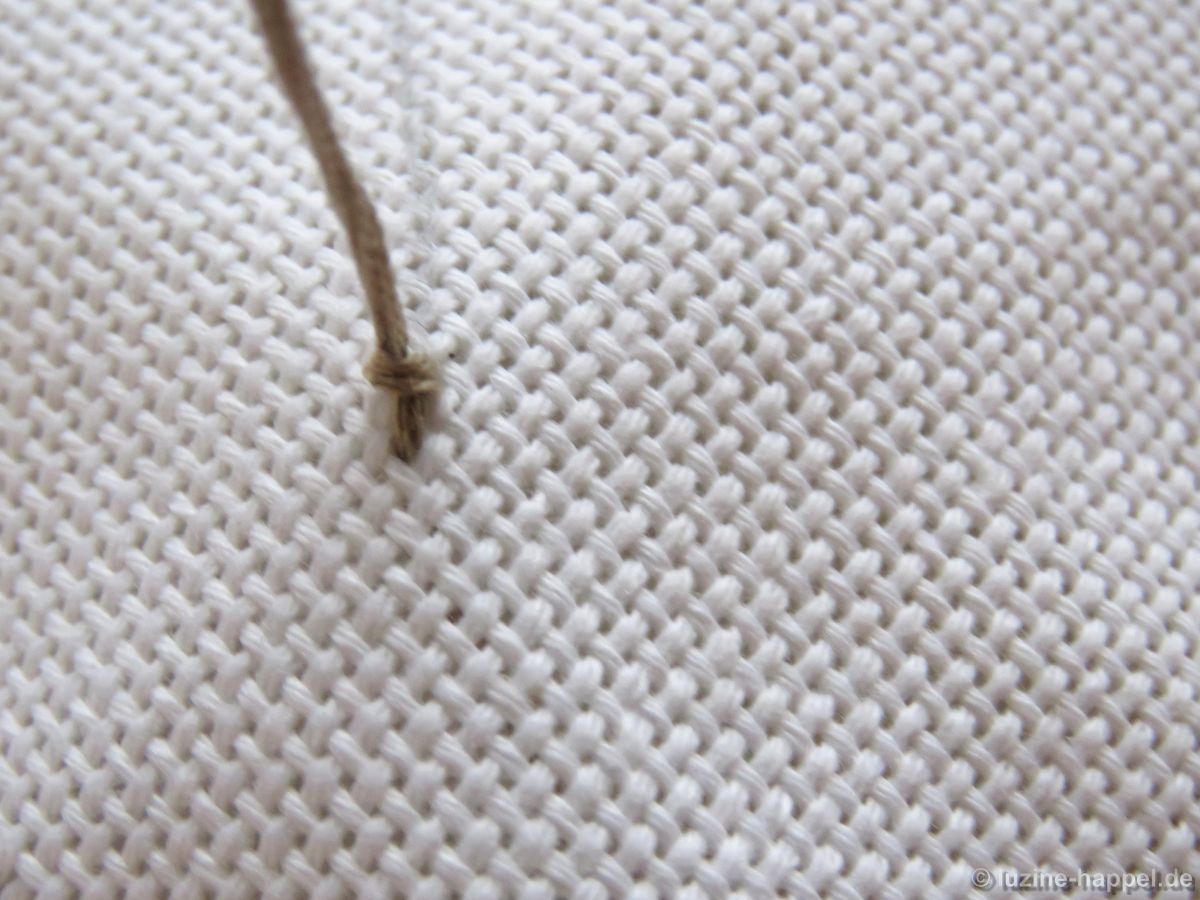
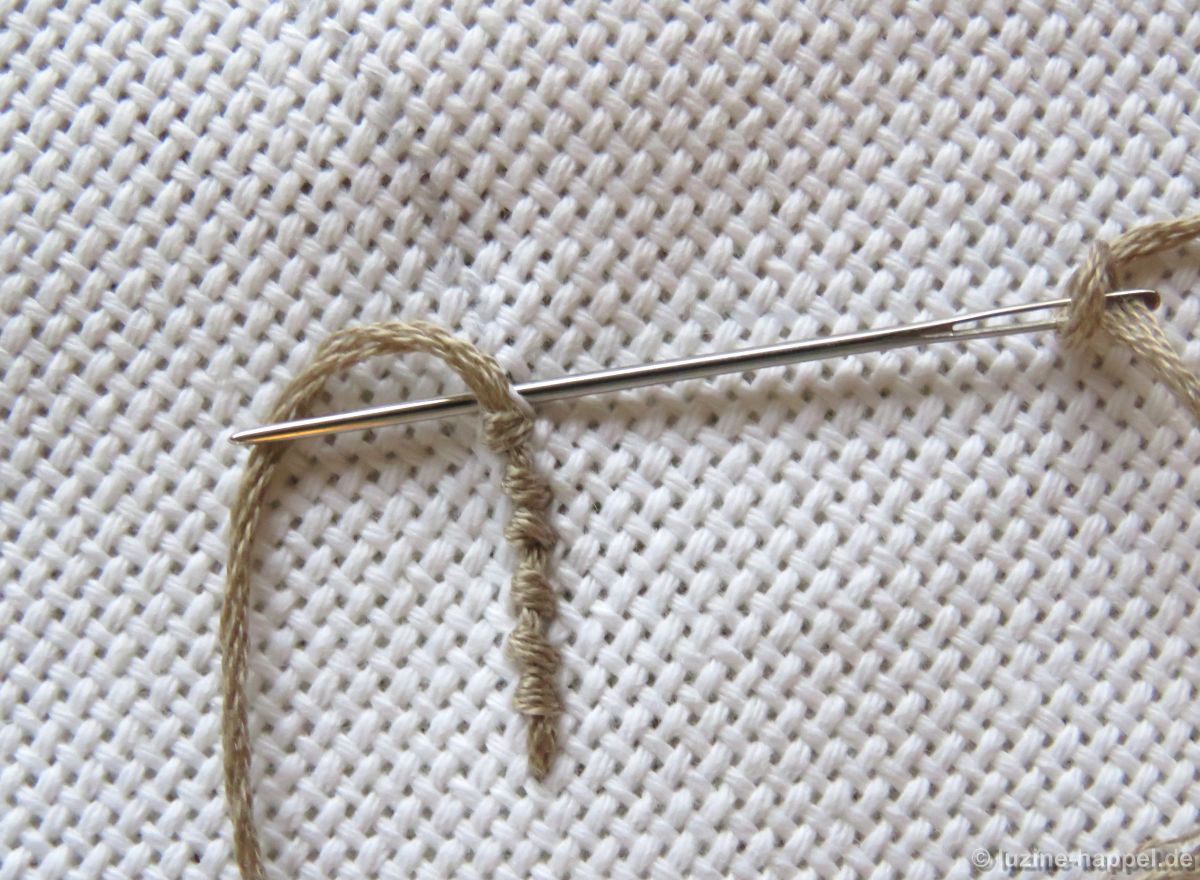
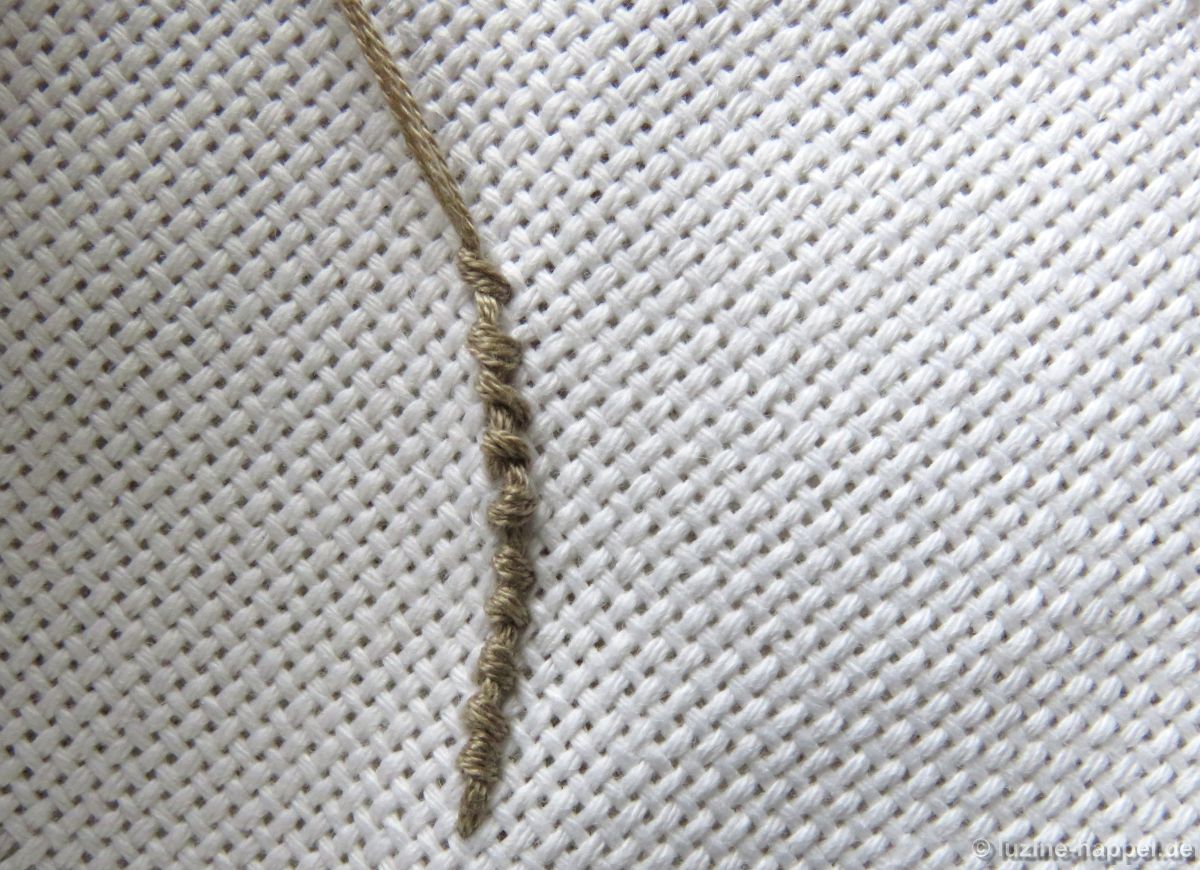
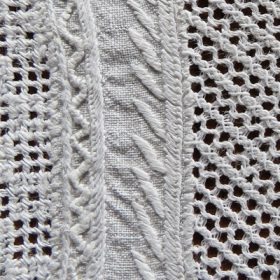
Mit dem dicksten Garn werden zuerst die Knötchenstiche (Korallen-Knötchenstiche oder auch linienbildende Knötchenstiche genannt) über die Haupt-Konturenlinien, die Stiele und Spiralen gestickt. Sie dienen zum einen zur Konturierung, zum anderen sichern sie das Gewebe des Motivs beim späteren Fadenauszug.
(Da es zu weit führen würde, alle Stiche im Einzelnen in diesem Blogbeitrag zu erklären, findet man demnächst für jeden Stich einen gesonderten Blogpost.)
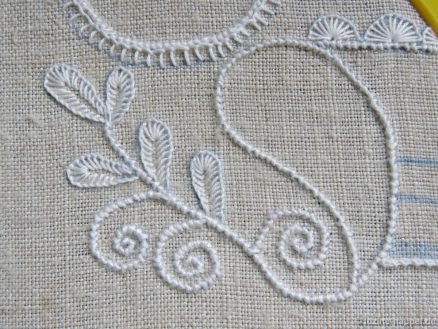
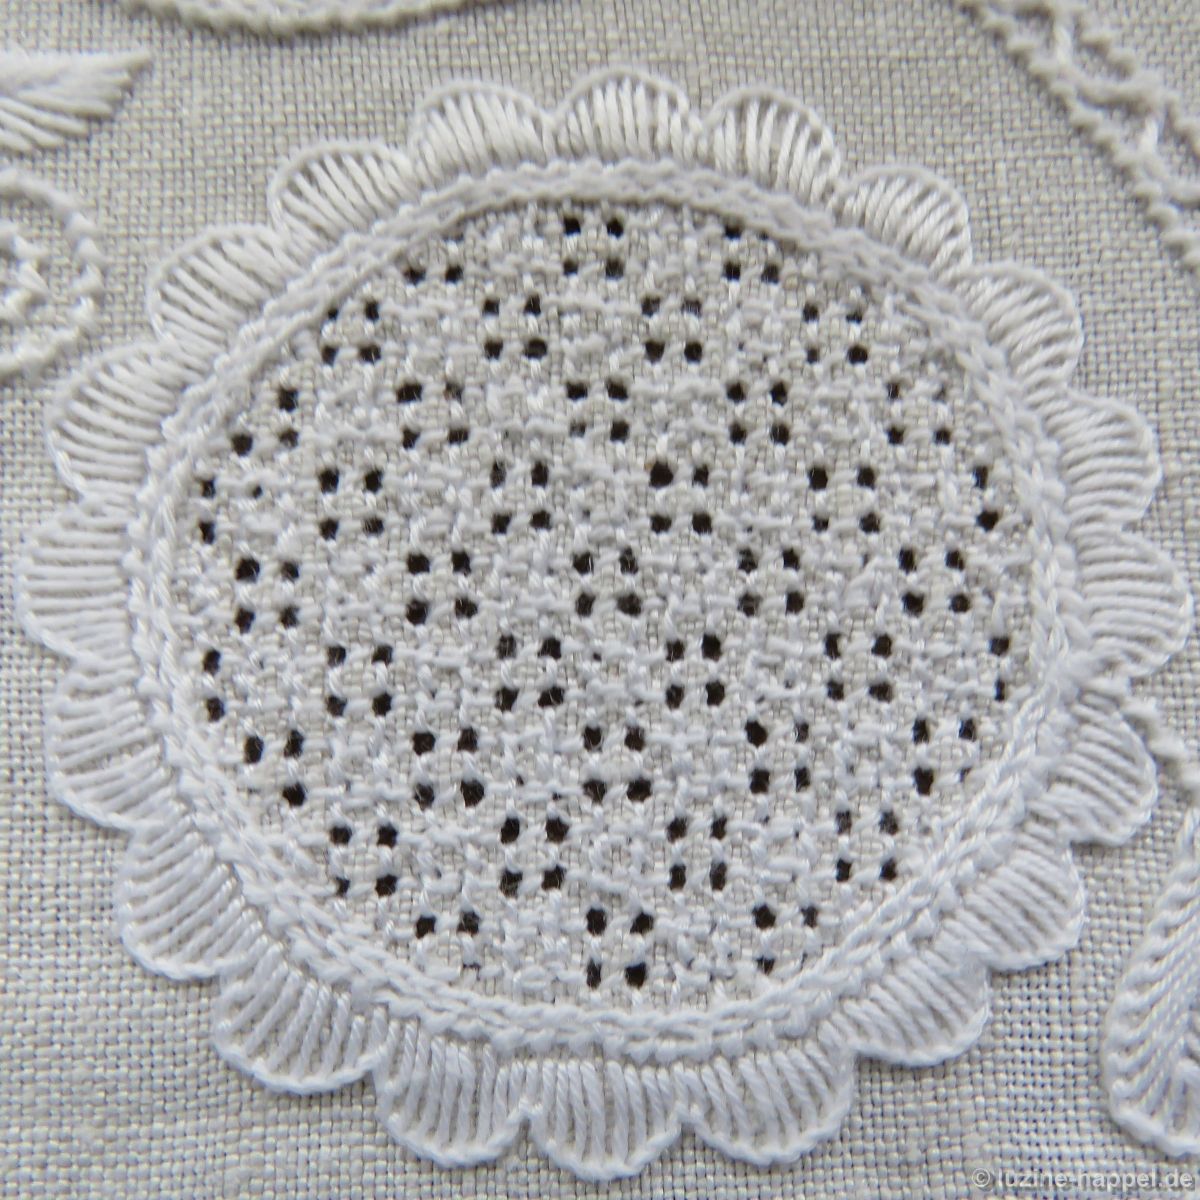
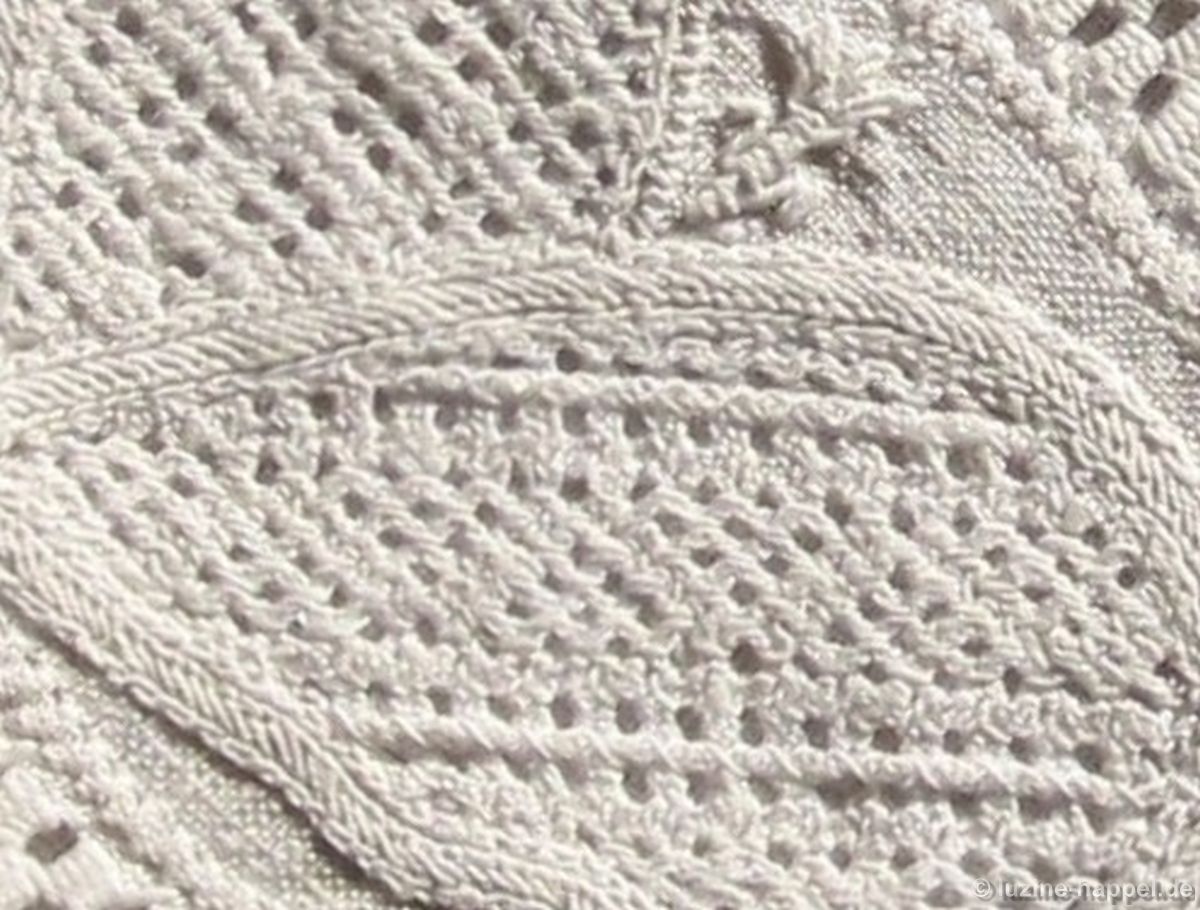
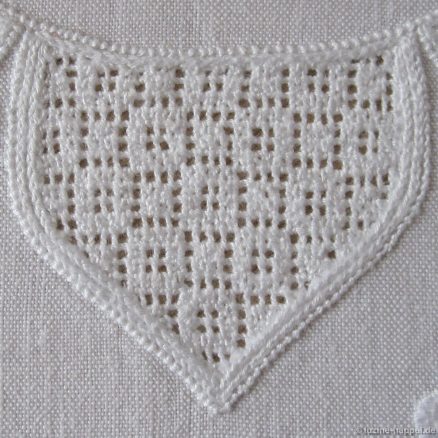
Gerundete Blätter werden üblicherweise mit Schlingstichen gearbeitet, ebenso Halbkreisbögen (sogenannte Schnürlochbögen), kleine Kreise (sogenannte Schnürlöcher) und Dreiecksspitzen (sogenannte Messerspitzen.
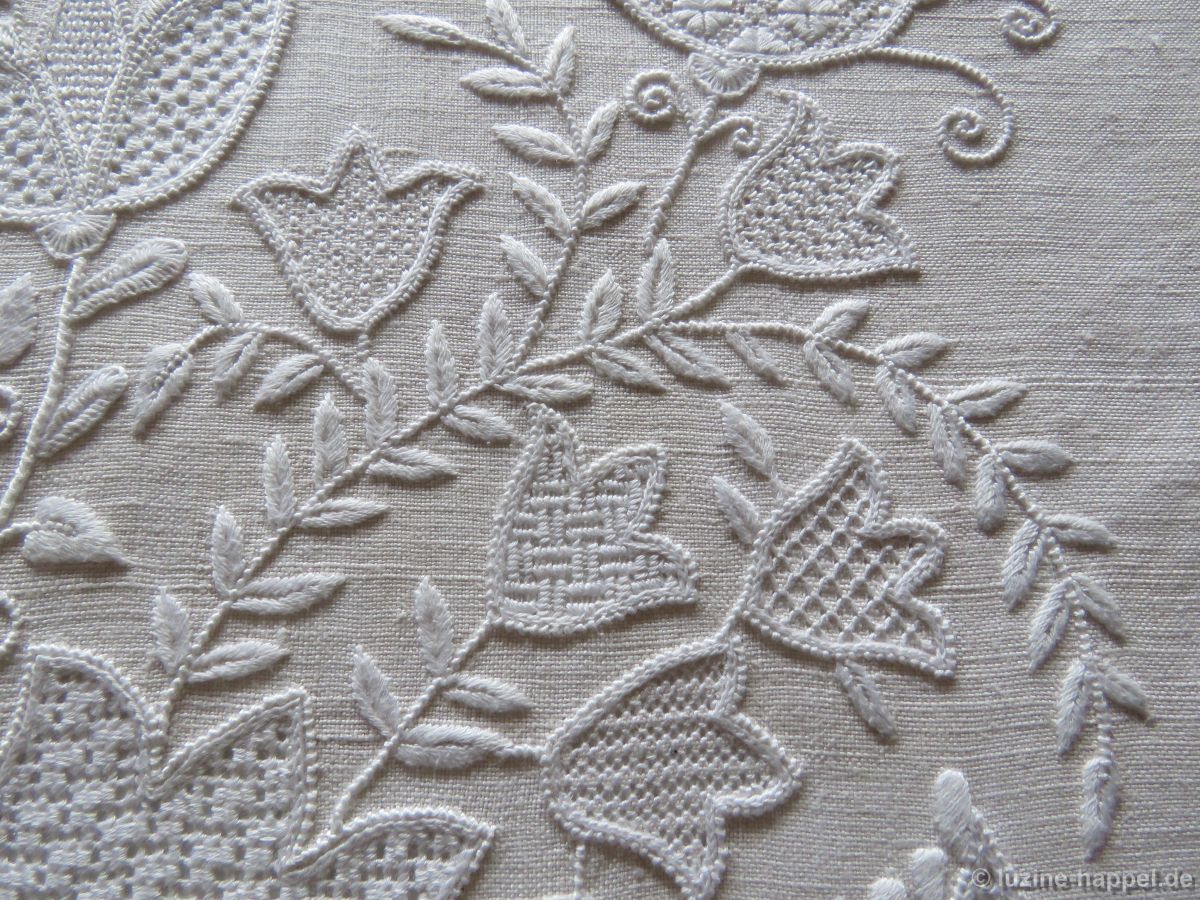
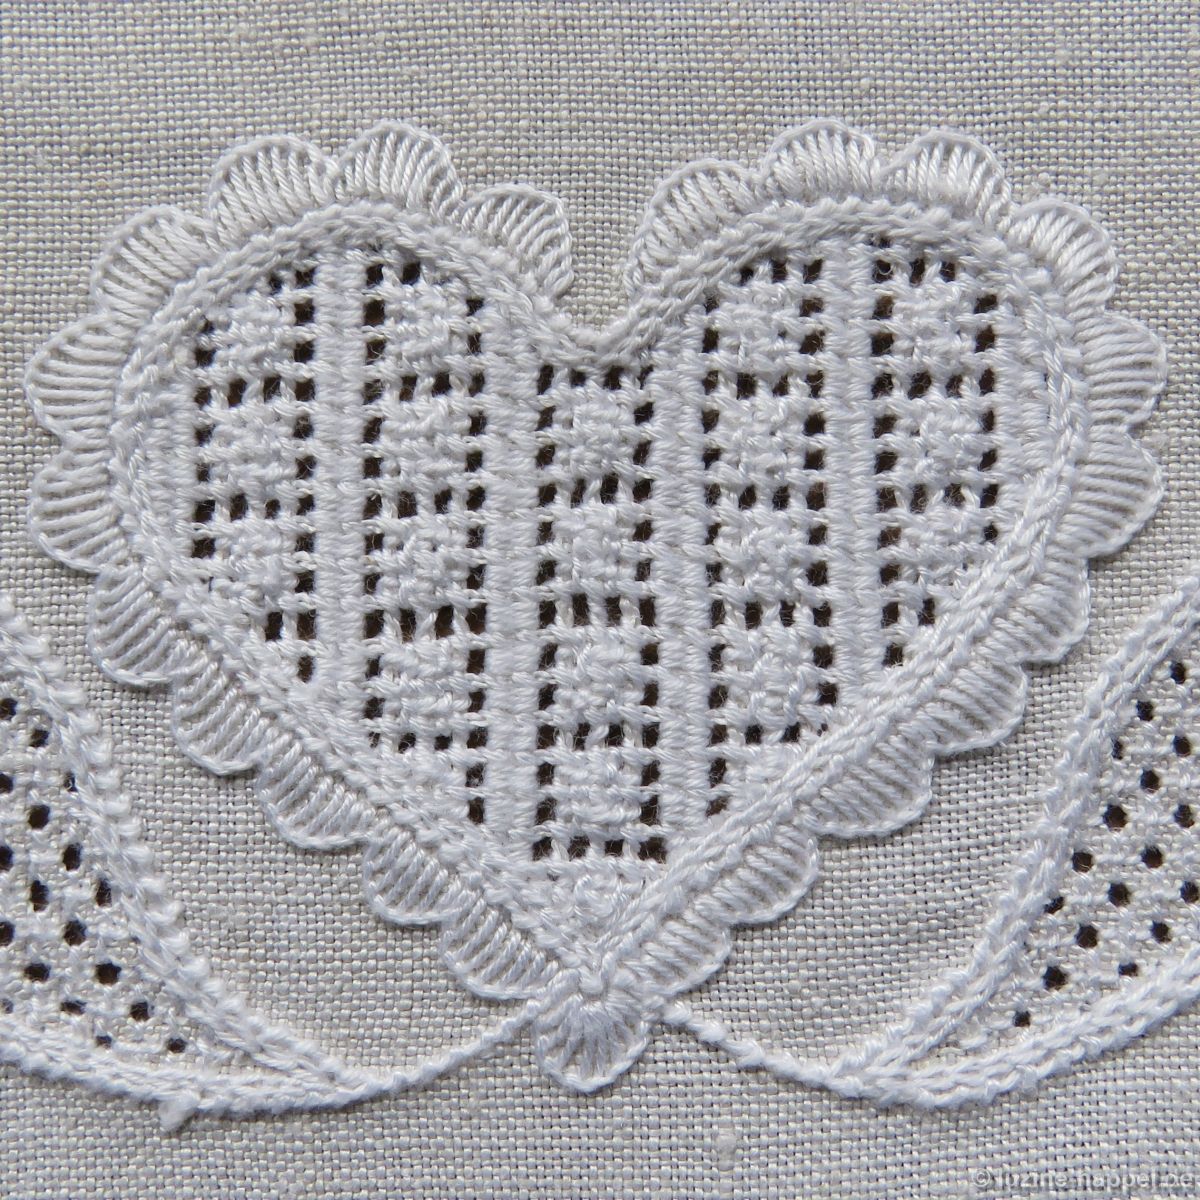
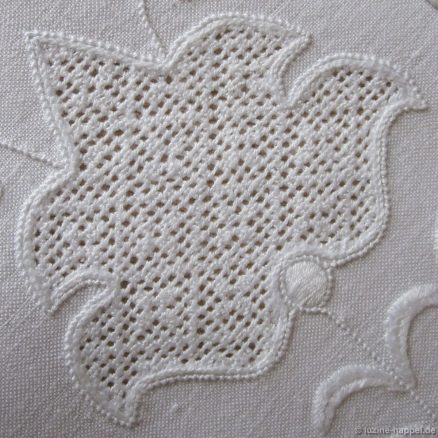
Die Schwälmer Weißstickerei beinhaltet neben den gerundeten Blättern auch kleine spitze Blätter, die geteilt oder ungeteilt gestickt werden können, und herzförmige Blätter. All diese werden mit Plattstichen ausgeführt.
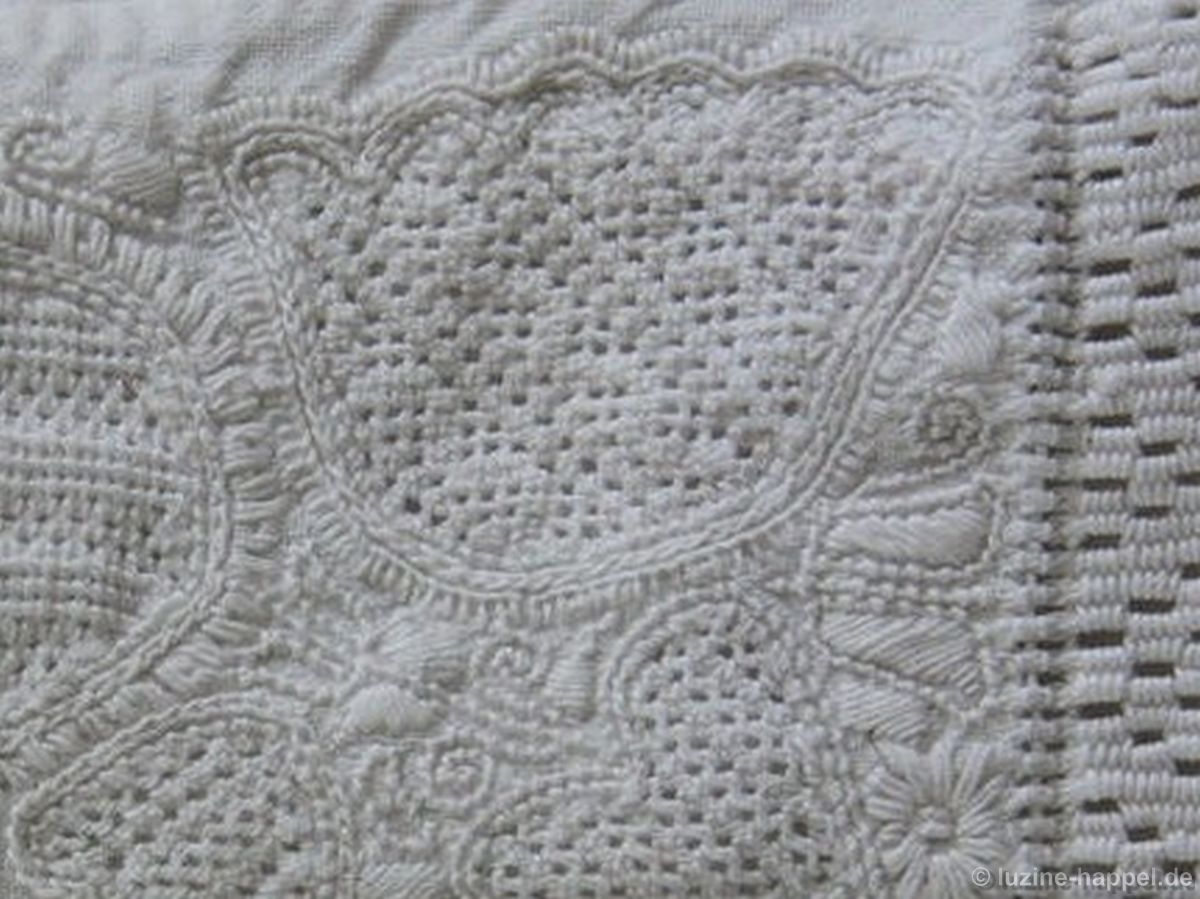
Sind alle Linien mit Stichen überdeckt, kann man die Ausgestaltung der Motivflächen beginnen.
Zierstichumrandungen – hier: „Schnürlochbögen“ – lassen die Motive gefälliger erscheinen, müssen aber nicht zwangsläufig alle Formen umschließen.
Um die Fadenenden der später auszuziehenden Gewebefäden zu verdecken, stickt man Kettenstiche dicht innerhalb der Knötchenstiche.
Um Durchbruchmuster vorzubereiten, zieht man dann von der Rückseite der Arbeit aus innerhalb der Motivflächen Gewebefäden aus und schneidet sie dicht an den Kettenstichen ab.
Es gibt drei Arten von Durchbruchmustern – einfache und Doppeldurchbruchmuster. Letztere unterscheidet man in Limet- und lichte Durchbruchmuster.
Für ein einfaches Durchbruchmuster wird – entweder vertikal
oder horizontal – jeder vierte Gewebefaden ausgezogen.
In den auf diese Weise vorbereiteten Grund stickt man hauptsächlich Mückenstiche– und
Waffelstiche sowie

Wickelstiche in „Stangen“ oder Kombinationen dieser Stiche.

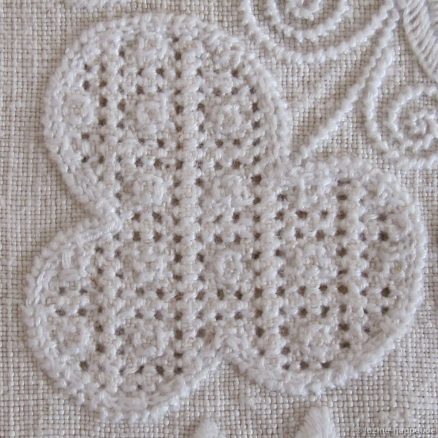
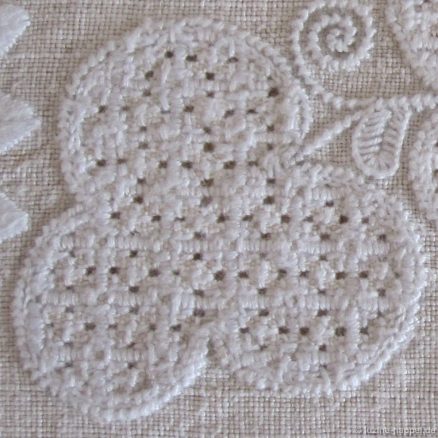
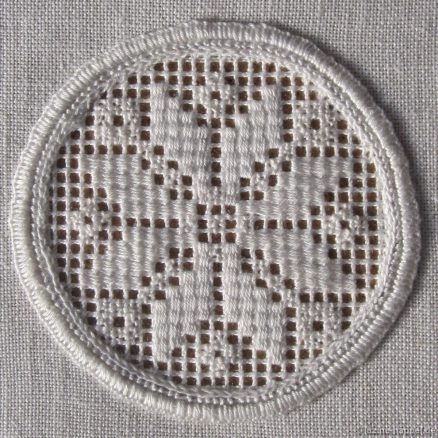
Für ein Limet-Durchbruchmuster entfernt man gewöhnlich jeden vierten Faden sowohl horizontal als auch vertikal.

In das entstandene Limetgitter stickt man hauptsächlich Kästchenstiche, Marburger Grundstiche, Rosenstiche, Limetrosen und Wickelstiche. Durch Kombinationen dieser Stiche ergibt sich eine riesige Anzahl an unterschiedlichen Flächenfüllmustern, die völlig andere Erscheinungsbilder abgeben können,
Aufbau eines Rosenstichrasters im Limetgrund
Fertiges Limetmuster aus Rosenstichen und Limetrosenteilen
Limetmuster aus Kästchenstichen und Rosenstichen
Limetmuster aus Wickelstichen und Rosenstichen
Limetmuster aus Kästchenstichen und Rosenstichen
Limetmuster aus Wickelstichen, Limetrosenteilen und Kästchenstichen
Limetmuster aus Rosenstichen und Kreuznahtstichen
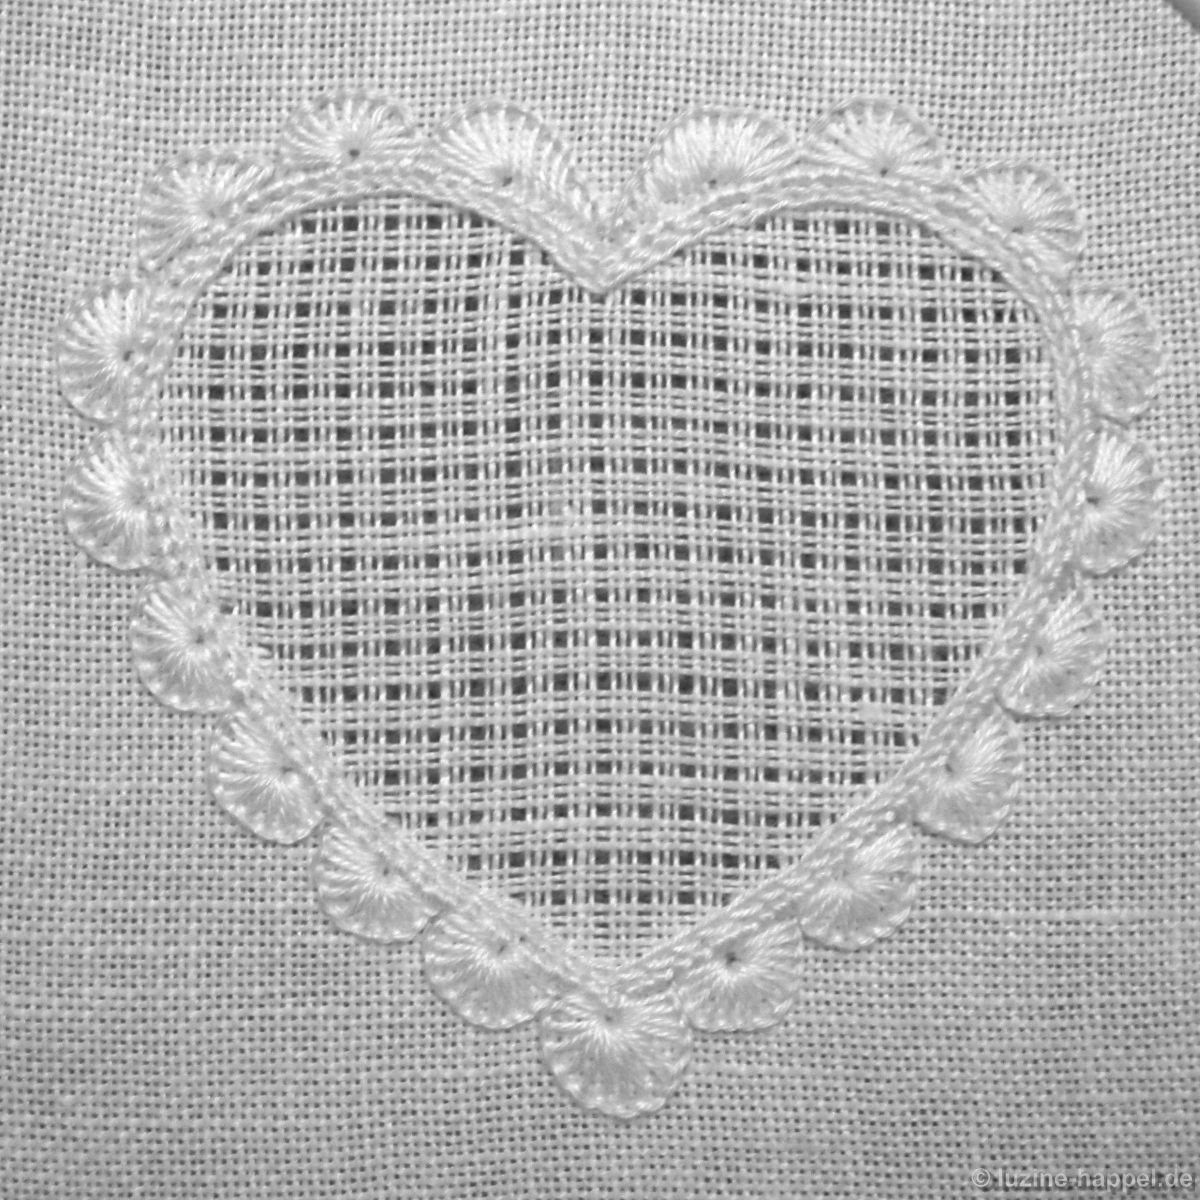
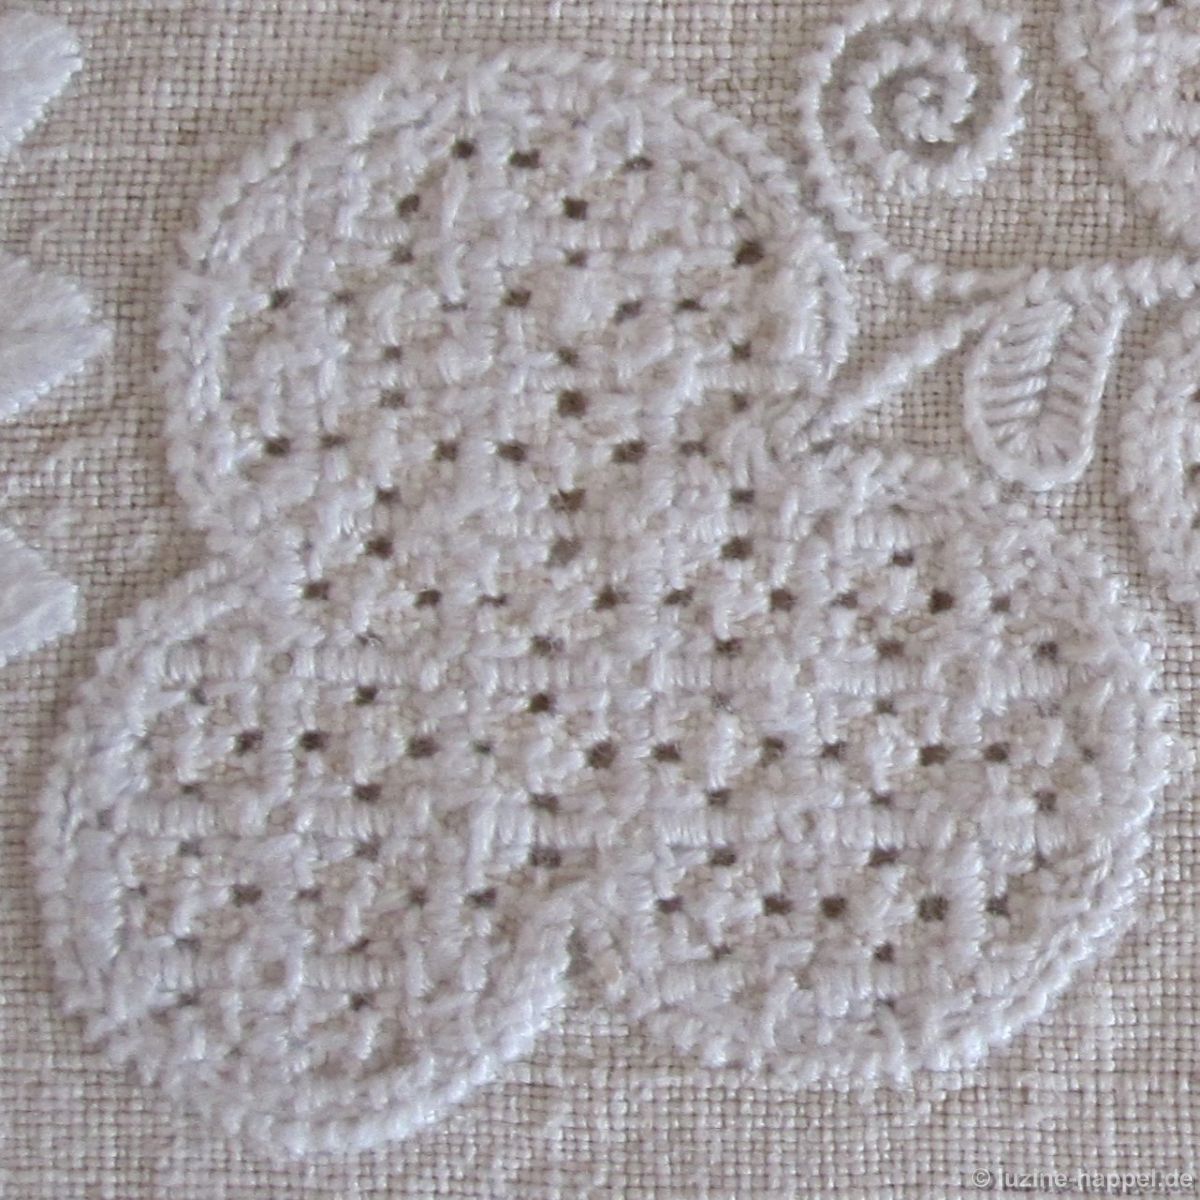
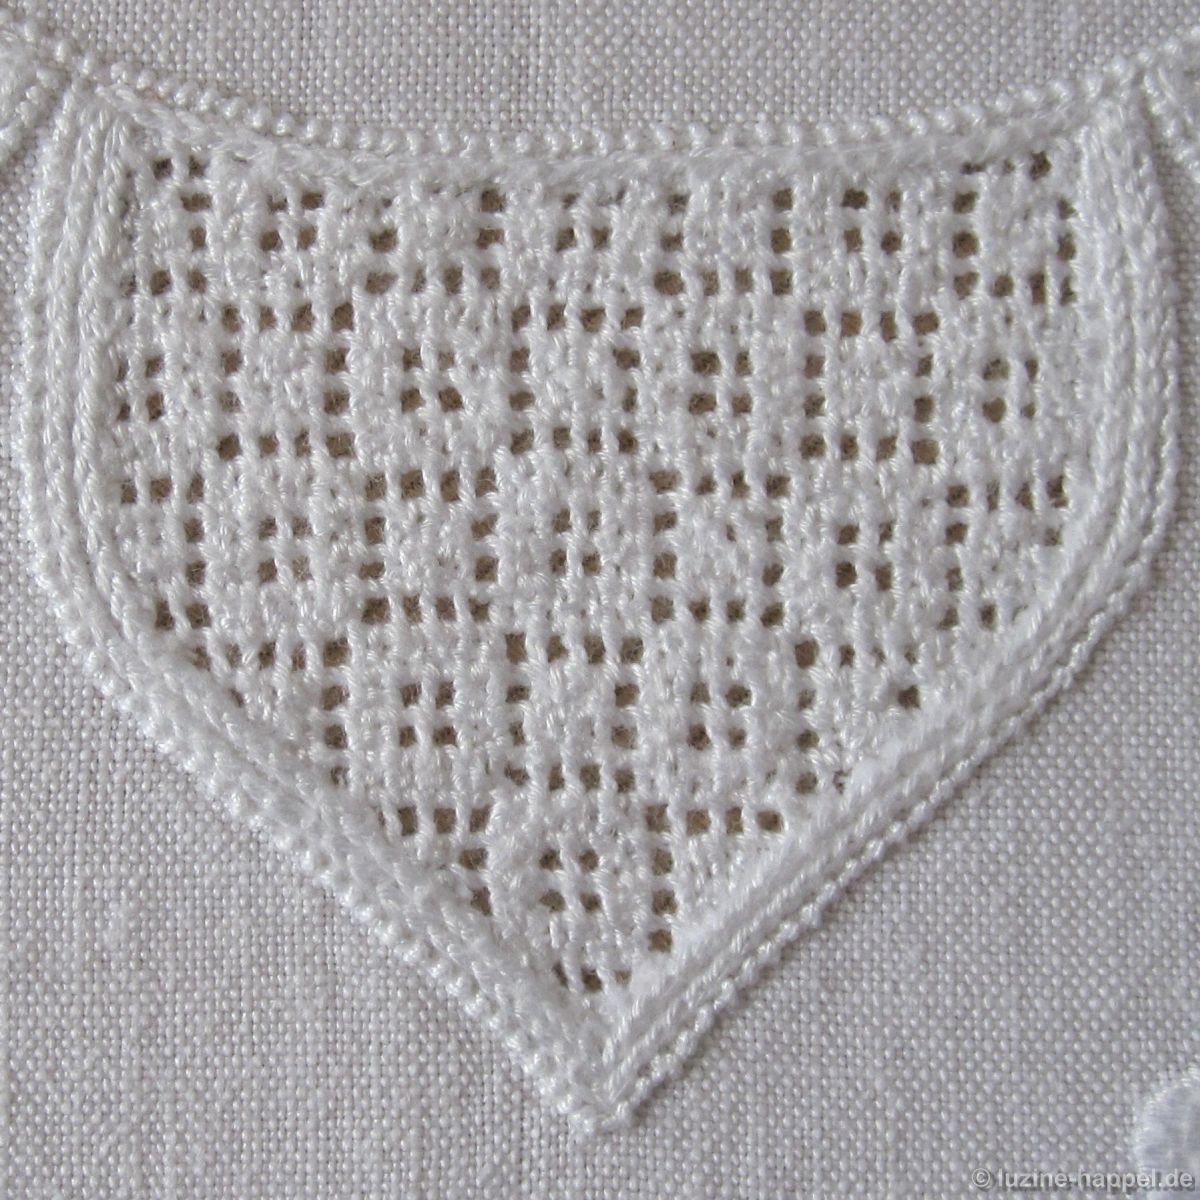
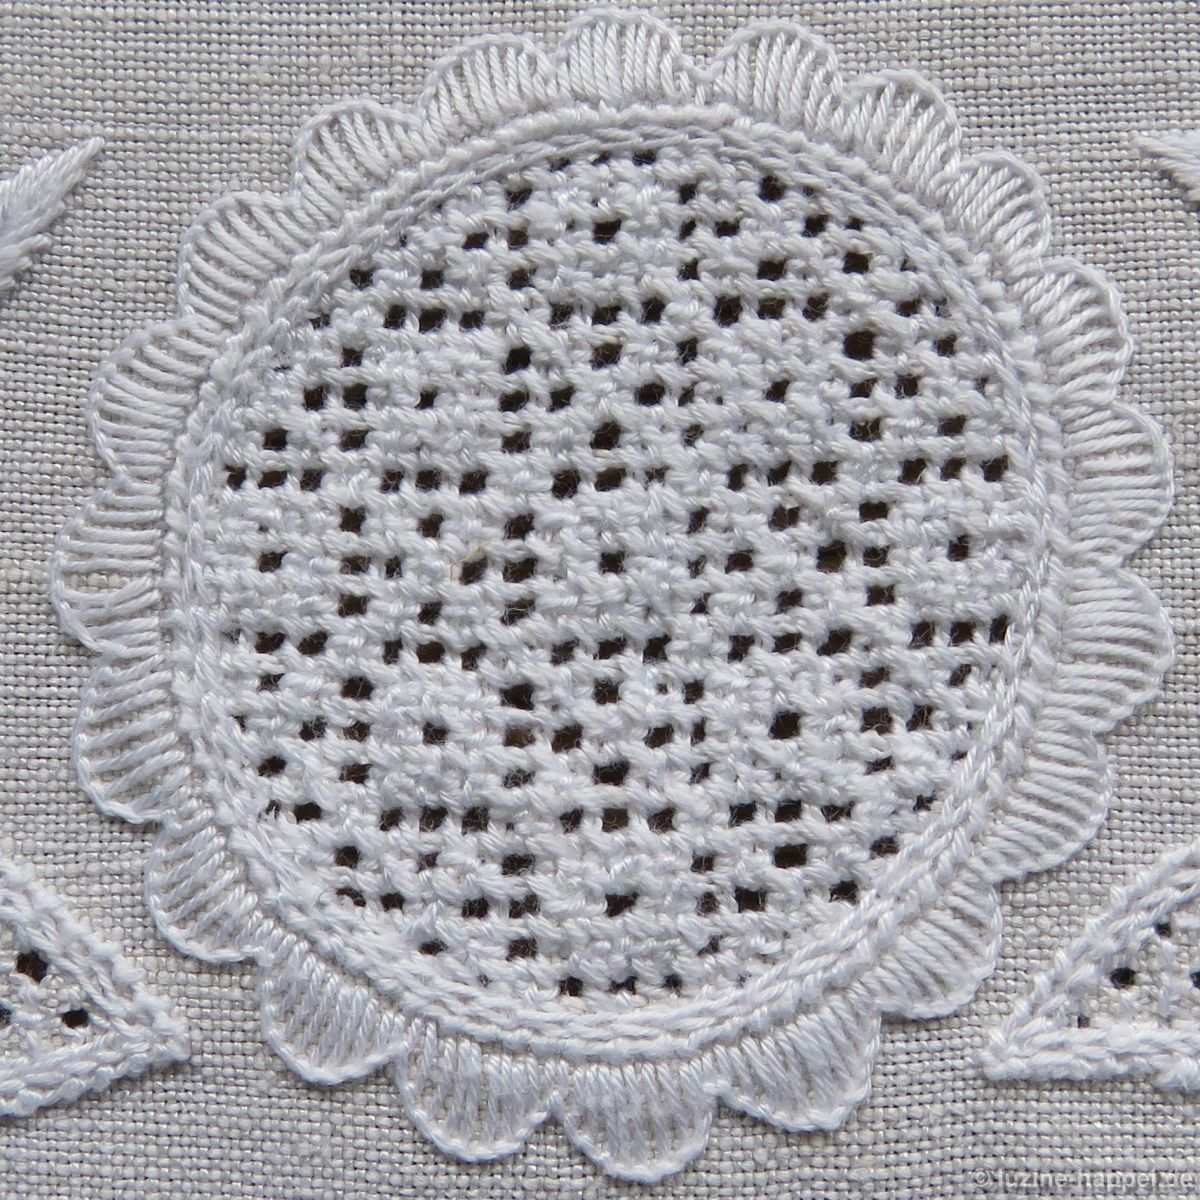
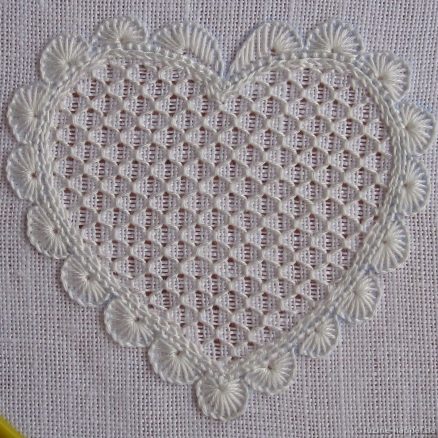
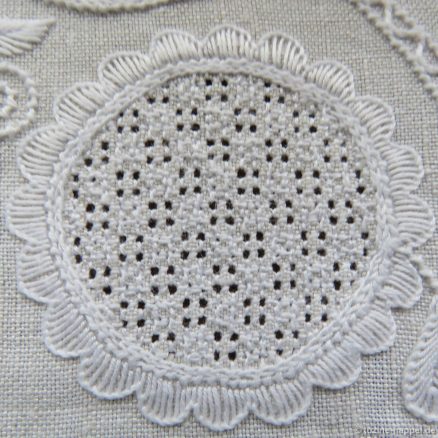
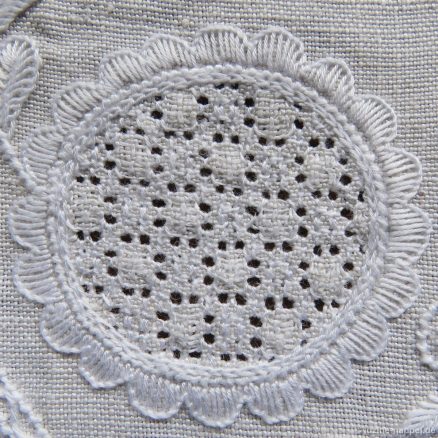
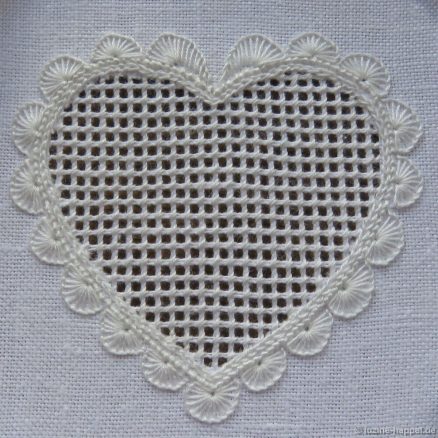
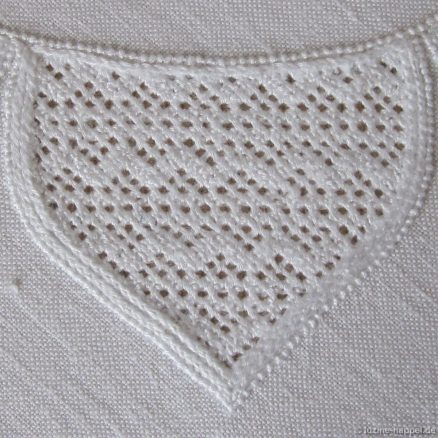
Für ein lichtes Durchbruchmuster werden paarweise Fäden zwischen jeweils 2 stehend bleibenden Fäden ausgezogen – sowohl horizontal als auch vertikal. Durch das Entfernen der Hälfte der Gewebefäden wird der Stoff durchscheinend, also „licht“.
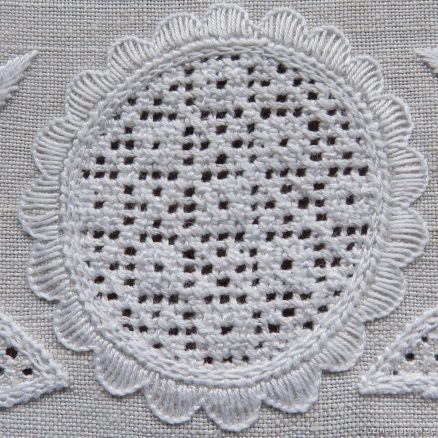
Manche Muster werden direkt in dieses lichte Grundgitter gestickt,
Lichtes Muster aus Grundstichen und Rosenstichen
meist aber wird das Gitter durch Grundstiche gesichert.
In das Grundstichgitter werden meist Stopfstiche
oder Rosenstiche
oder Kombinationen beider gearbeitet.
Es gibt mehrere hundert lichte Muster.
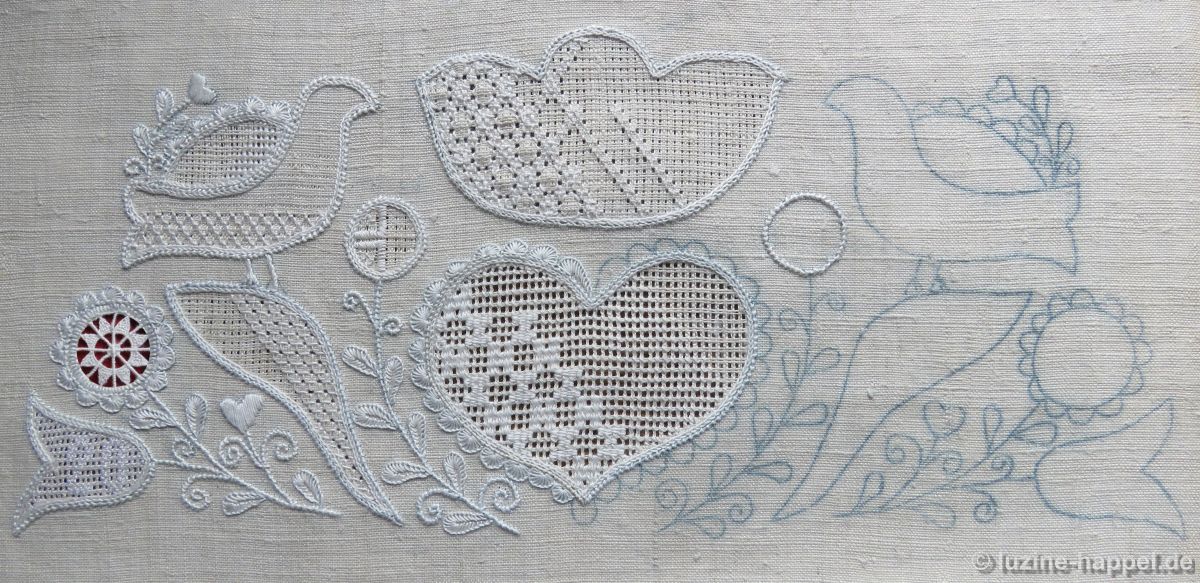
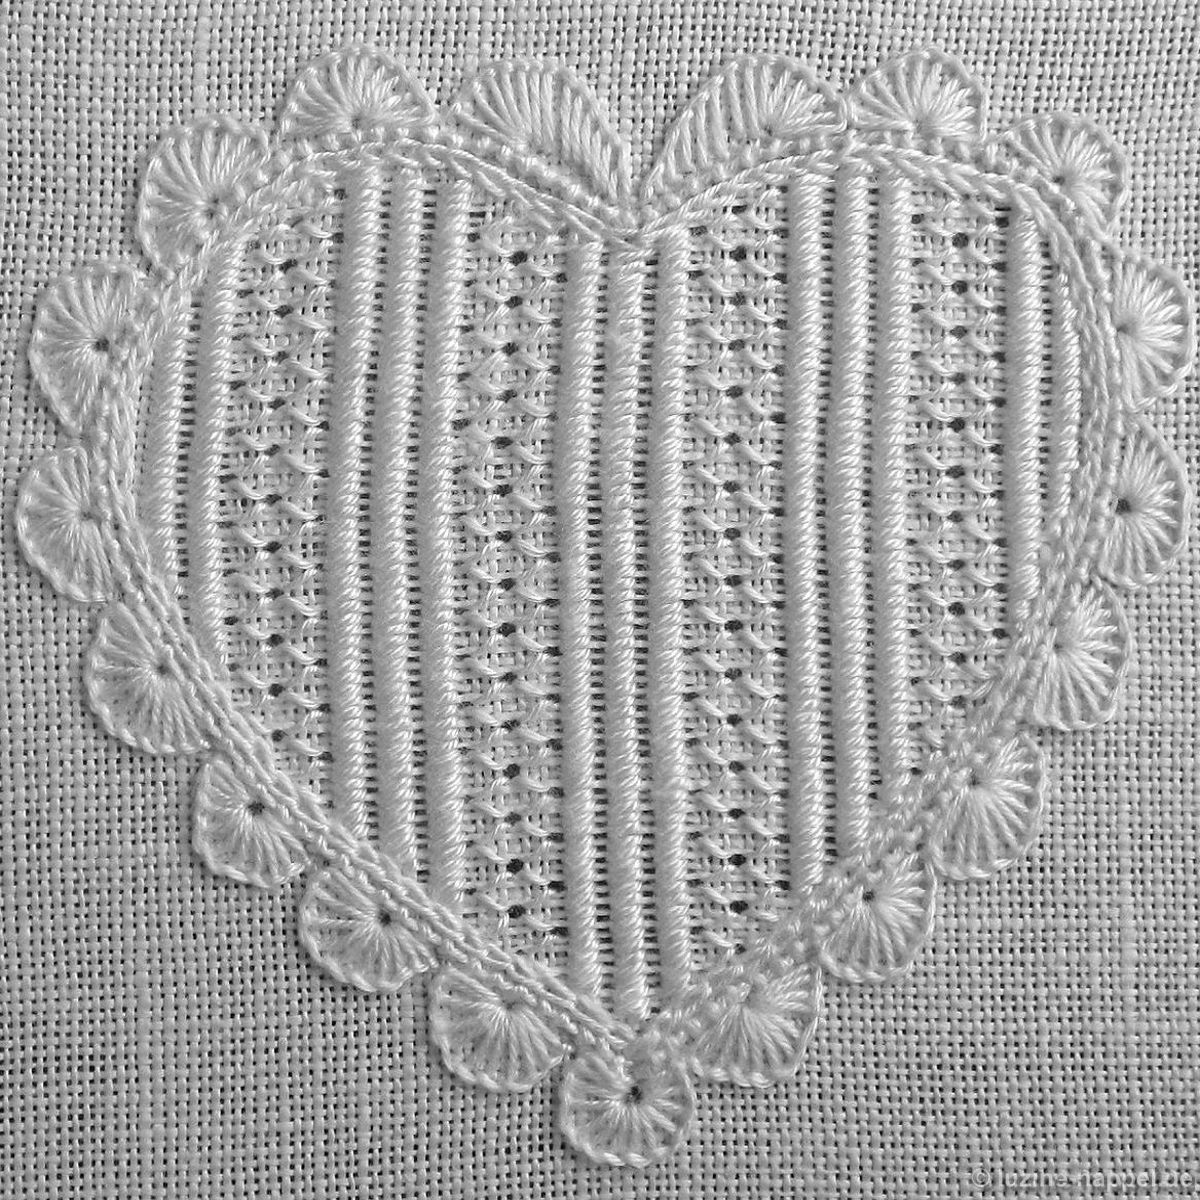
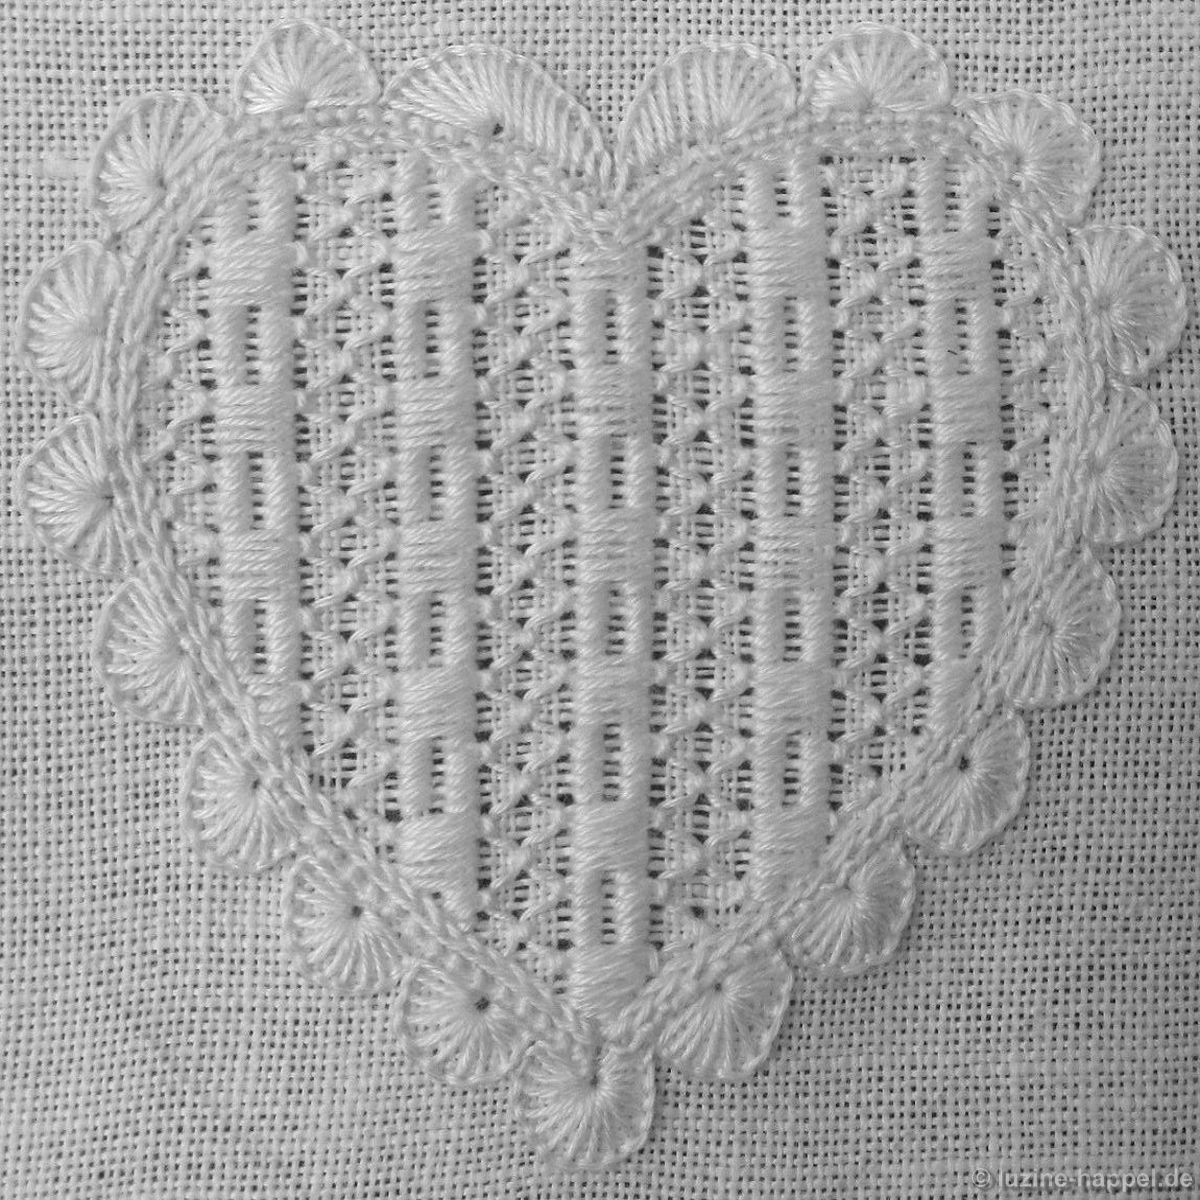
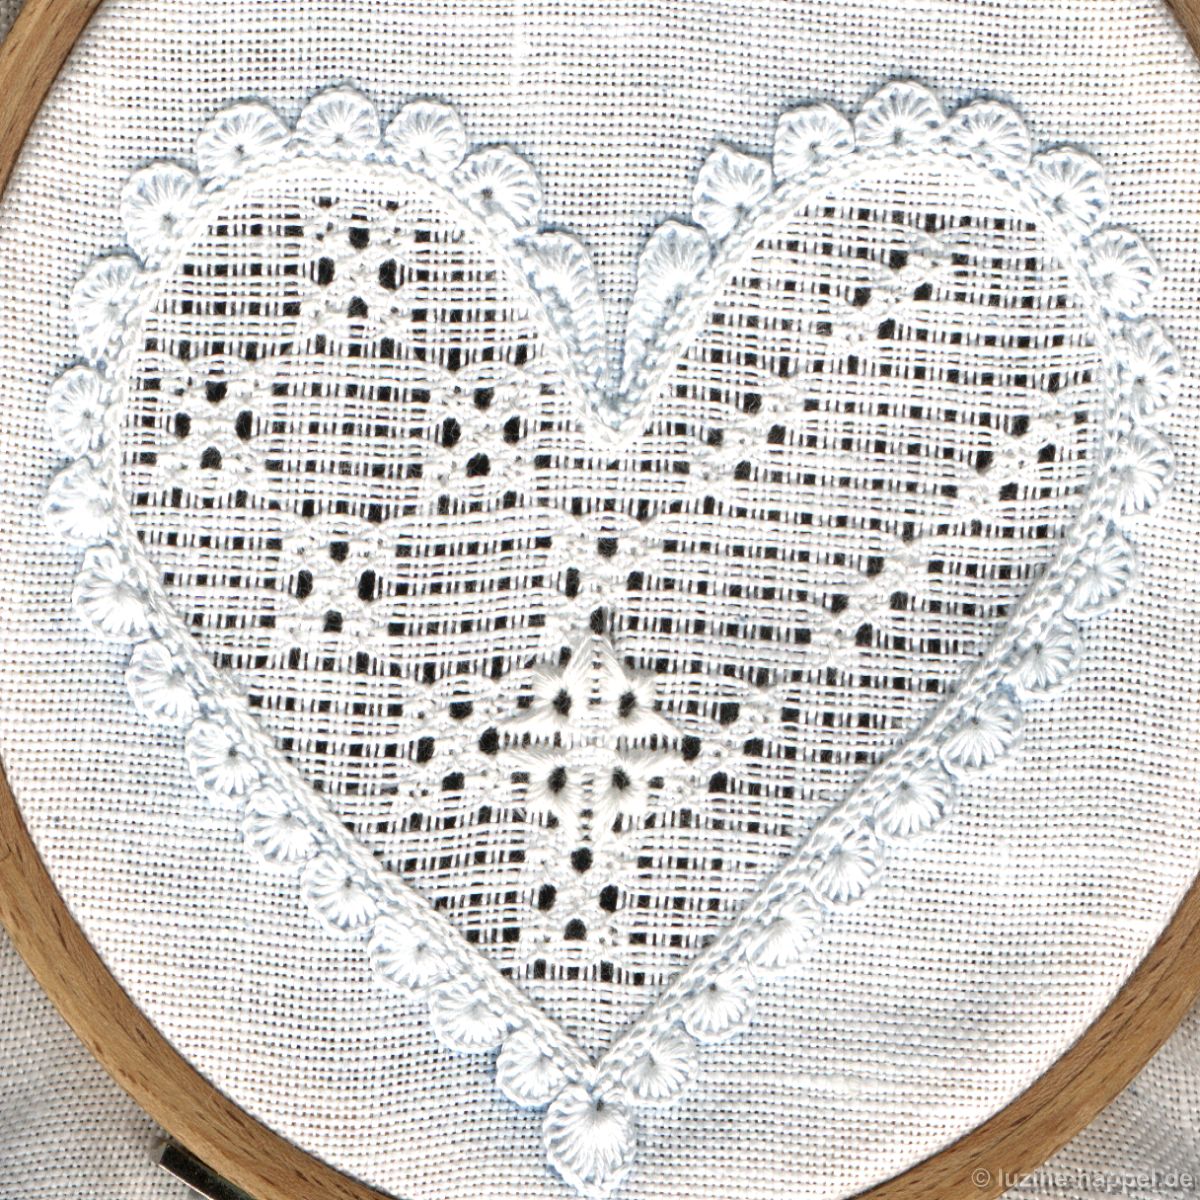
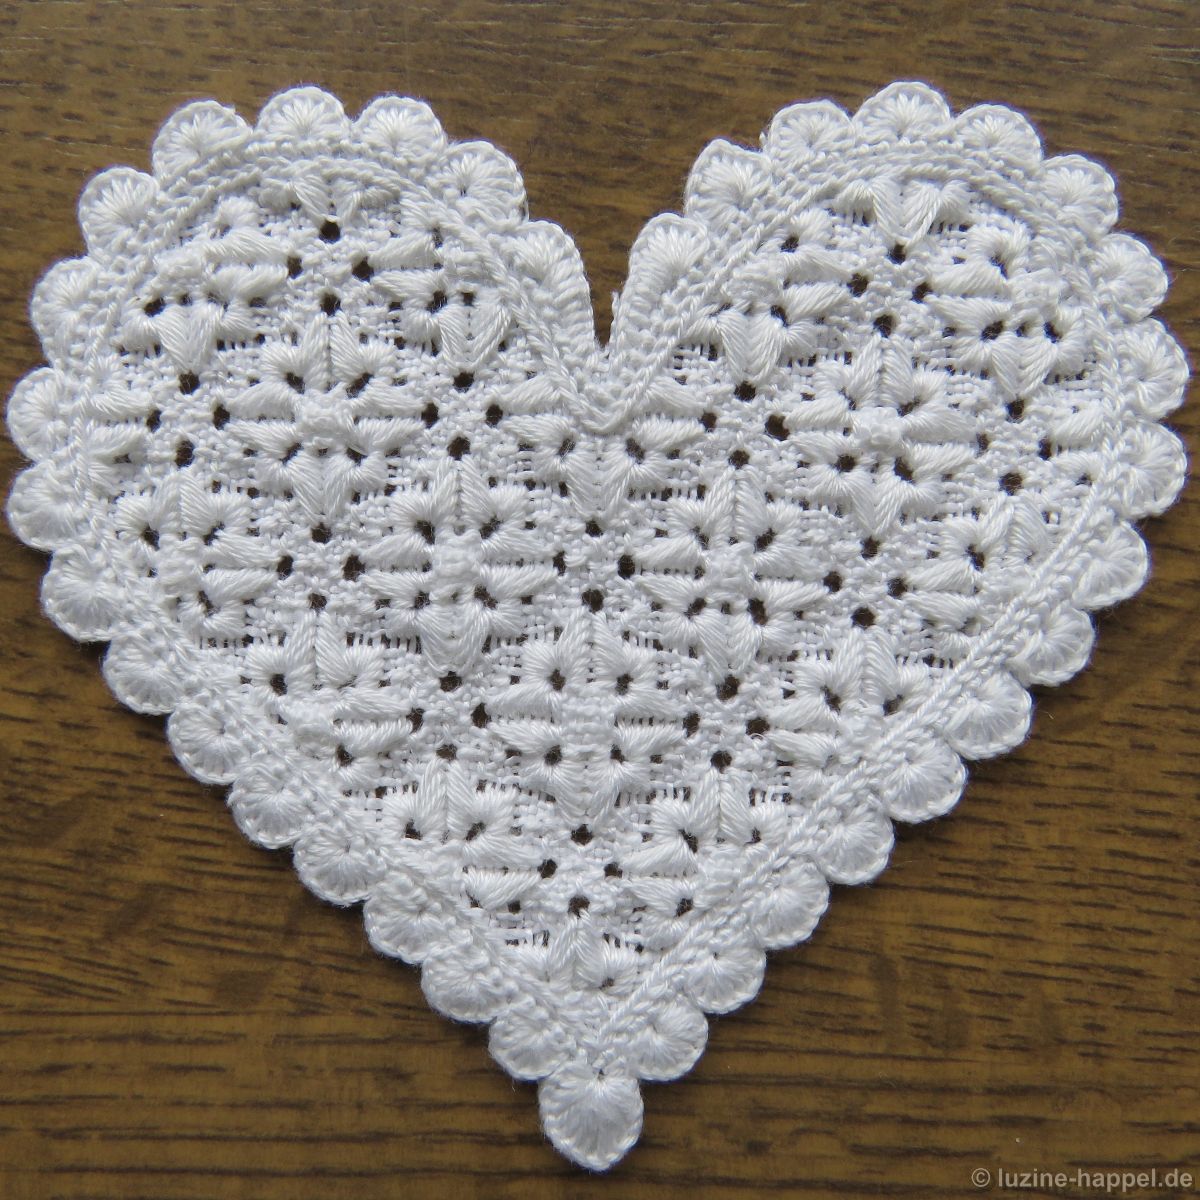
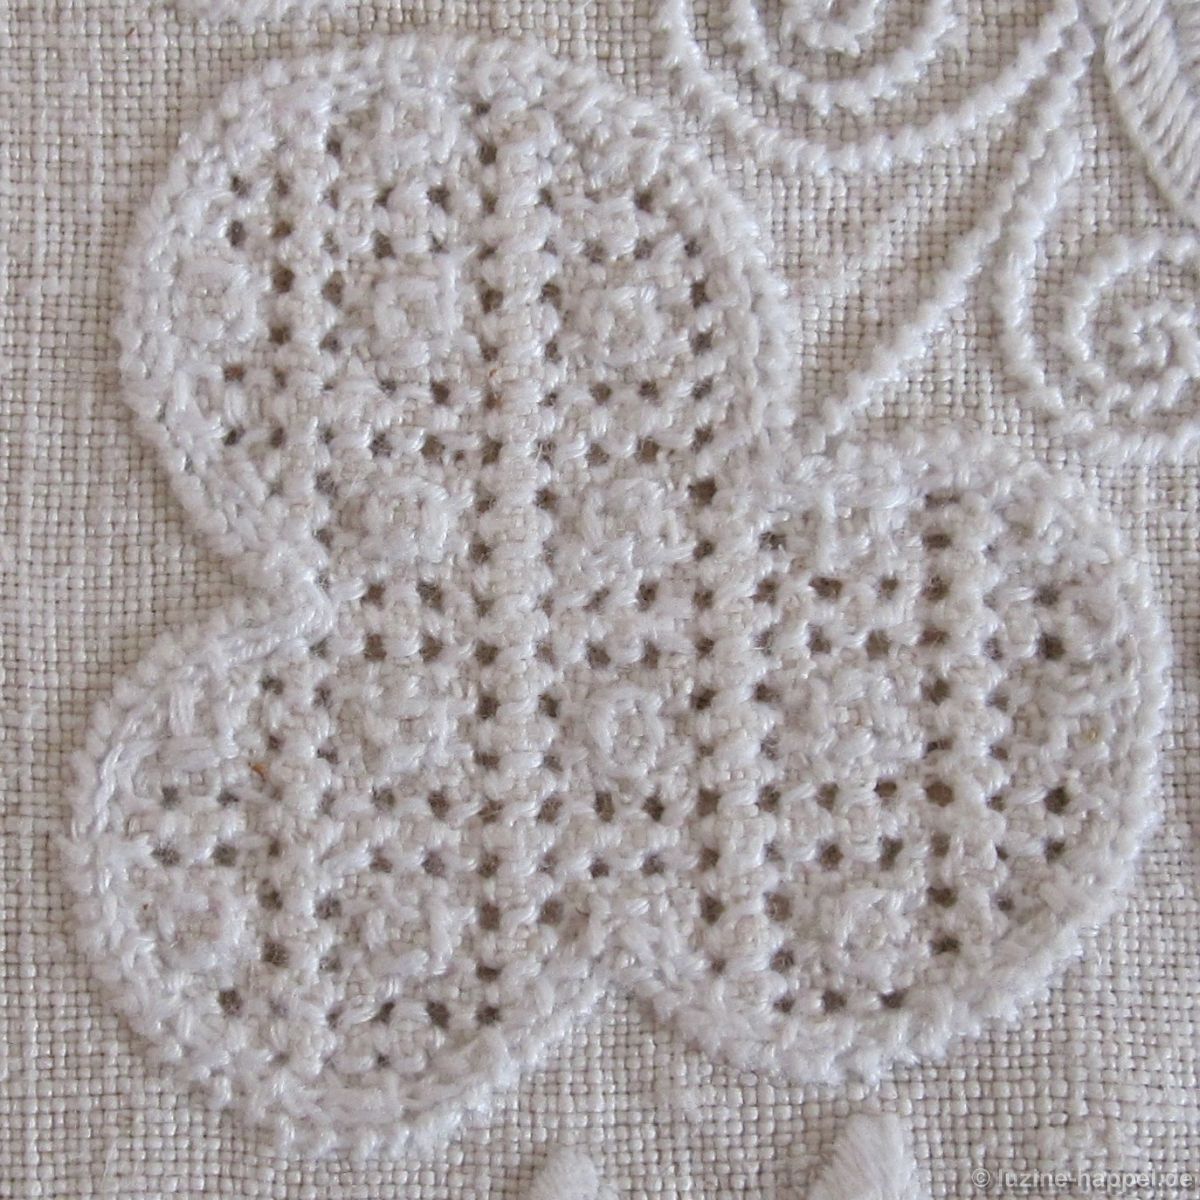
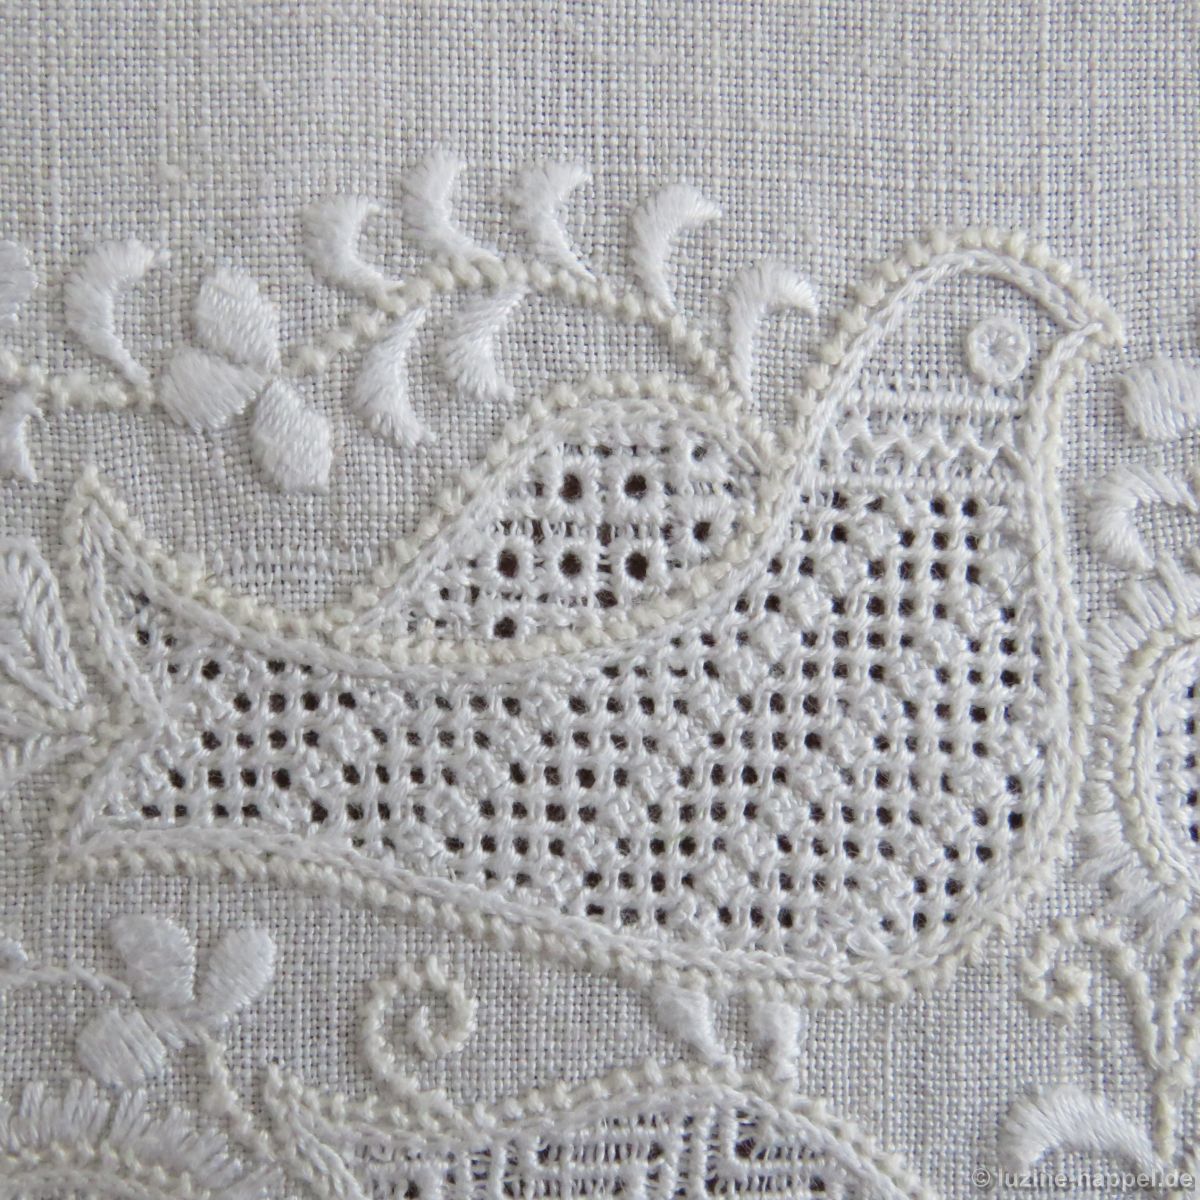
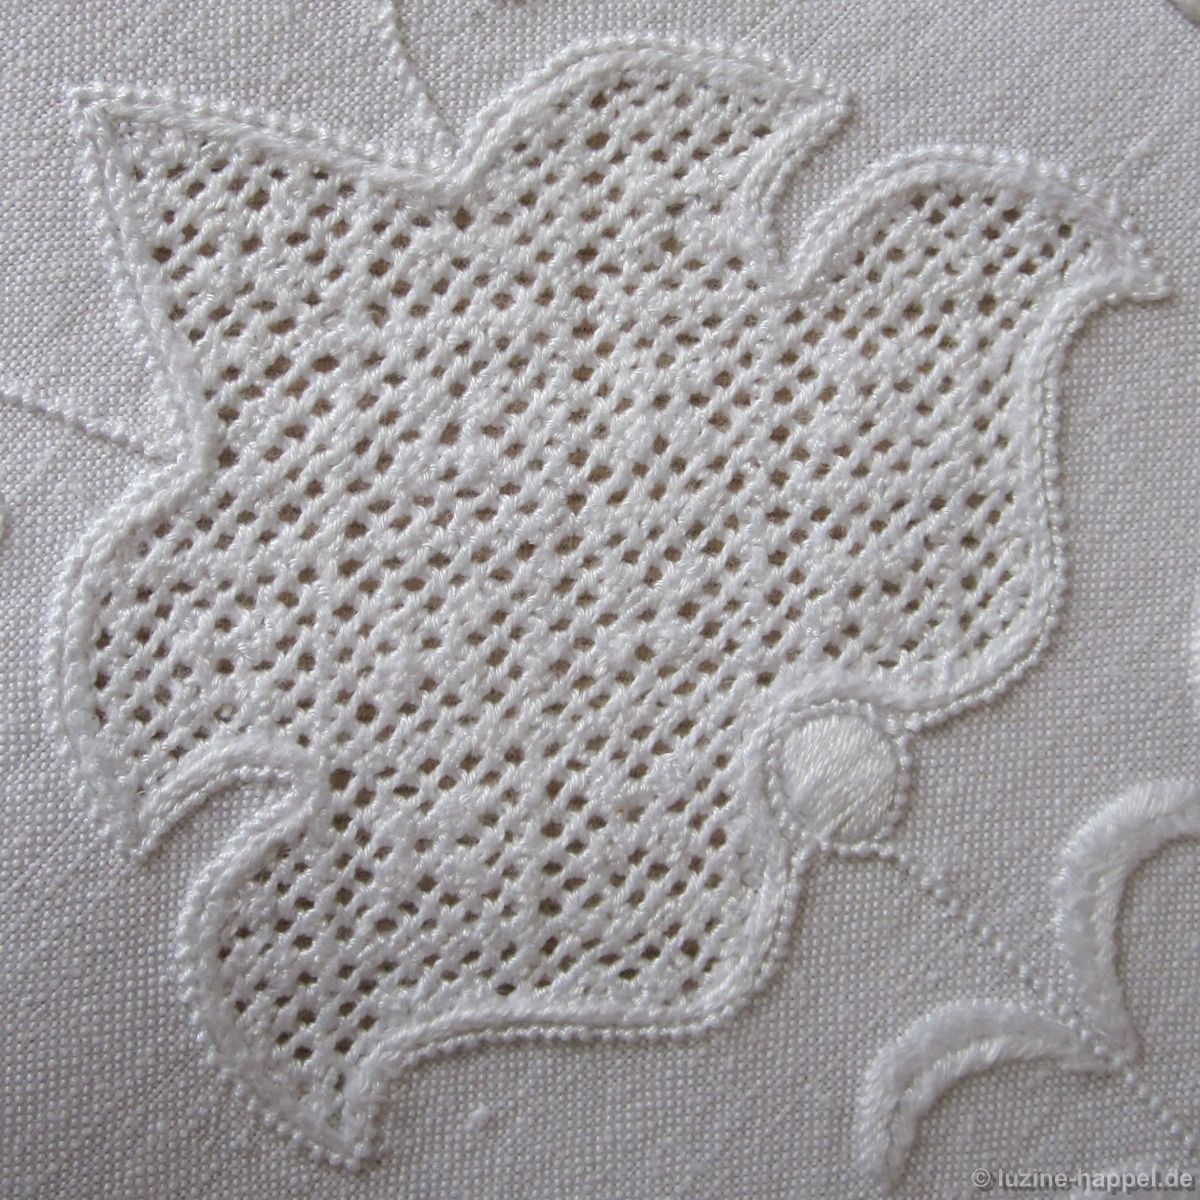
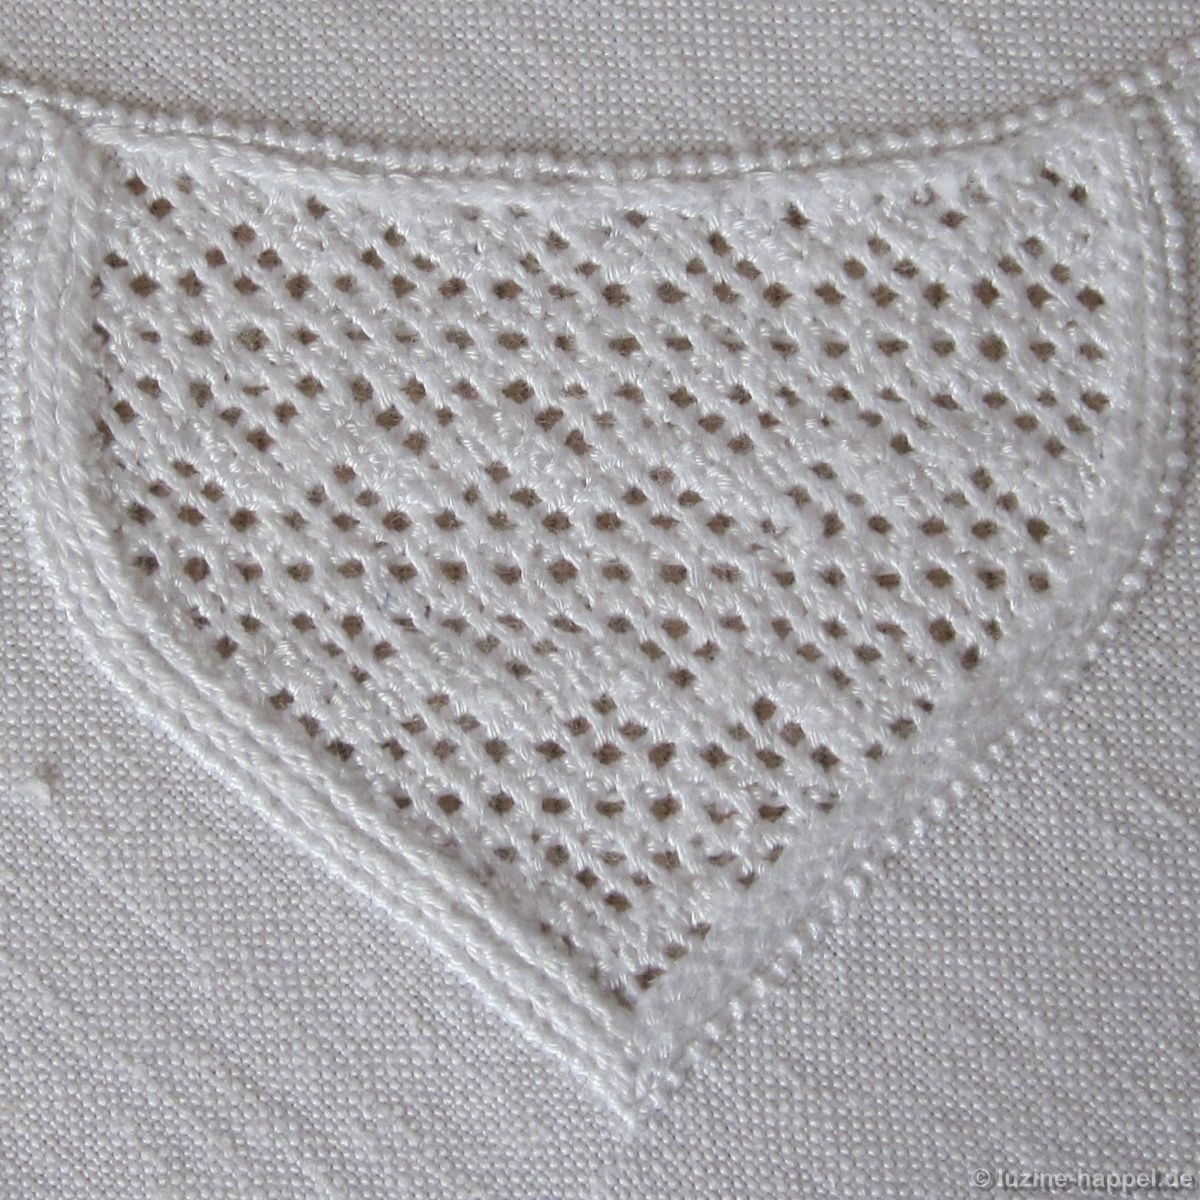
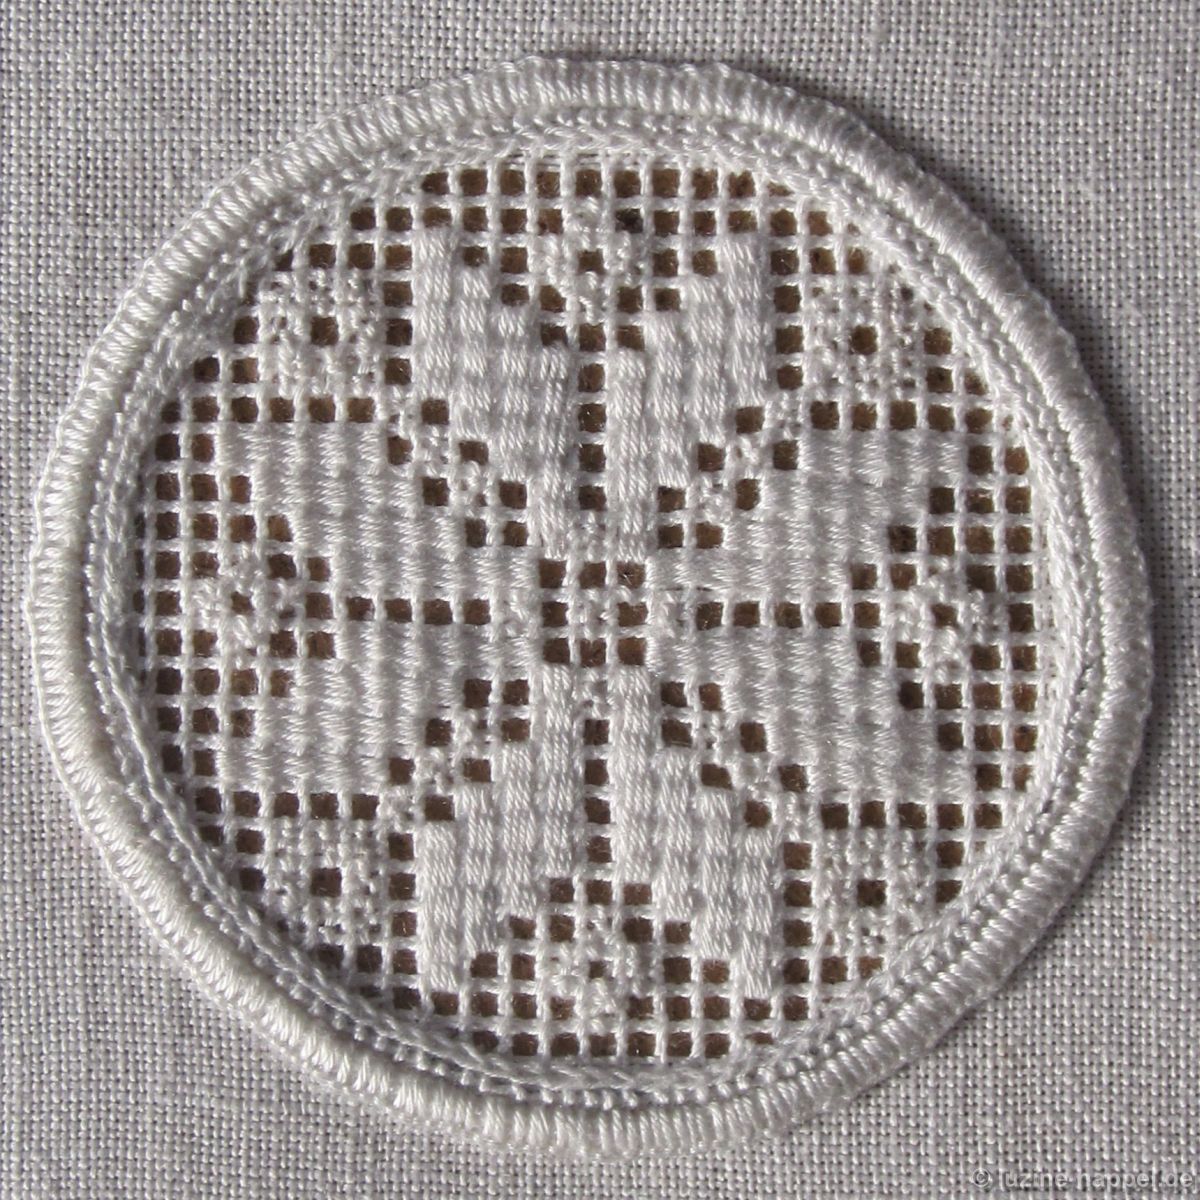
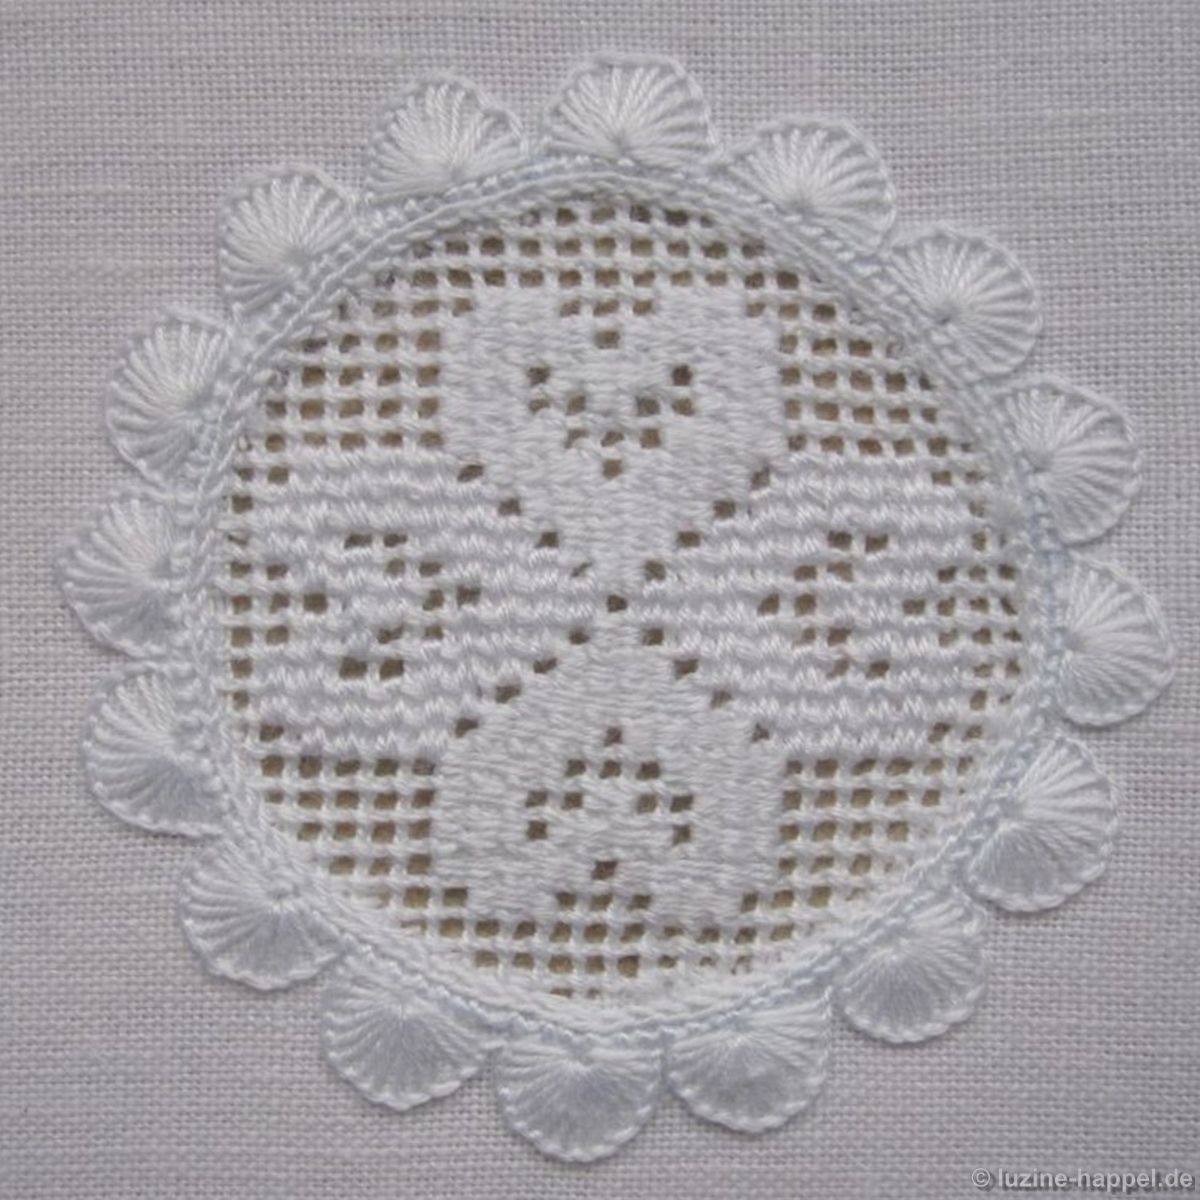
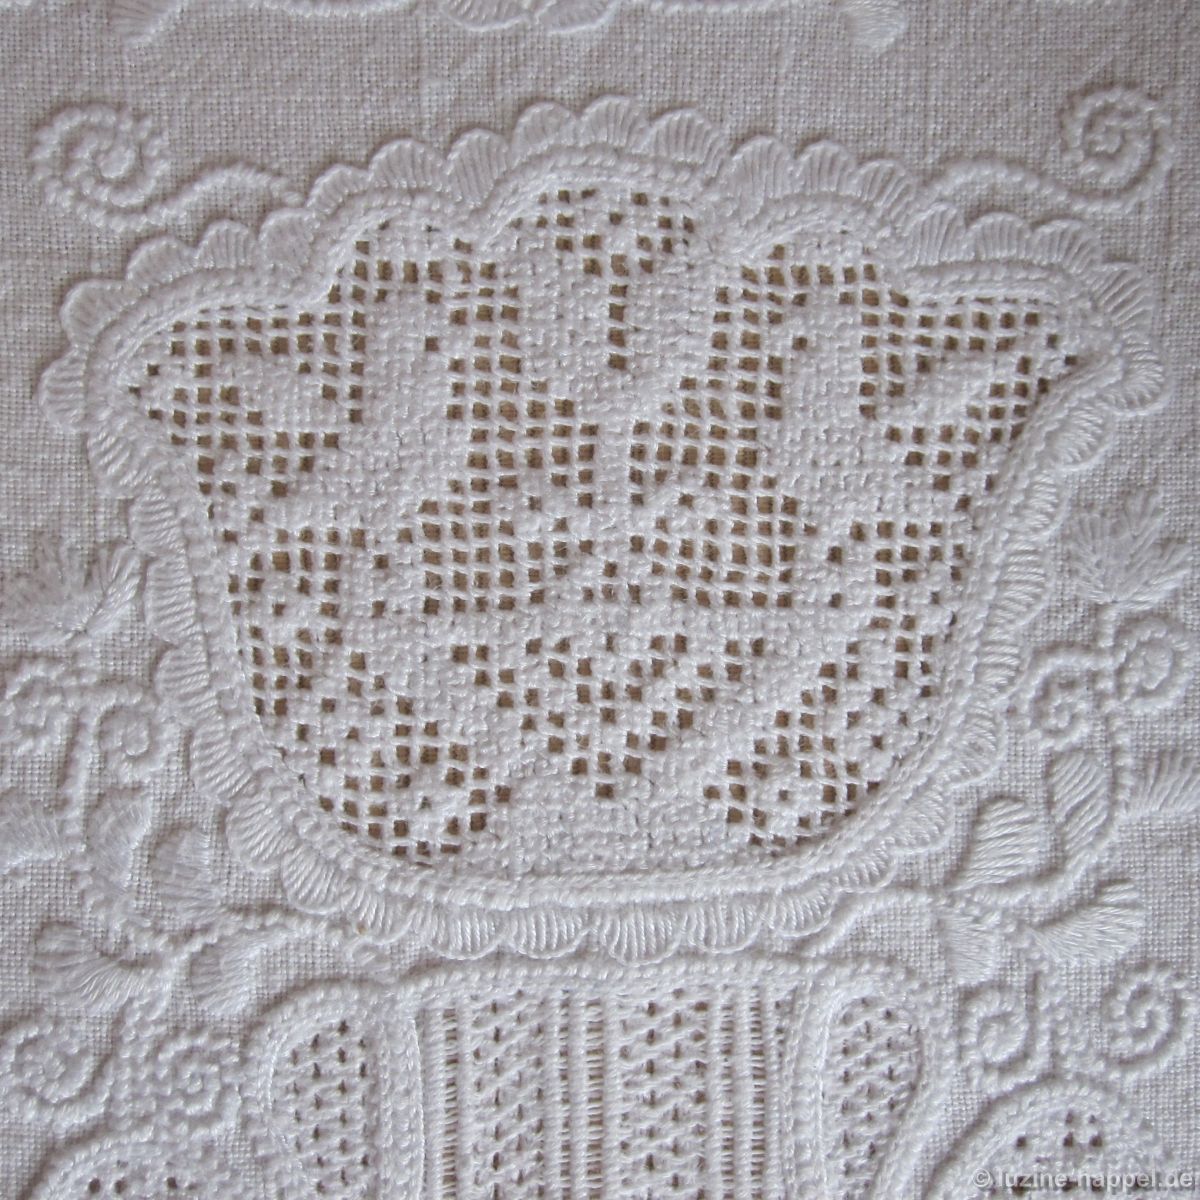
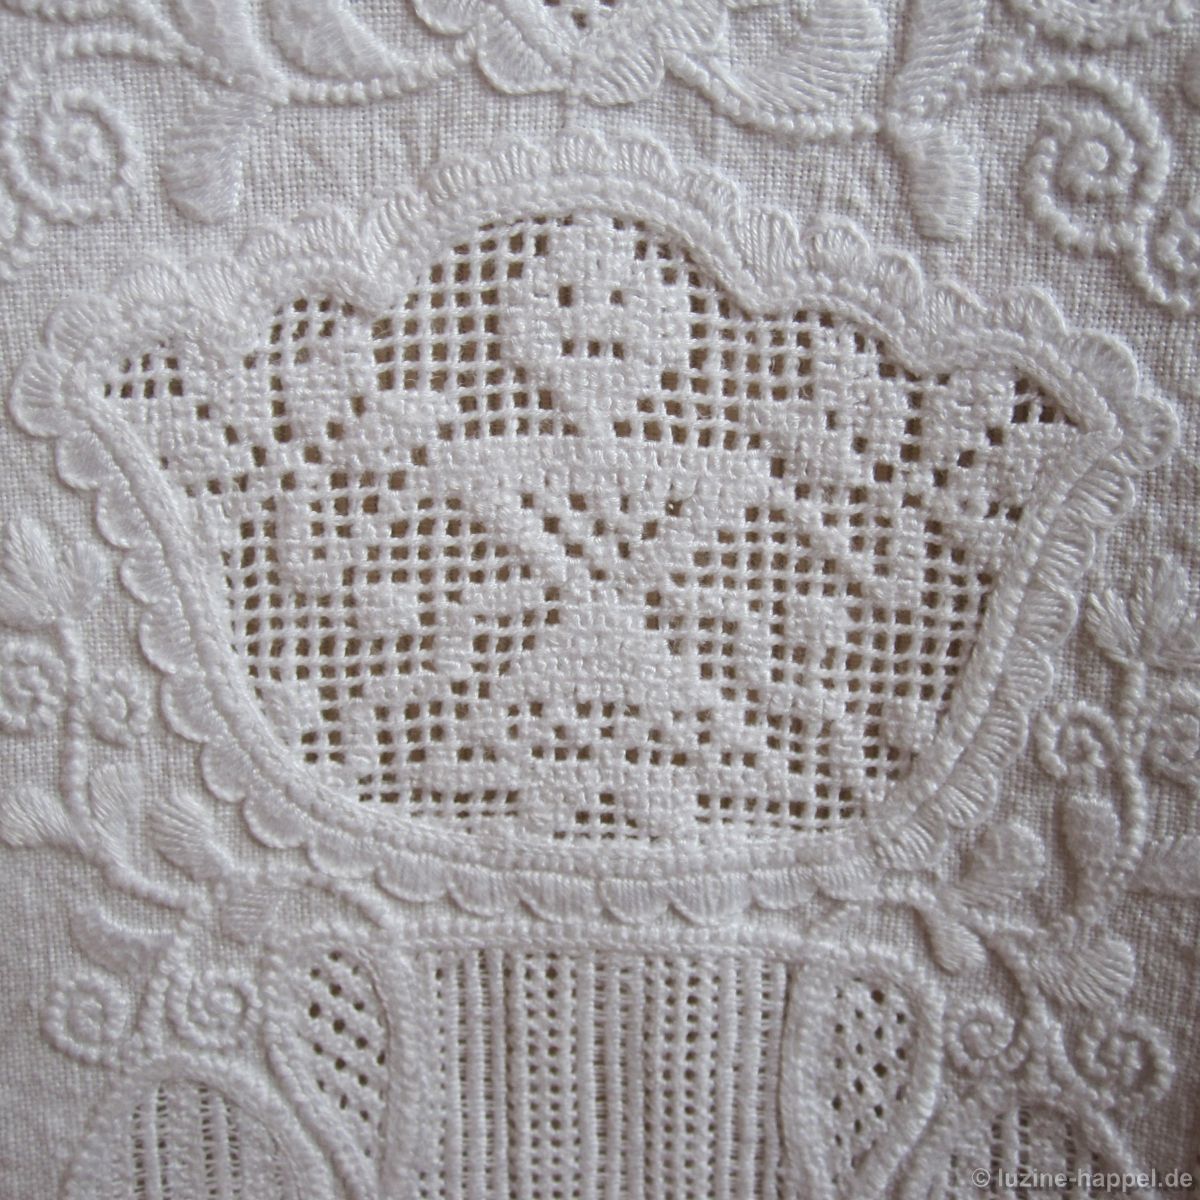
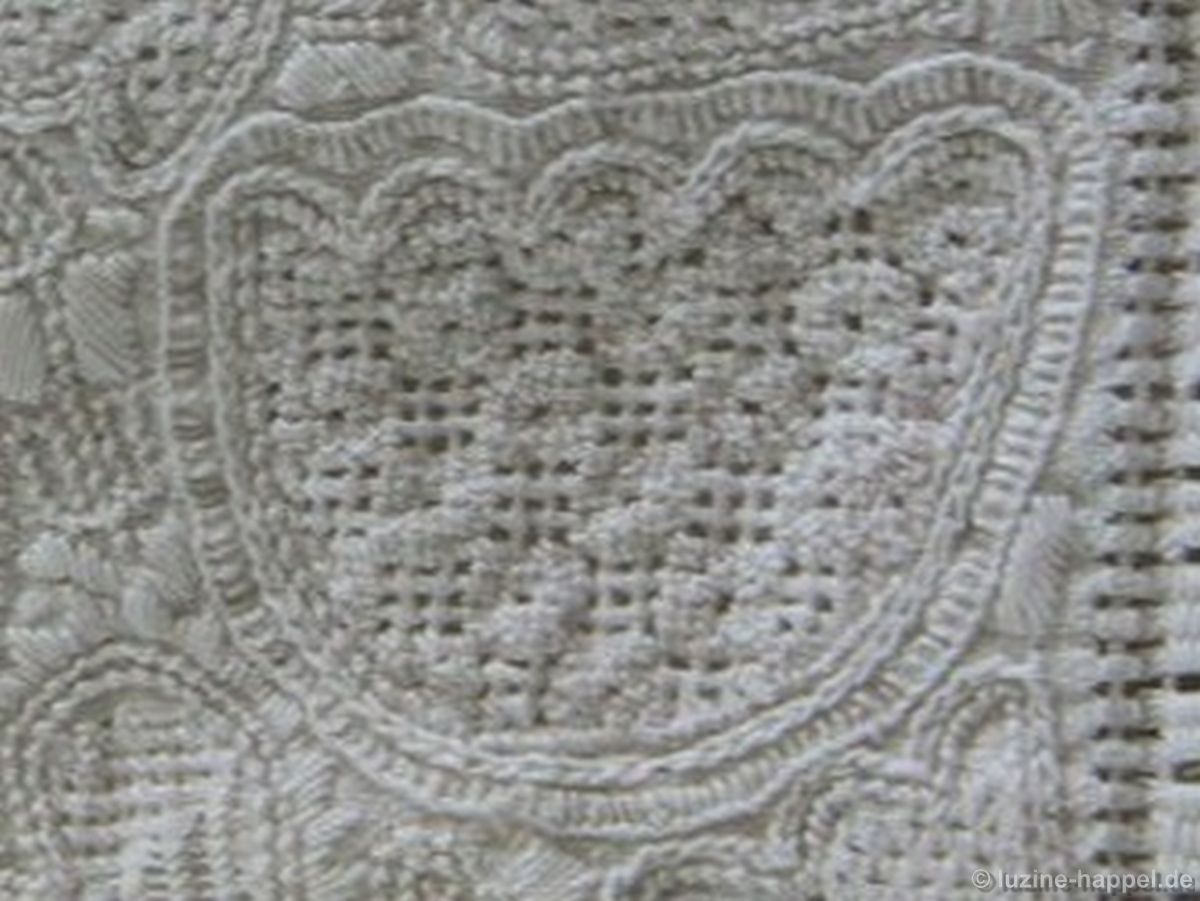
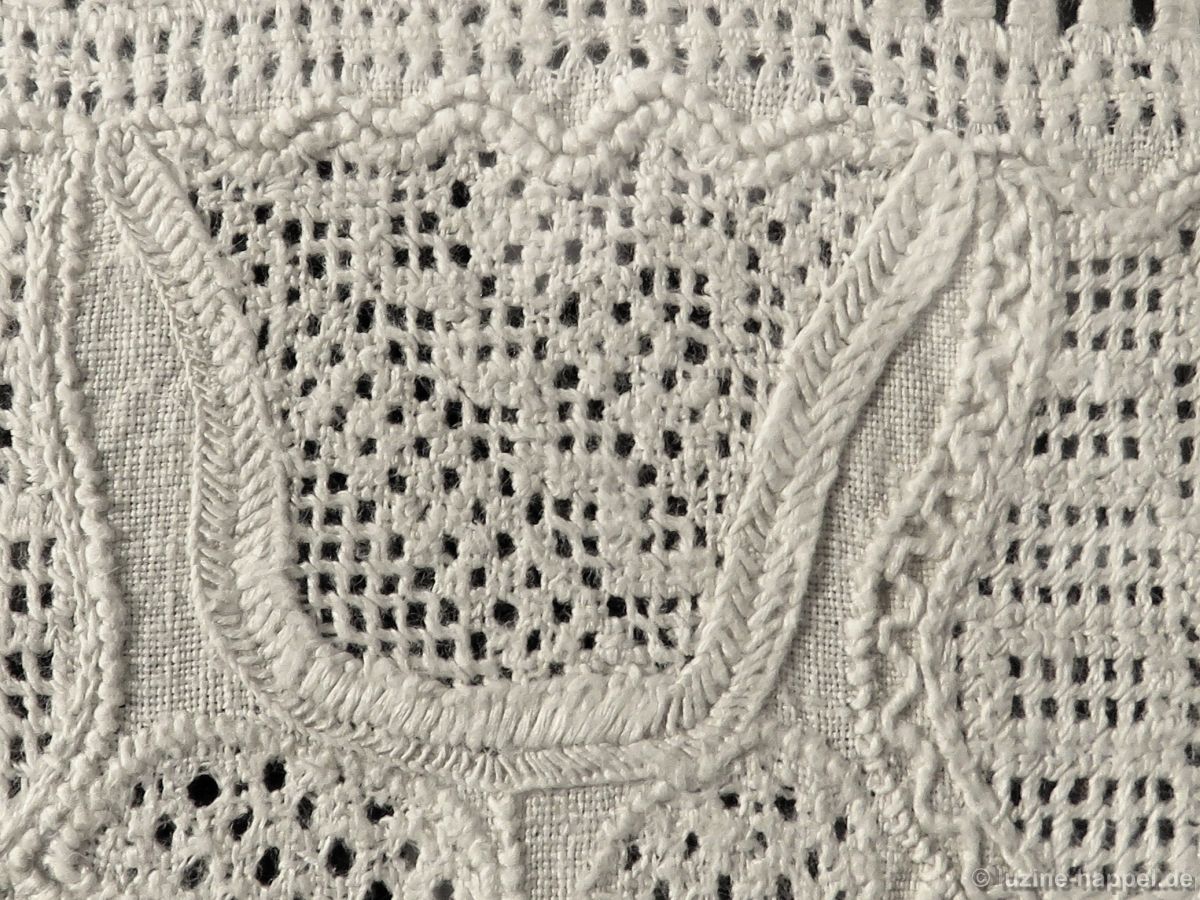
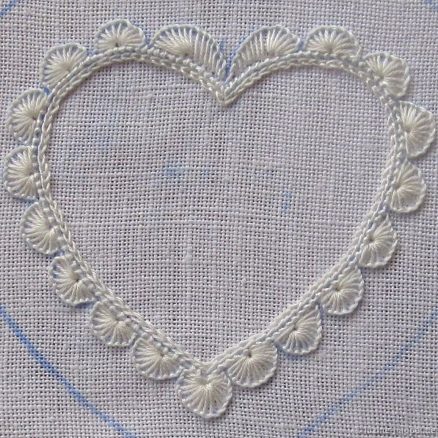
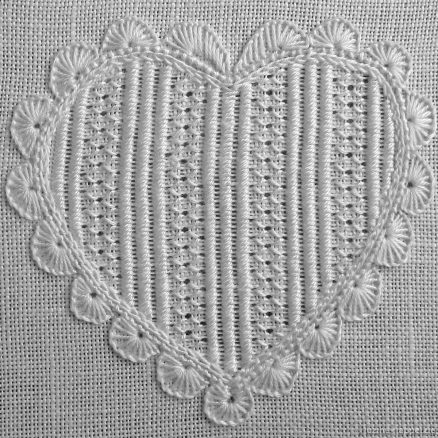
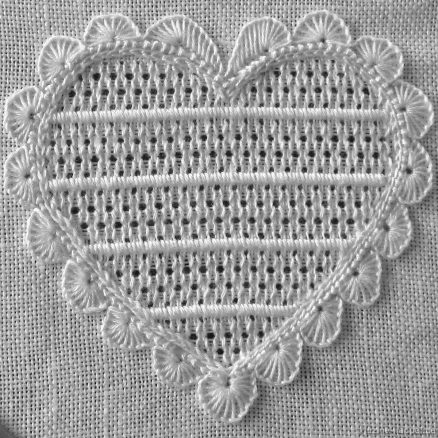
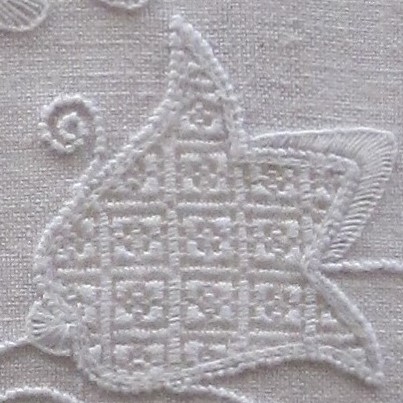
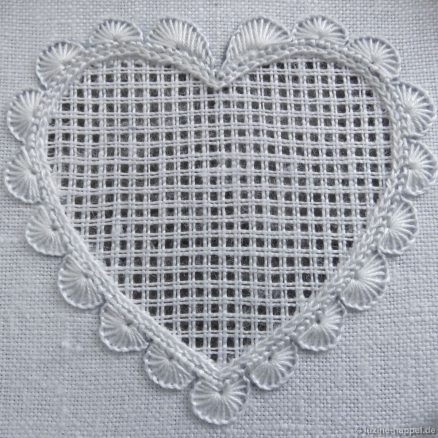
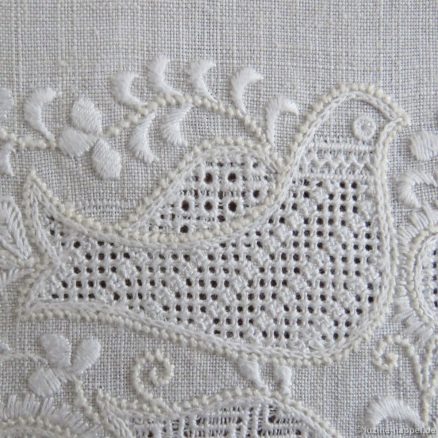
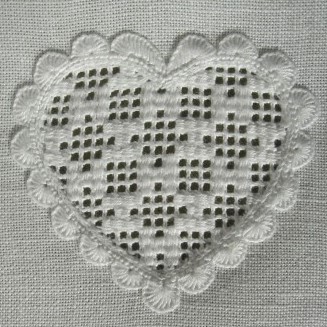
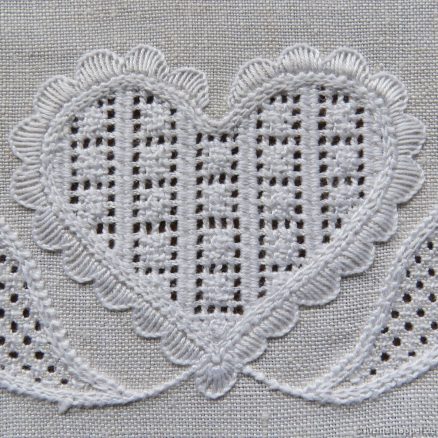
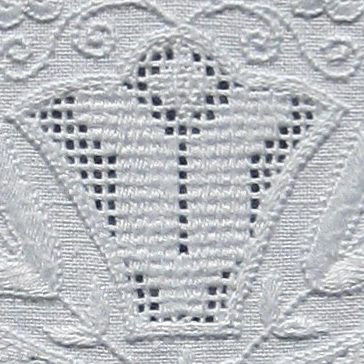
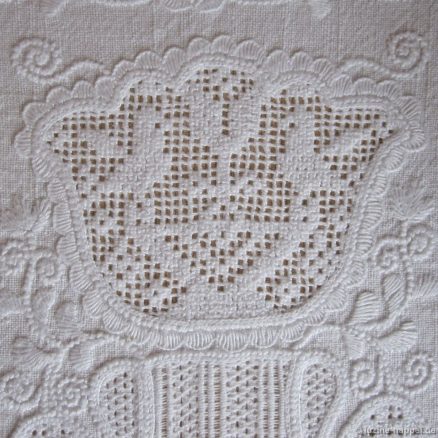
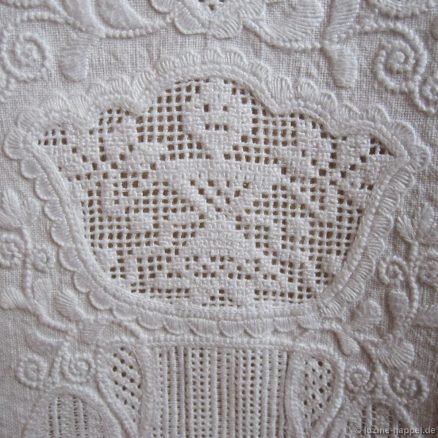
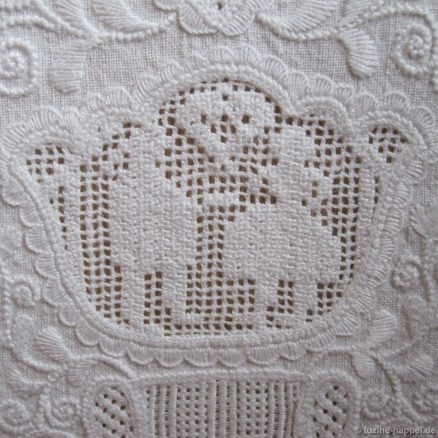
Neben den oben gezeigten Endlosmustern werden lichte Grundstichgitter in der Schwalm auch gern mit figürlichen Mustern verziert.
Sterne und
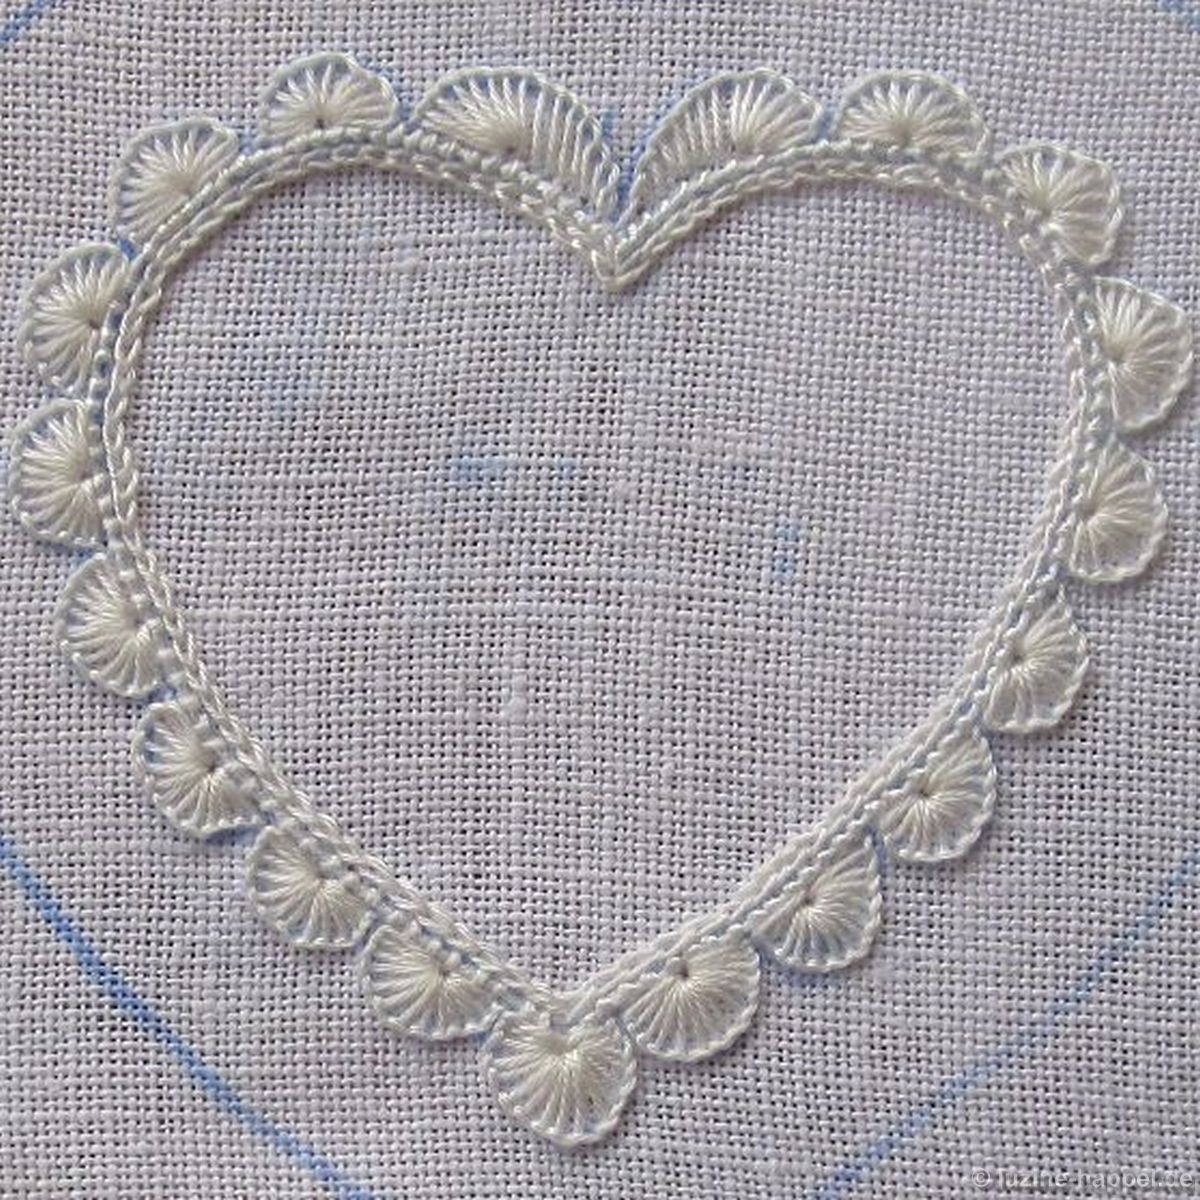
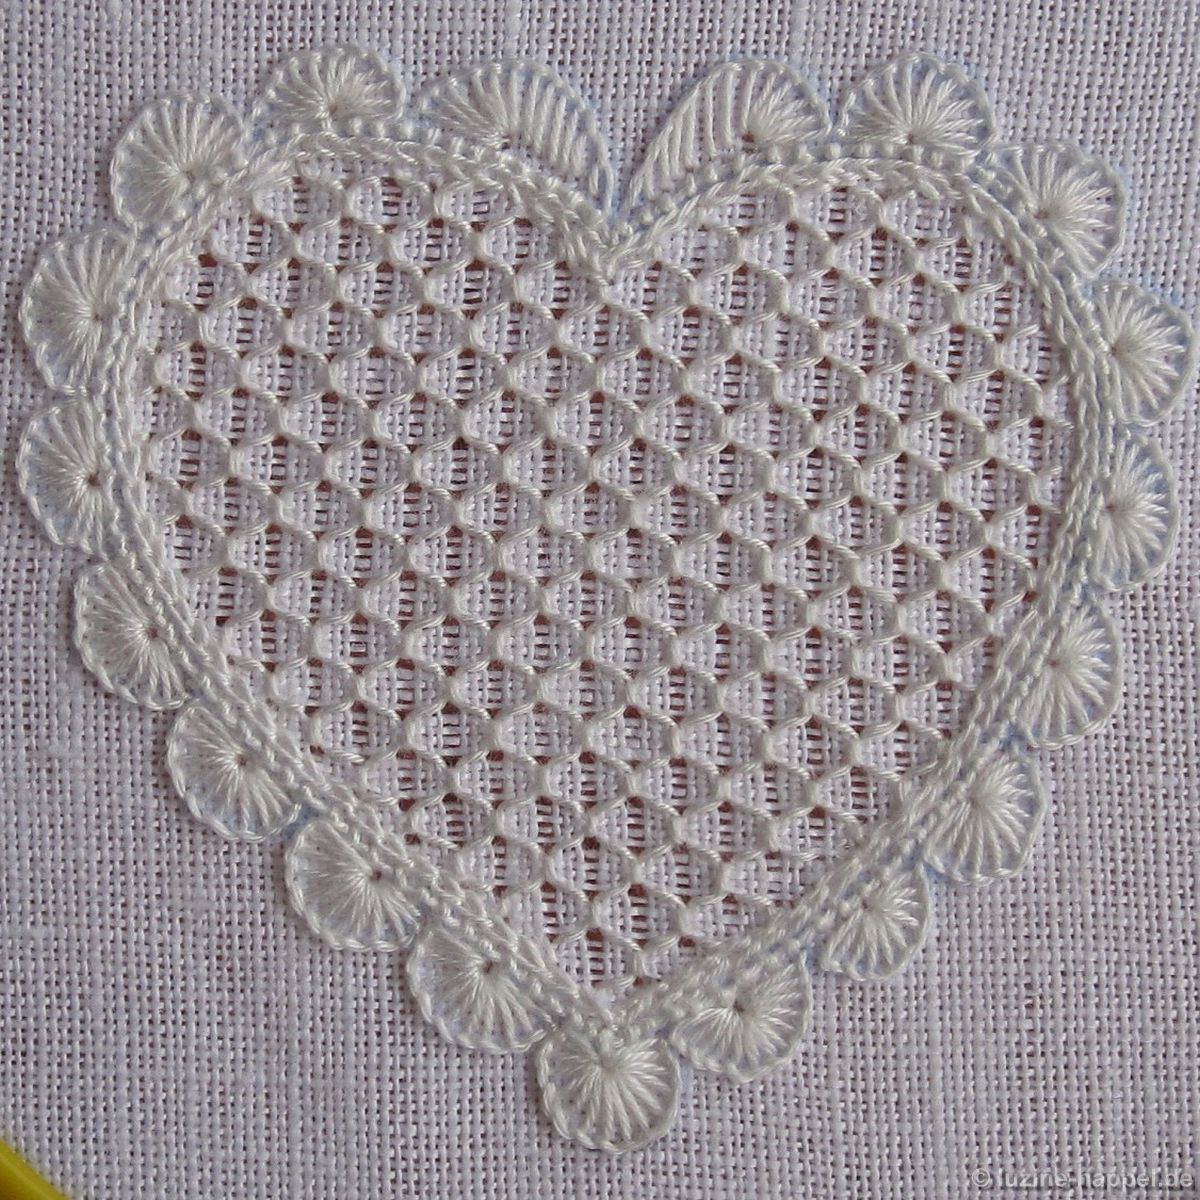
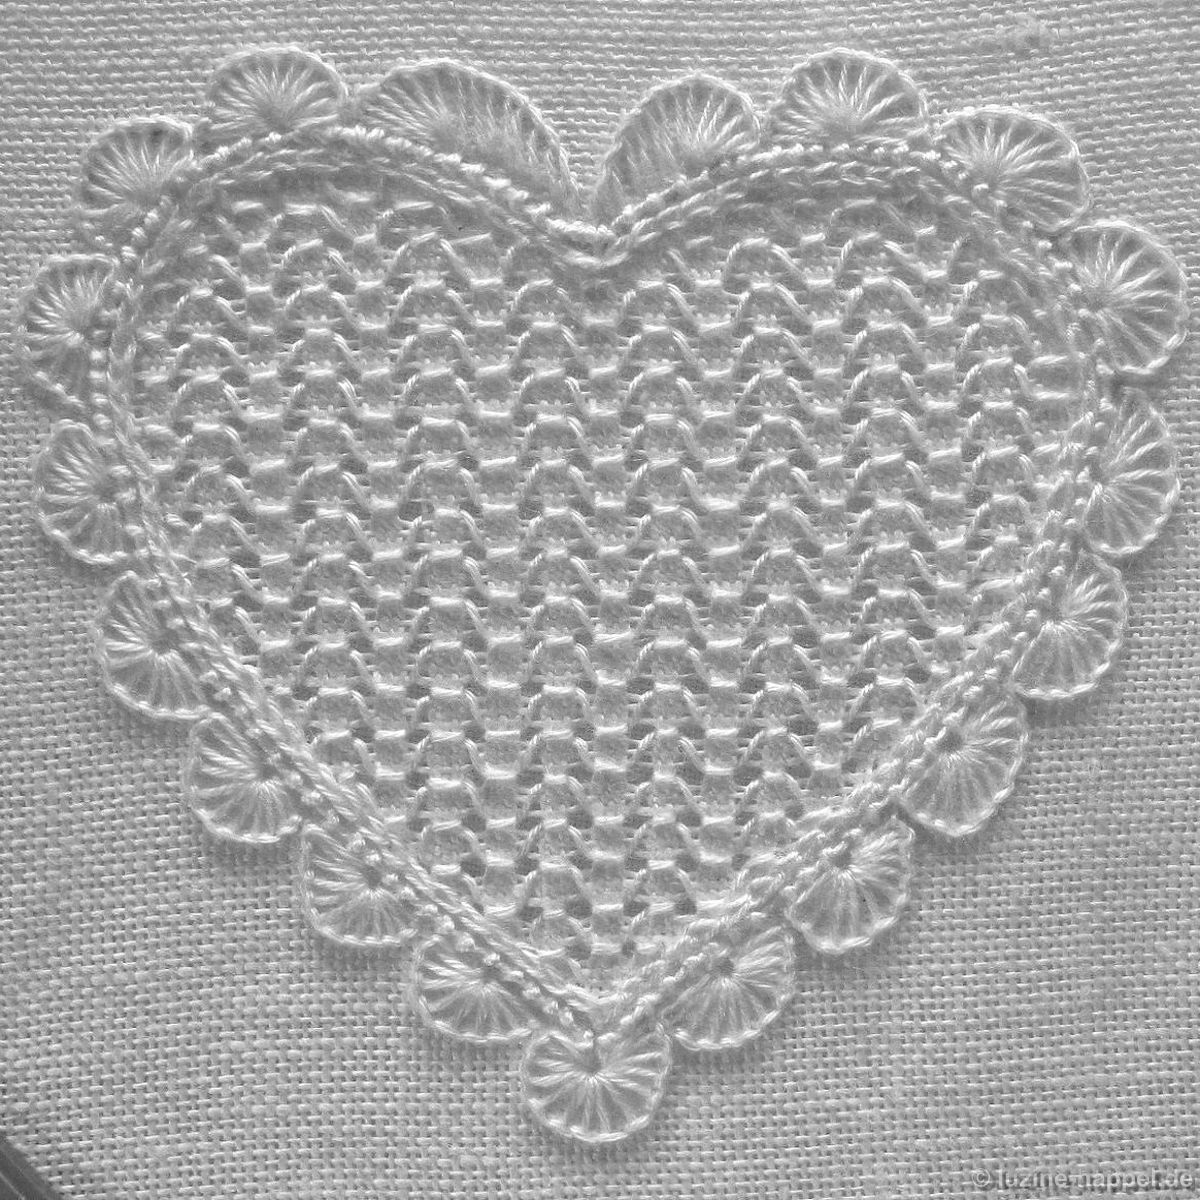
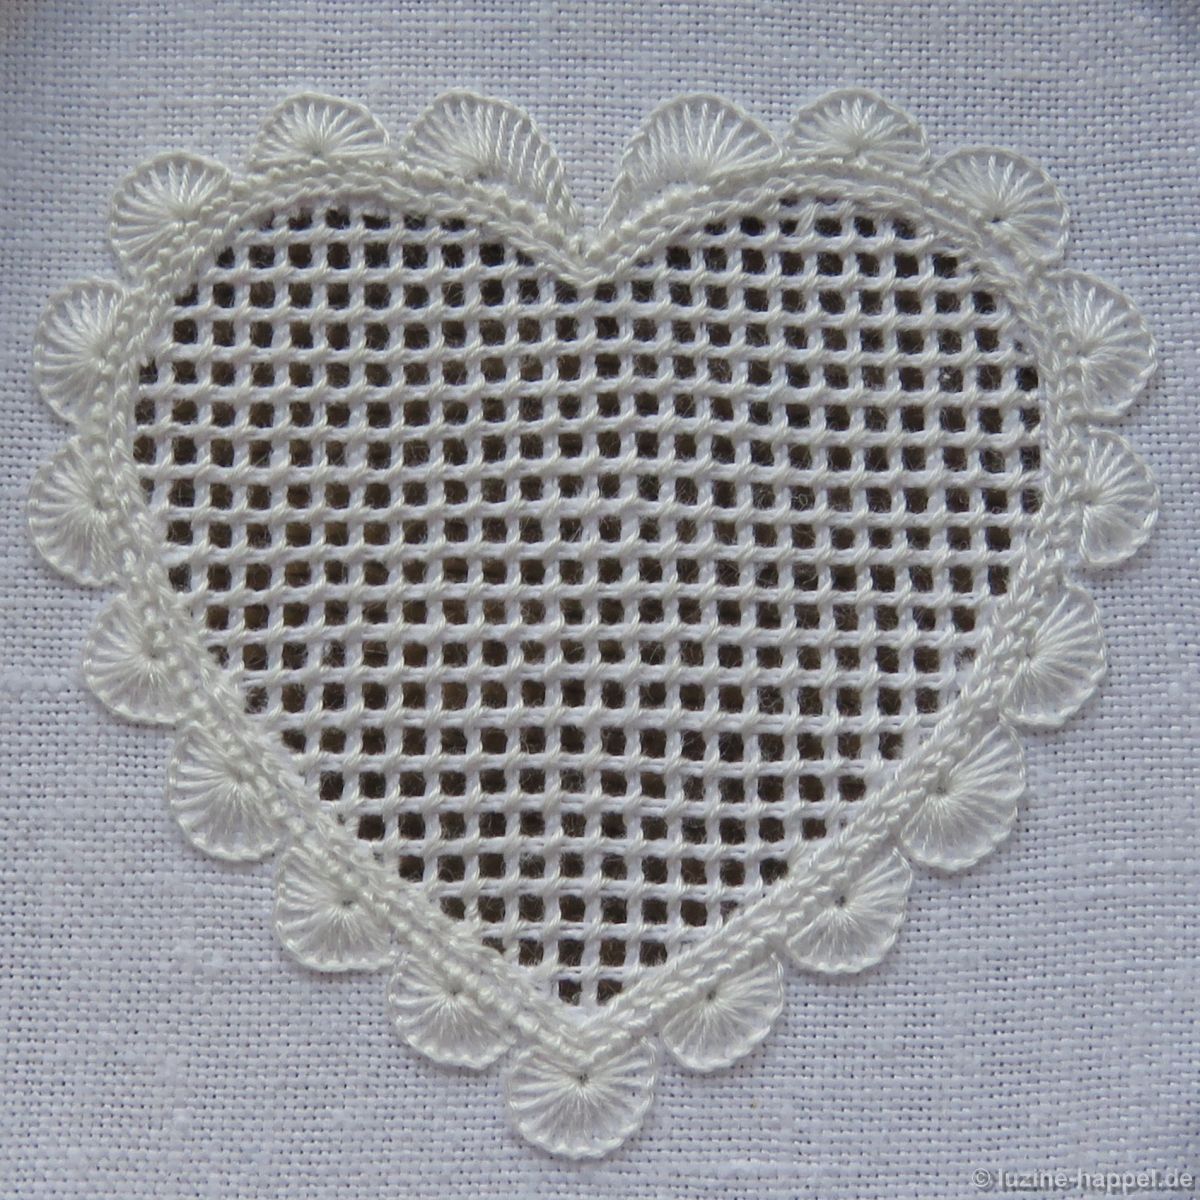
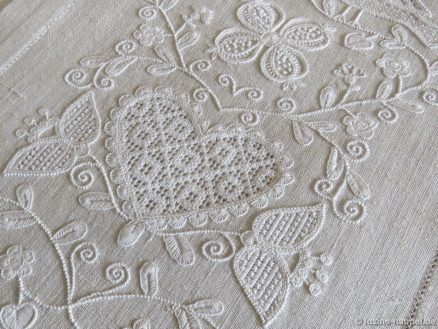
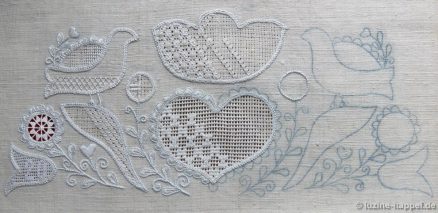
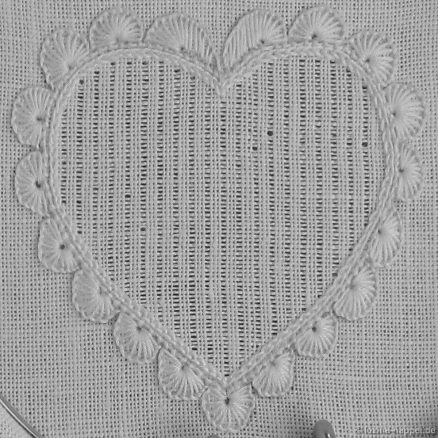
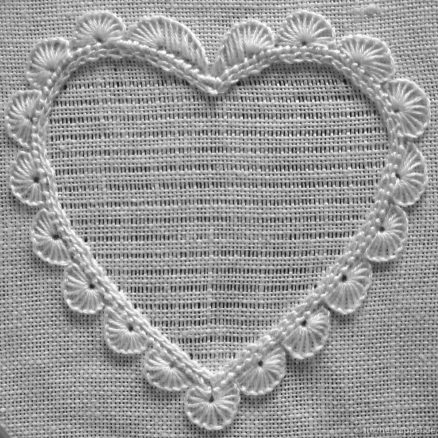
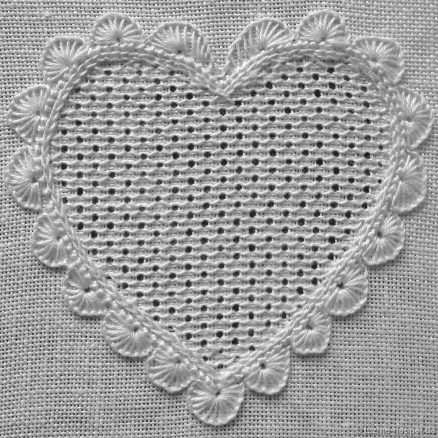
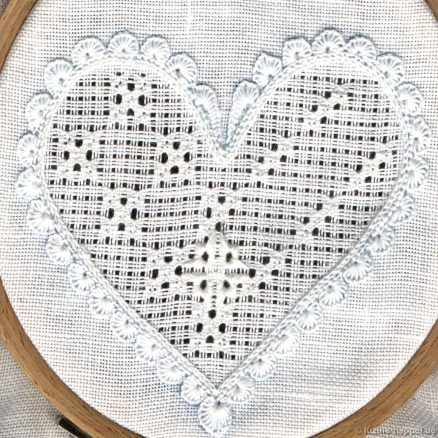
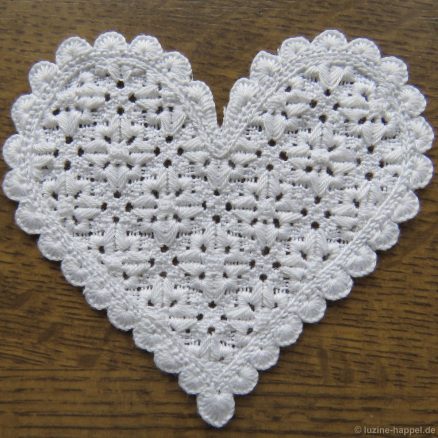
Herzen
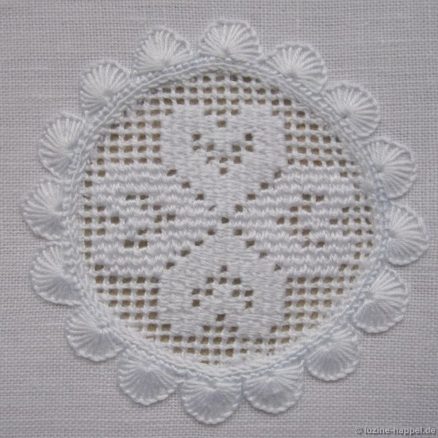
spielen hier eine große Rolle, aber auch Tulpen, Vögel und andere Tiere sowie Männchen und Weibchen kann man finden.
In Verbindung mit der überaus großen Anzahl an Limetmustern und der Vielzahl der einfachen Durchbruchmuster kann man auf eine Auswahl von annähernd 1000 unterschiedlichen Flächenfüllmustern zurückgreifen.
Mit den immer wieder abwandelbaren Konturenmustern, der breiten Palette an Flächenfüllmustern und der Art der zu bestickenden Gegenstände kann jedes Stickprojekt zu einem absoluten Unikat werden.
Diese Möglichkeit wird heutzutage wieder sehr geschätzt.
Auch die gesundheitlichen Vorteile sollten nicht unbeachtet bleiben. Am Ende des Tages ein greifbares Ergebnis seiner Tätigkeit in Händen halten zu können, stärkt die Psyche. Die Nutzung beider Hände ist wichtig, um Gehirnleistung aufrecht zu erhalten.
Einen Überblick über mögliche Gestaltungen der Schwälmer Weißstickerei kann man durch die Thumbnails erhalten. Durch den Klick auf ein interessantes Bild kann man tiefer in die jeweilige Materie vorstoßen.