Handwoven Linen (F II) in the Test

After testing linen F I, I have now tested the next bale of linen. Here are the results.

The linen is in the original condition of the bale it was sewn into after production. It has smooth selvedges.

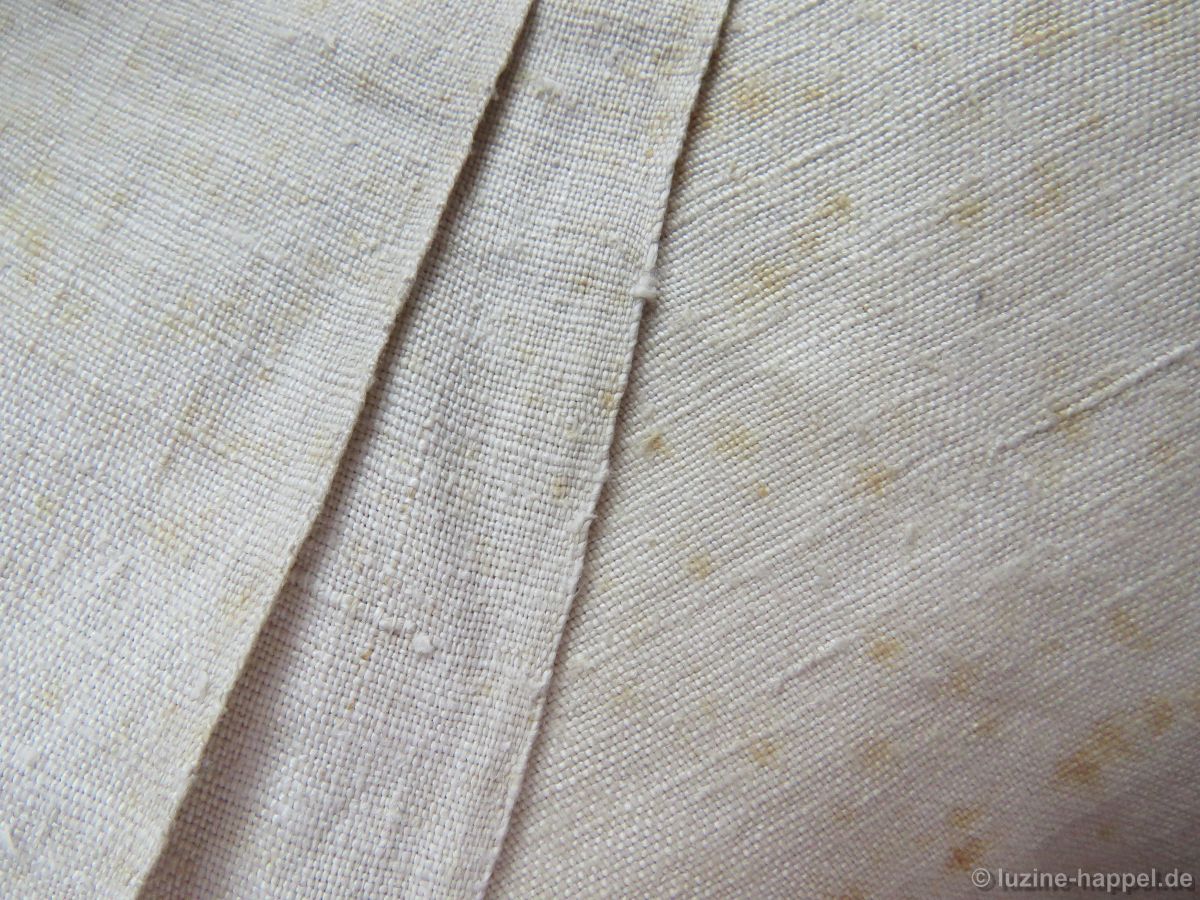
Approximately 100 cm needs to be cut off at both the beginning and end of the roll, as the linen is too distorted there.
The linen is 80 cm wide – a very versatile width for handwoven linen.
It feels relatively soft; I would describe the feel as soft.

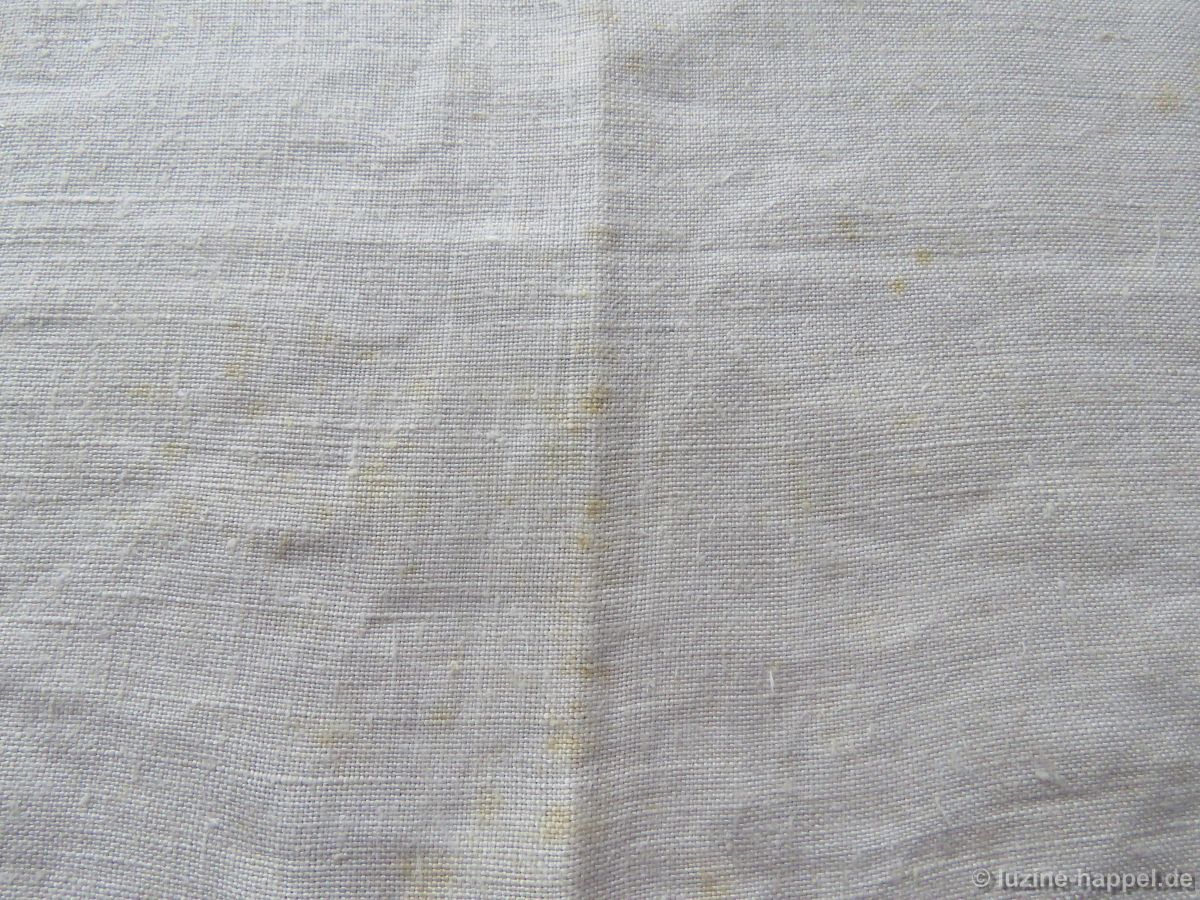
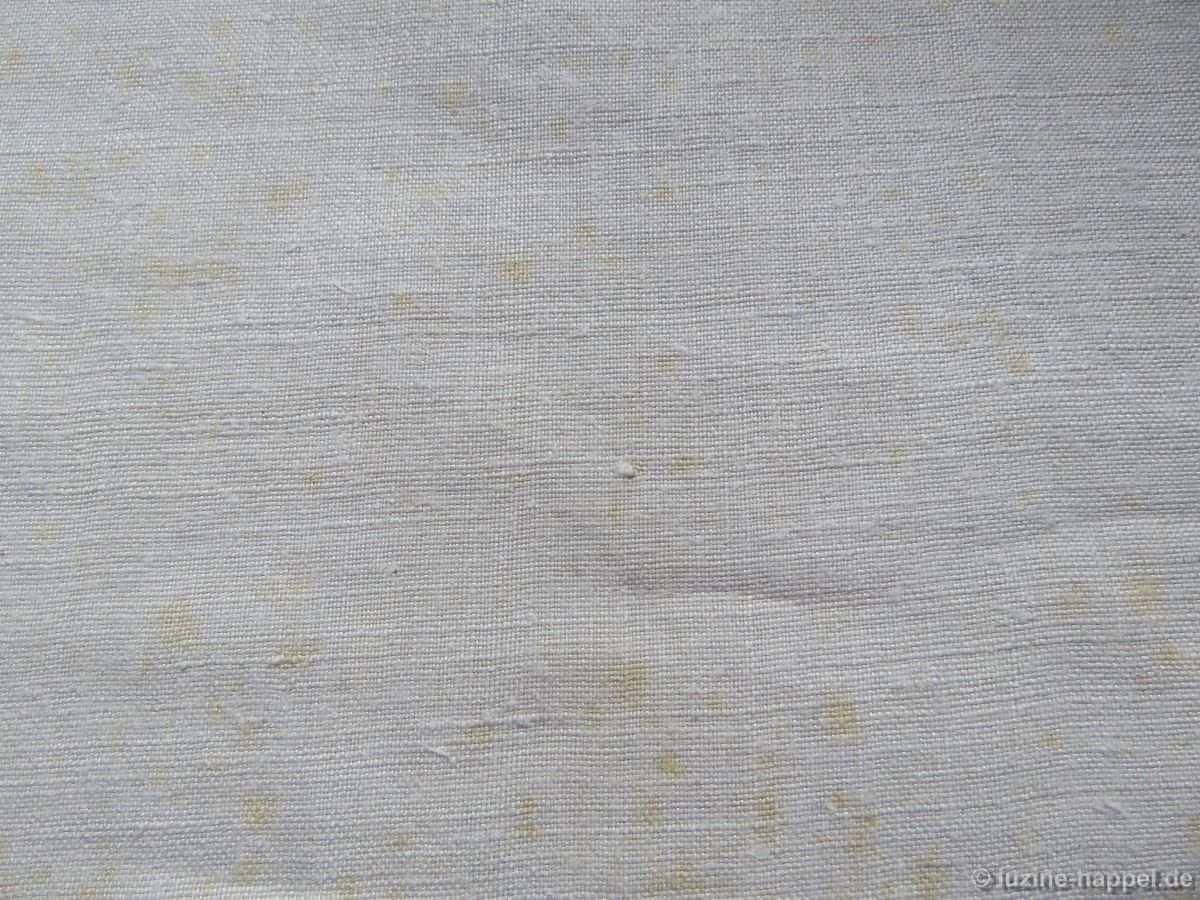
The linen shows little soiling at the fold and mostly lighter stains across the entire surface.

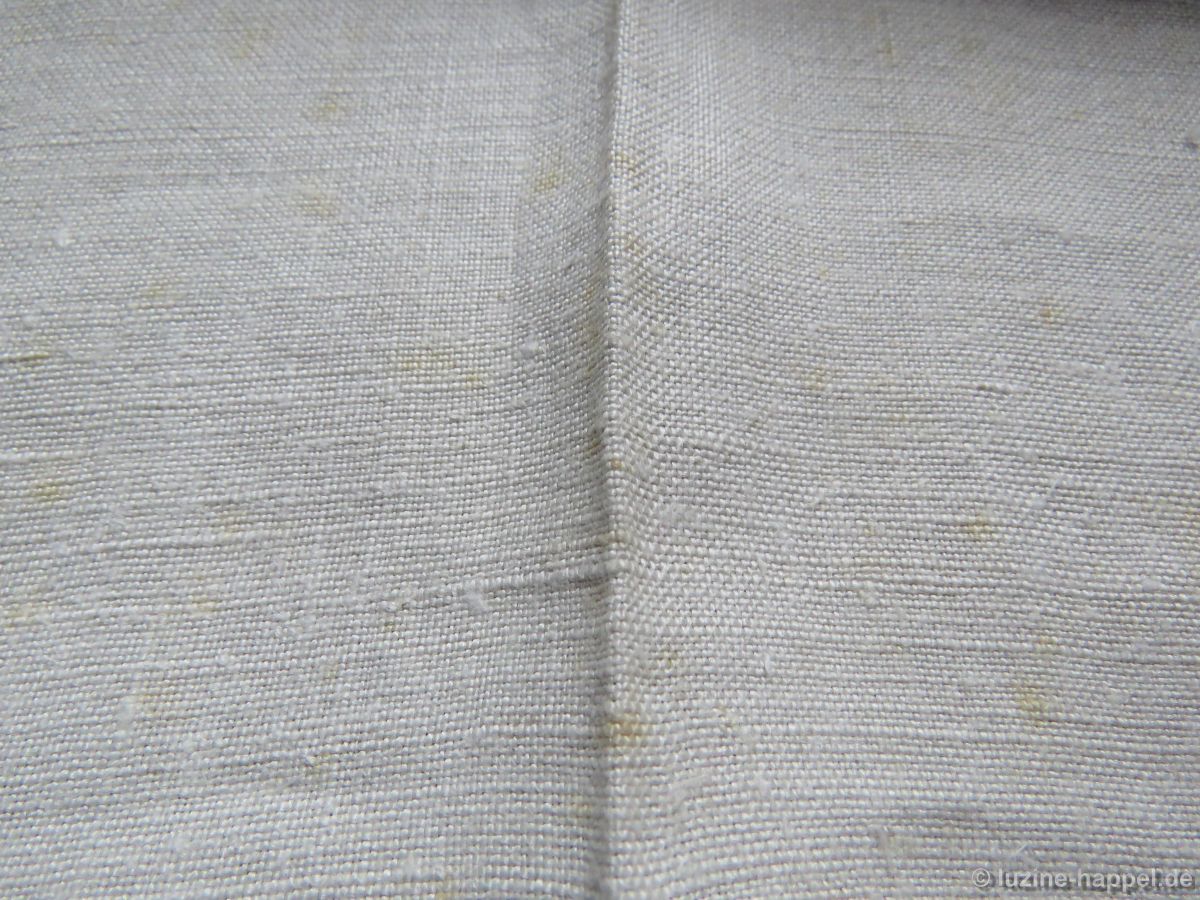
A quick wash test removed all these stains.
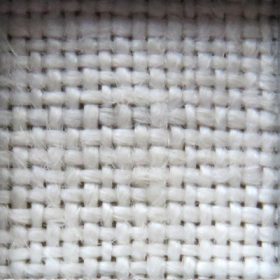
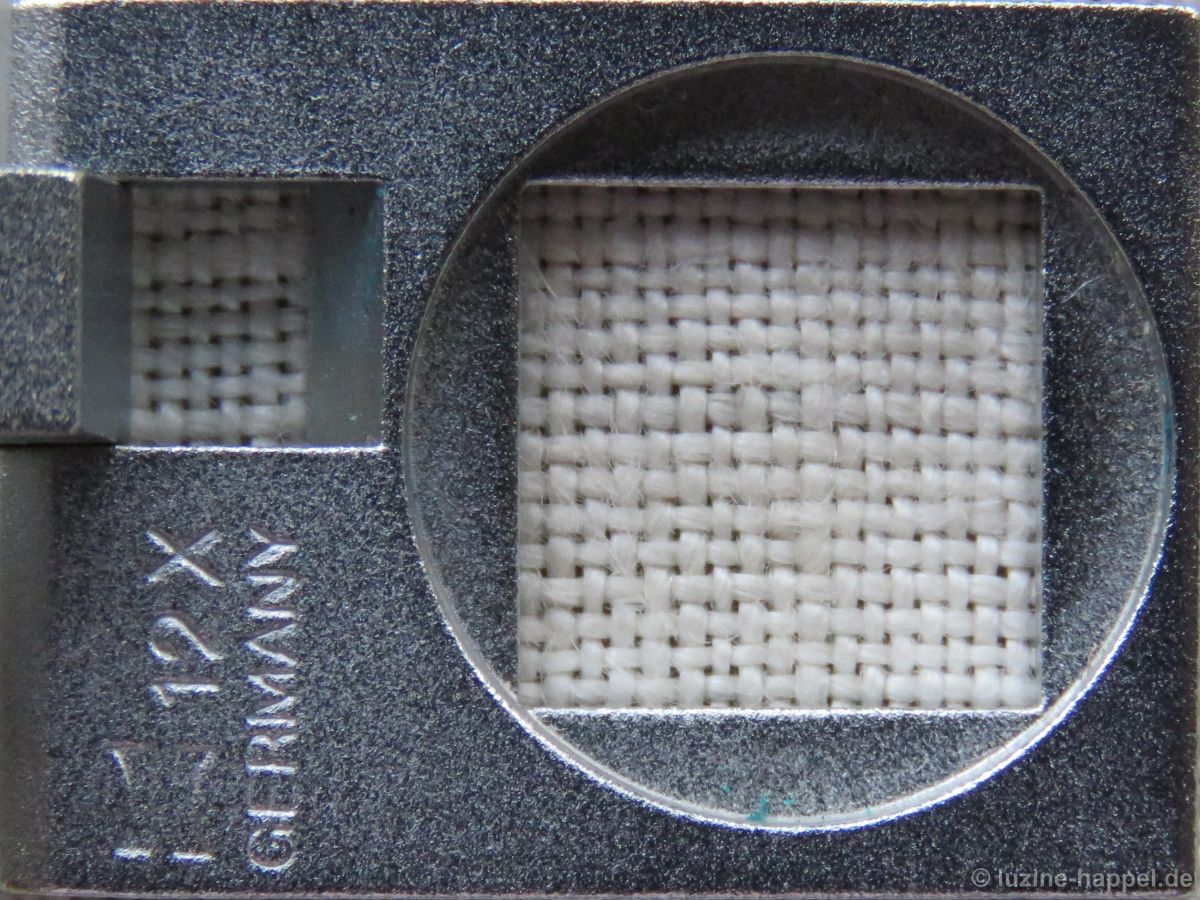
The fabric is dense, the threads used vary in thickness. I count 16 to 18 warp threads and 14 to 16 weft threads per centimeter.

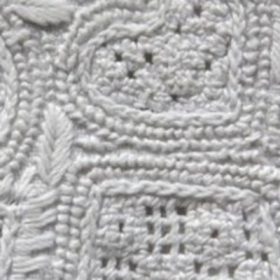
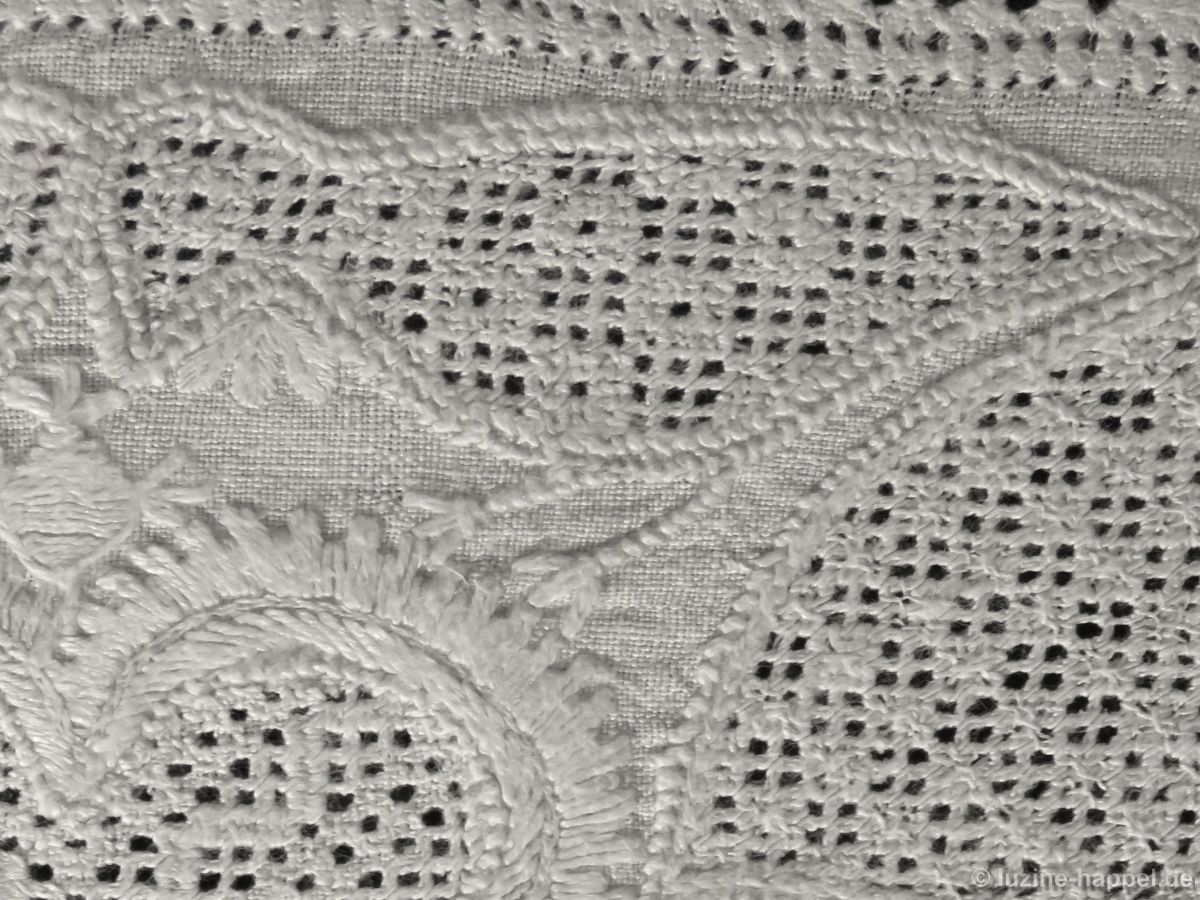
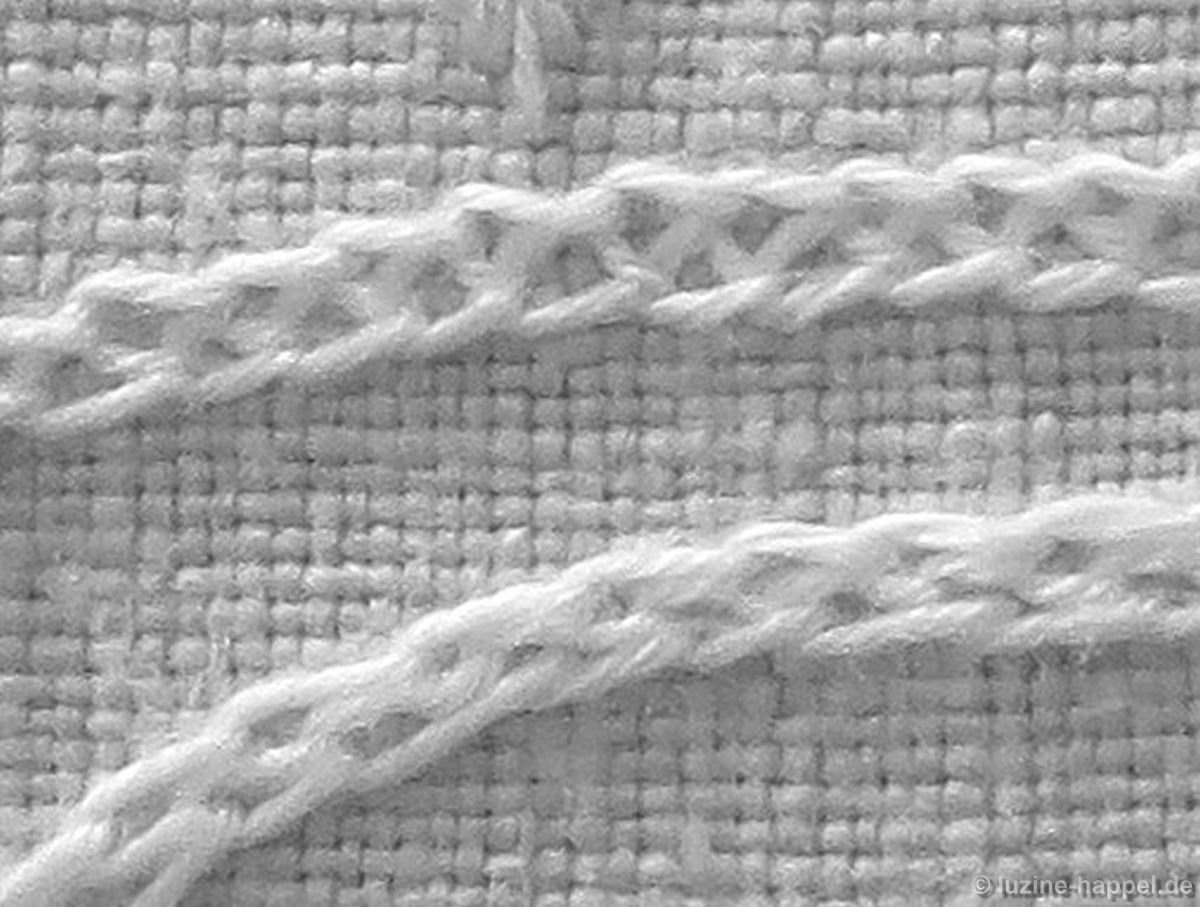
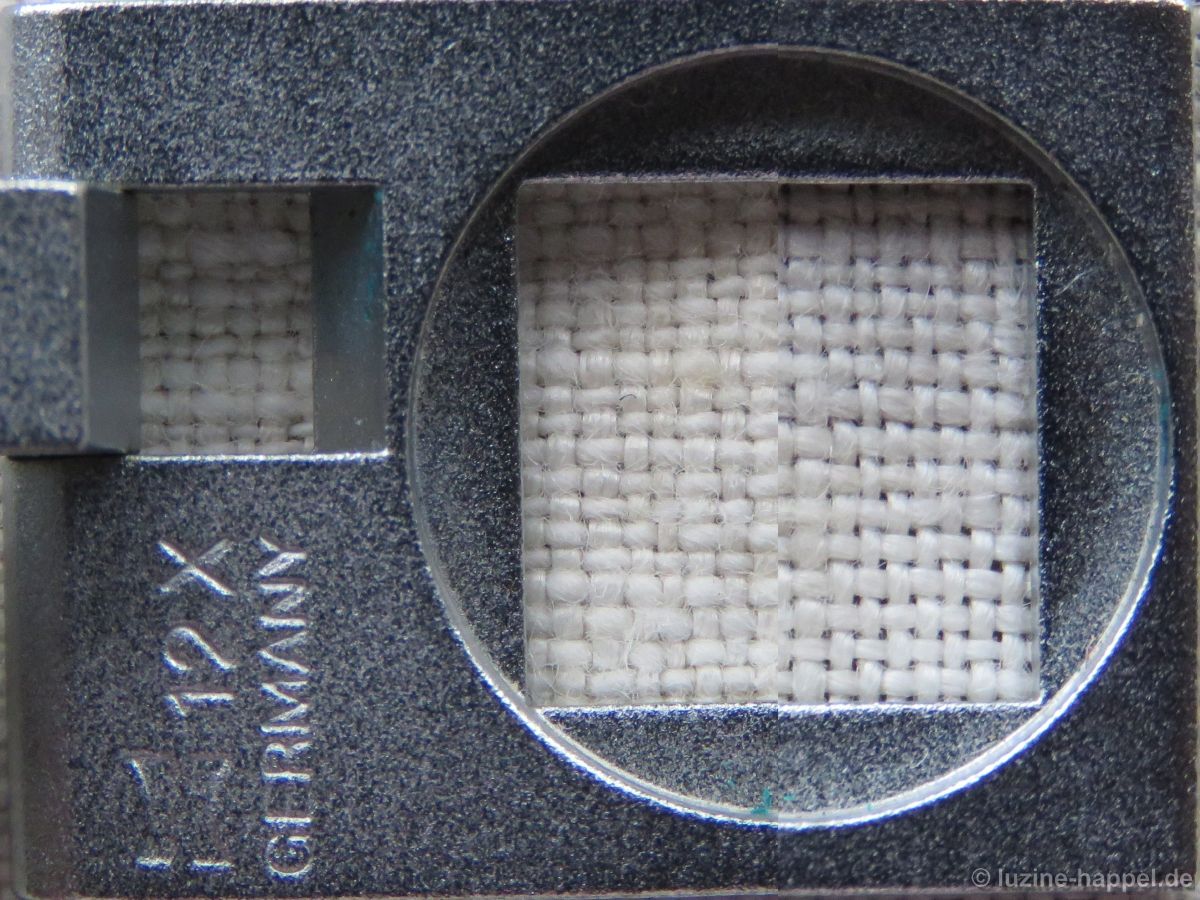
In comparison to linen F I – shown here in the left half in the large square in the lower image – the spaces between the threads are larger.

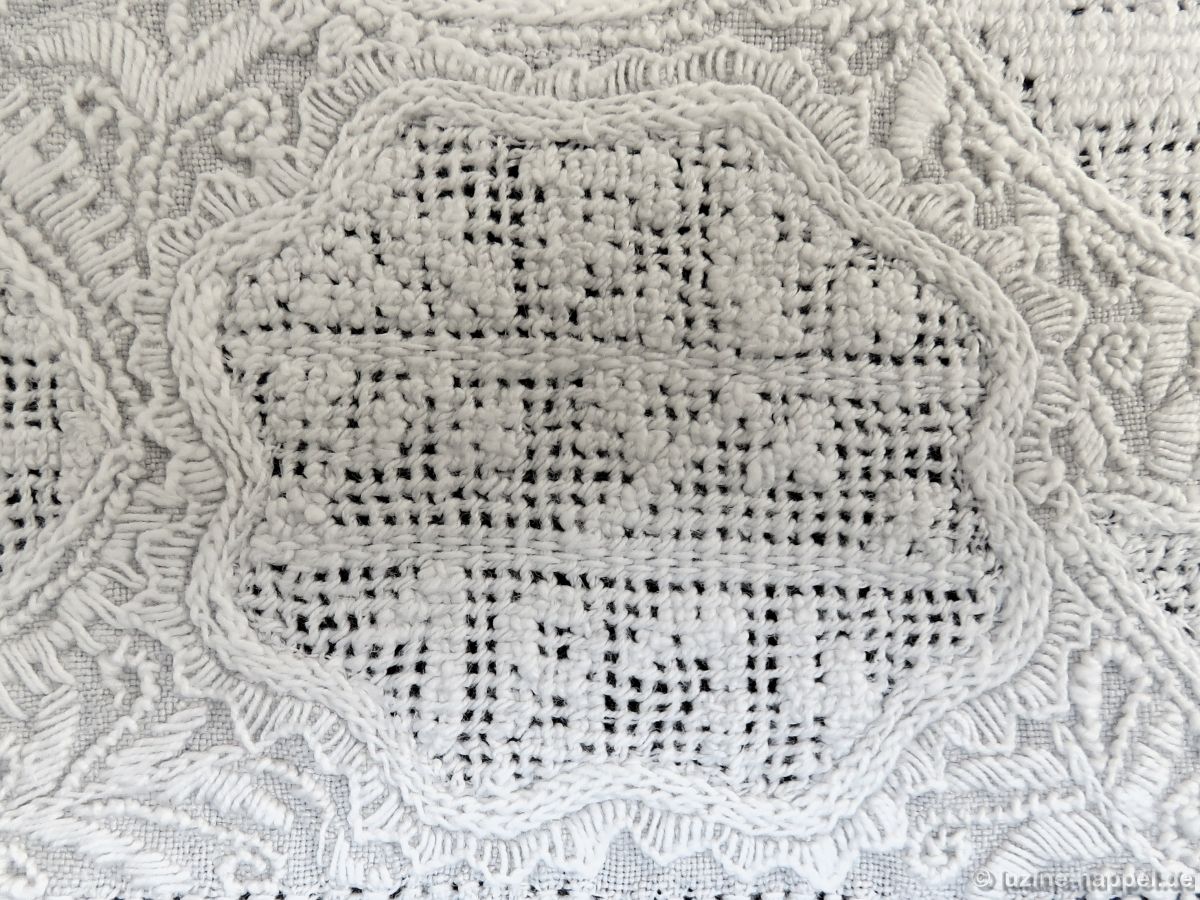
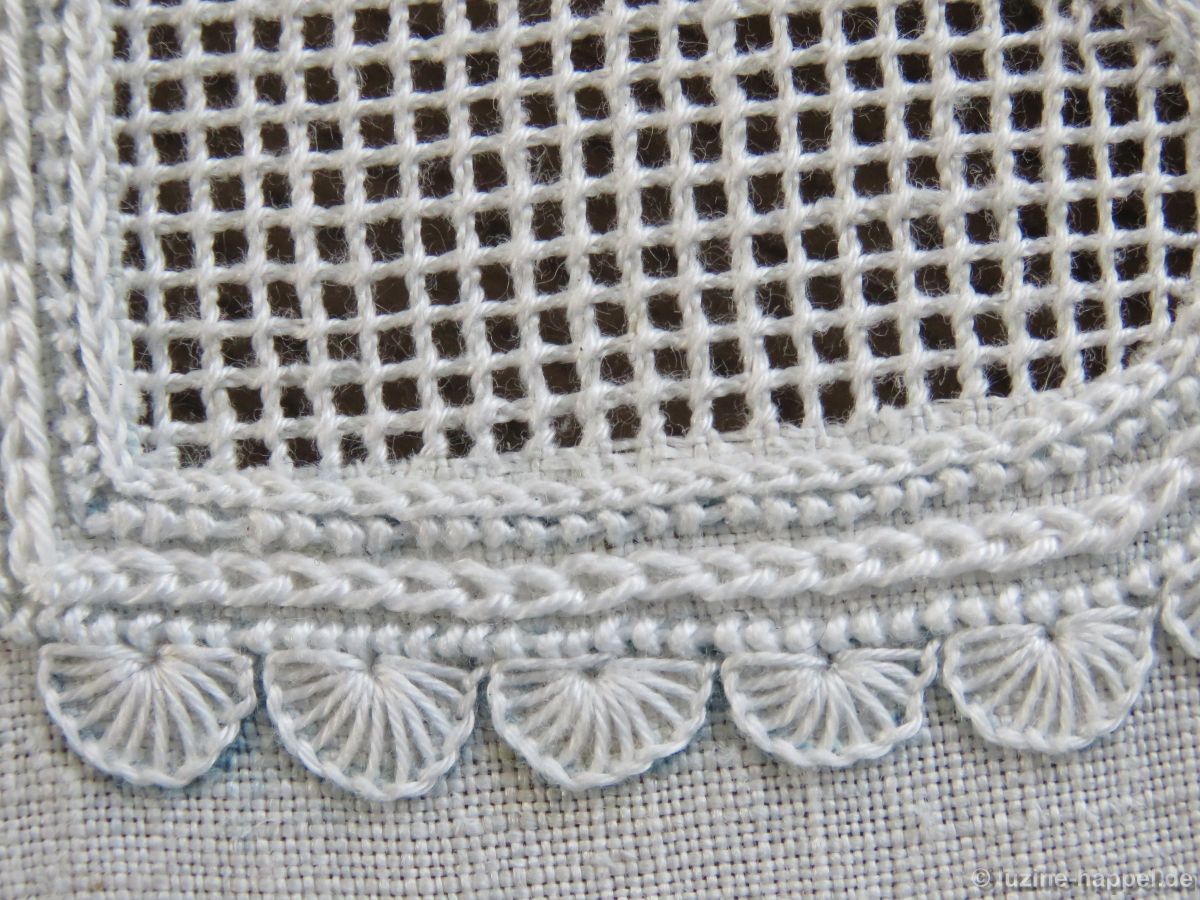
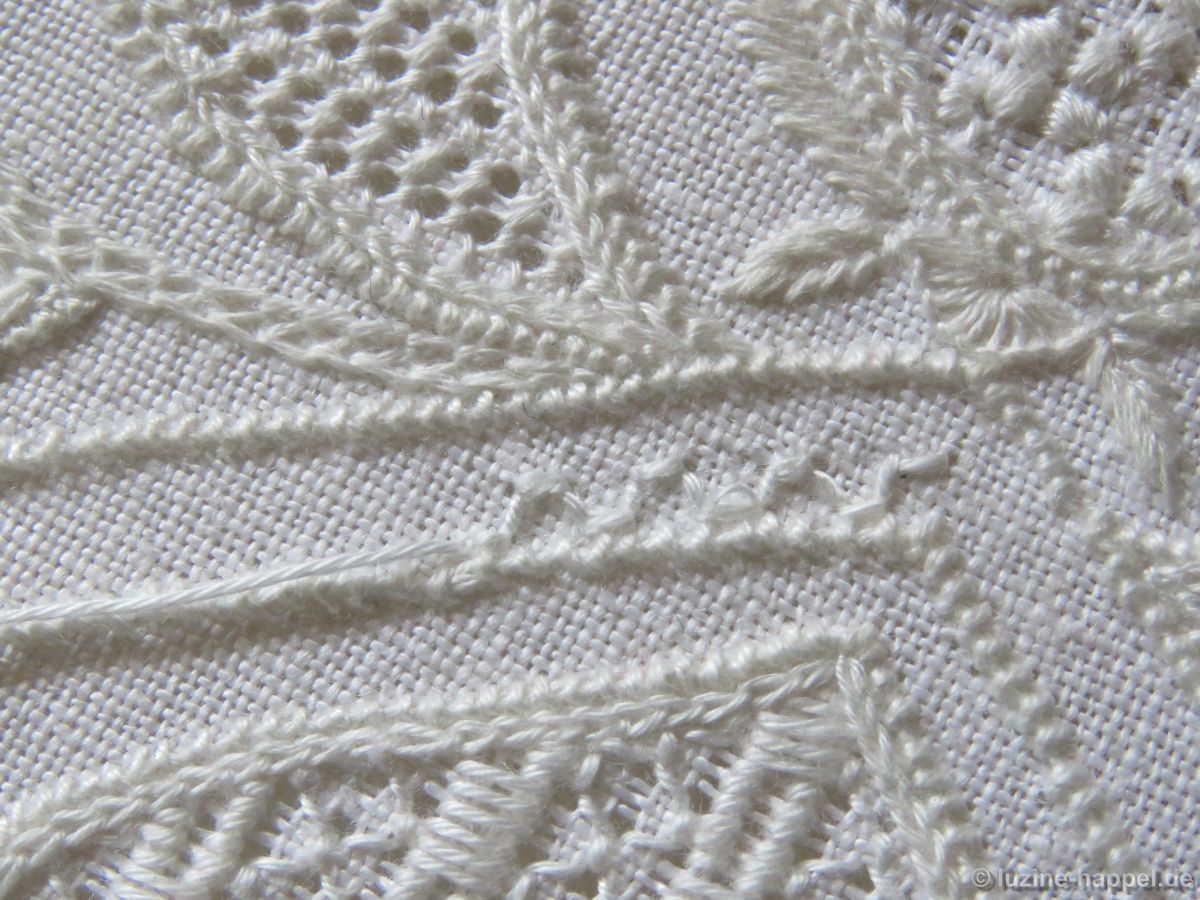
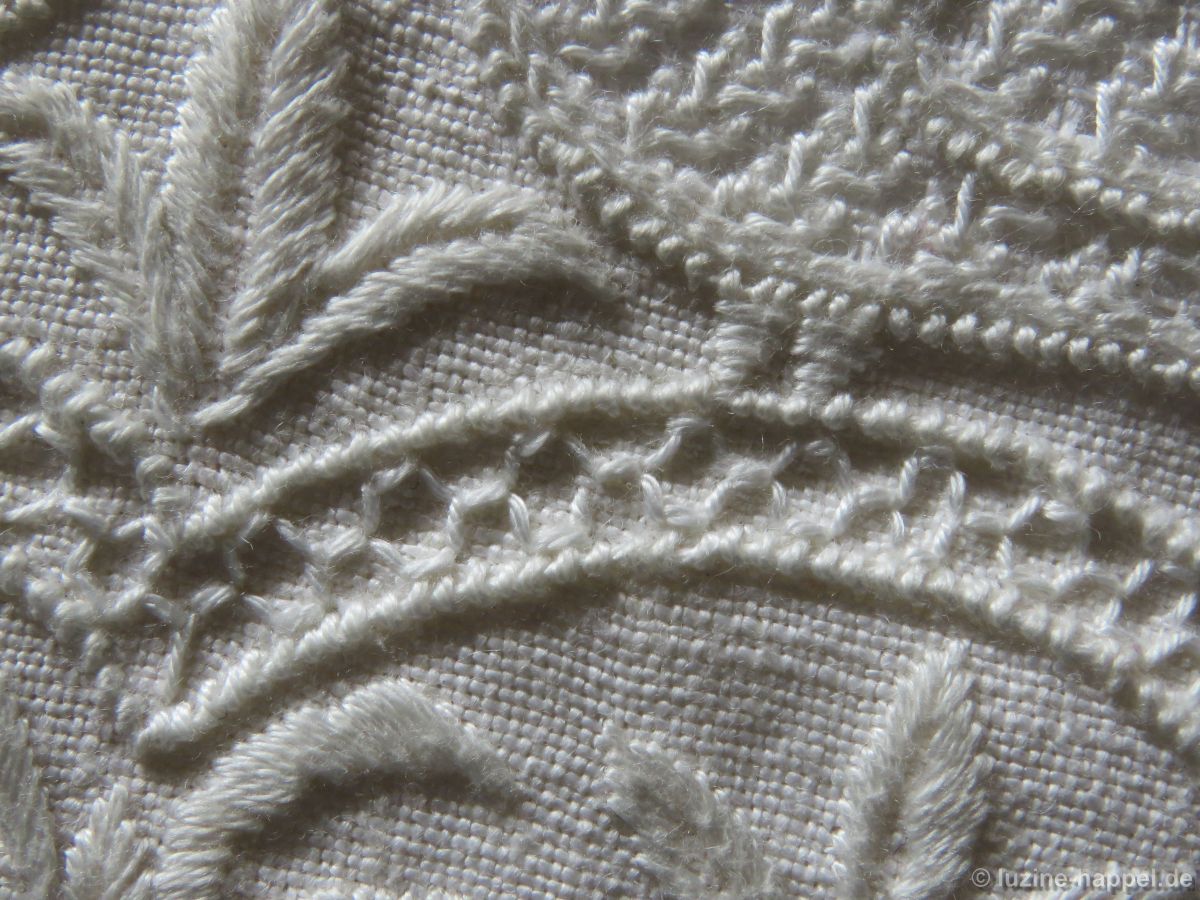
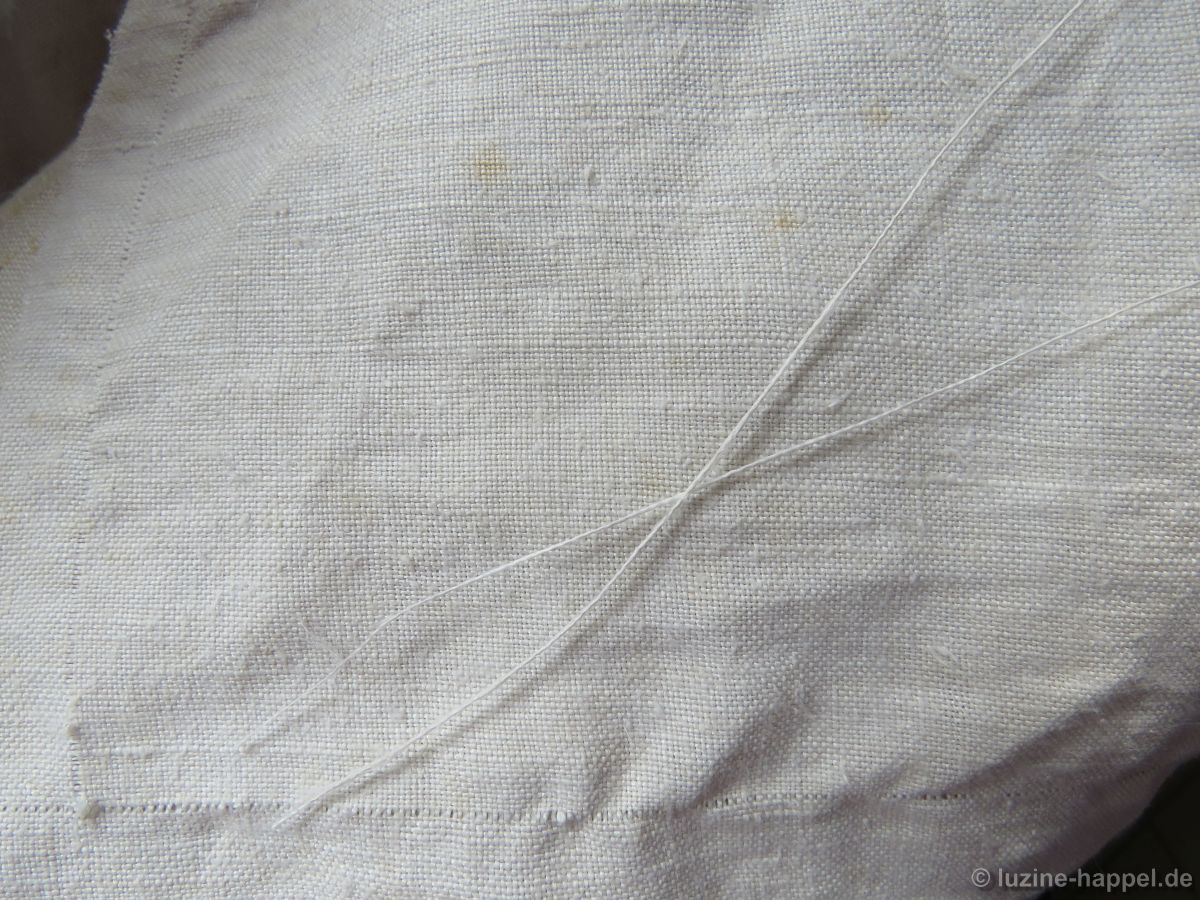
The threads are usually clearly separated from each other – a sign that they can be easily pulled out.

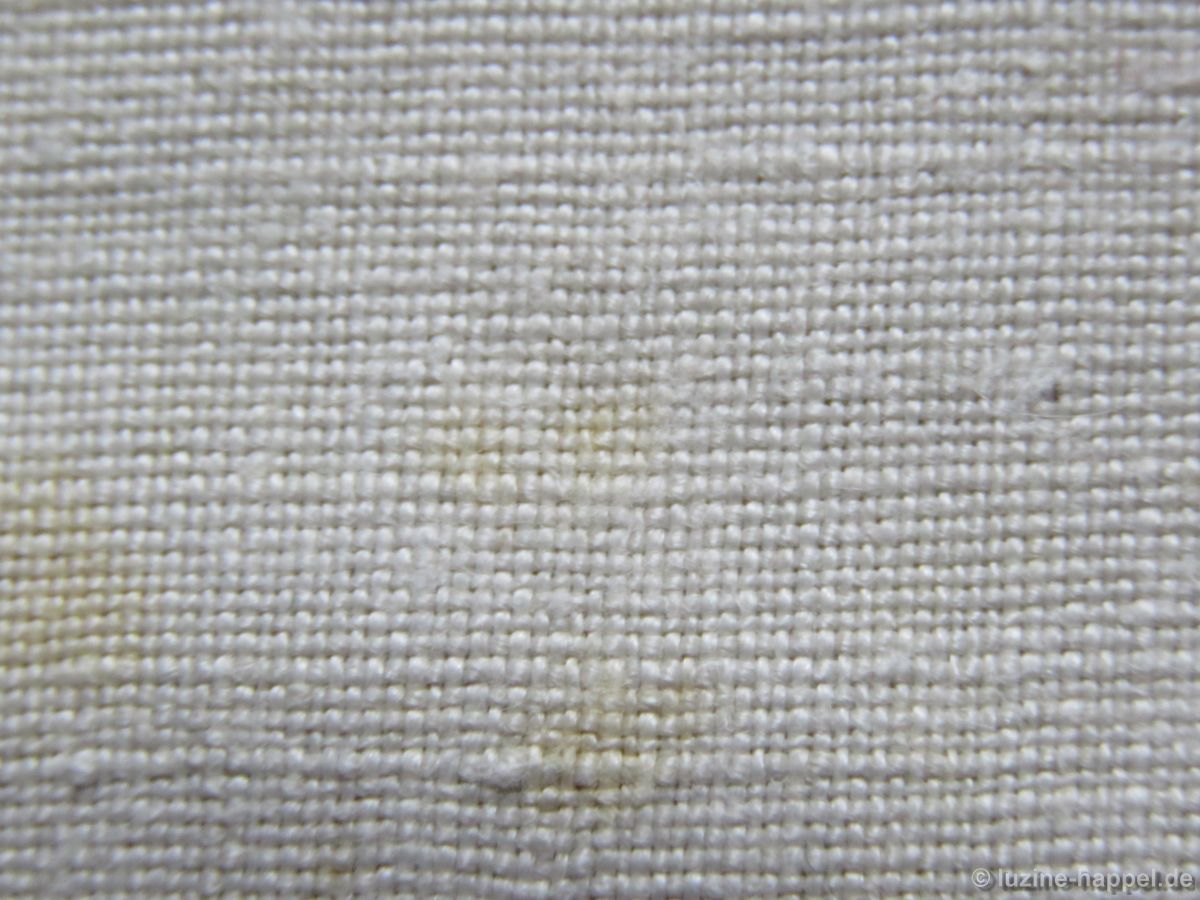
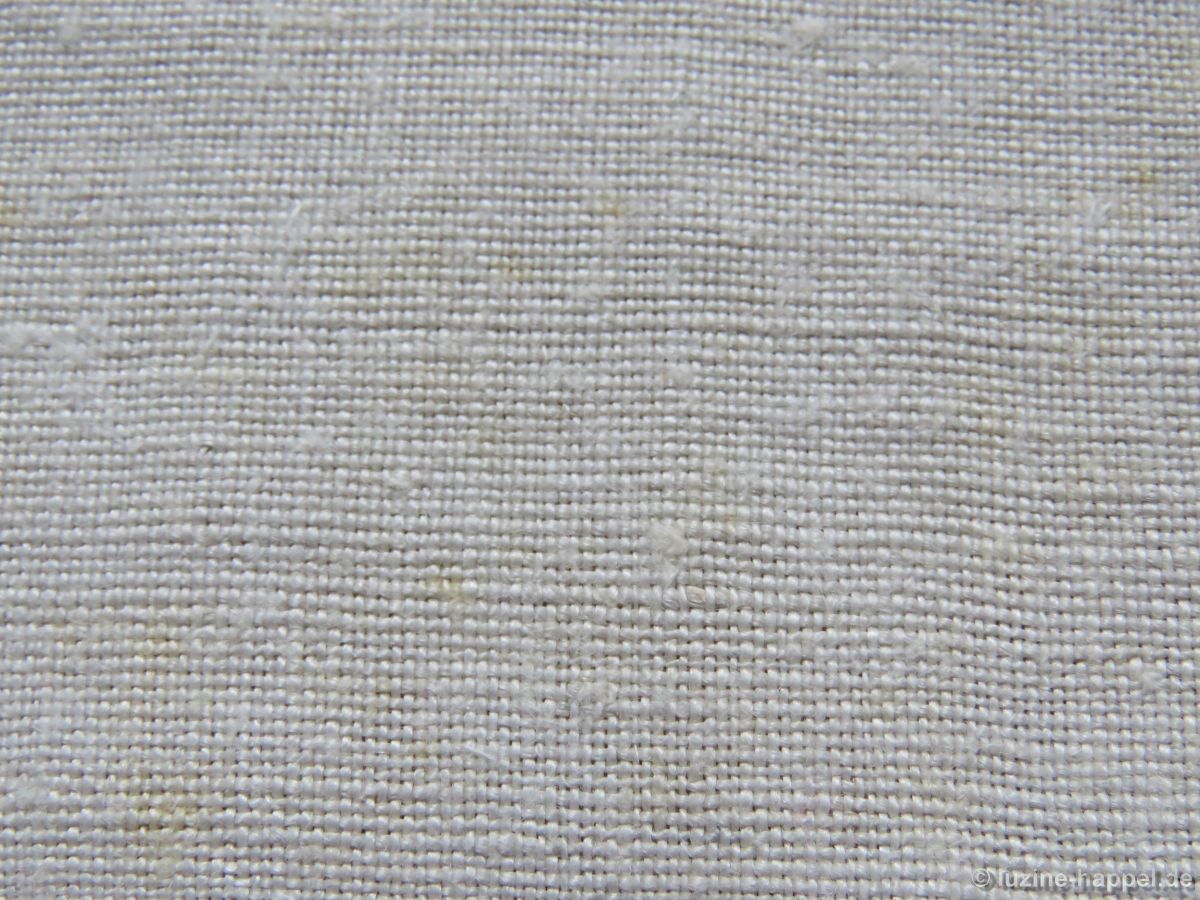
However, there are also areas with matting, although it is relatively minor.

Occasionally, one finds thread thickenings and also small weaving defects.

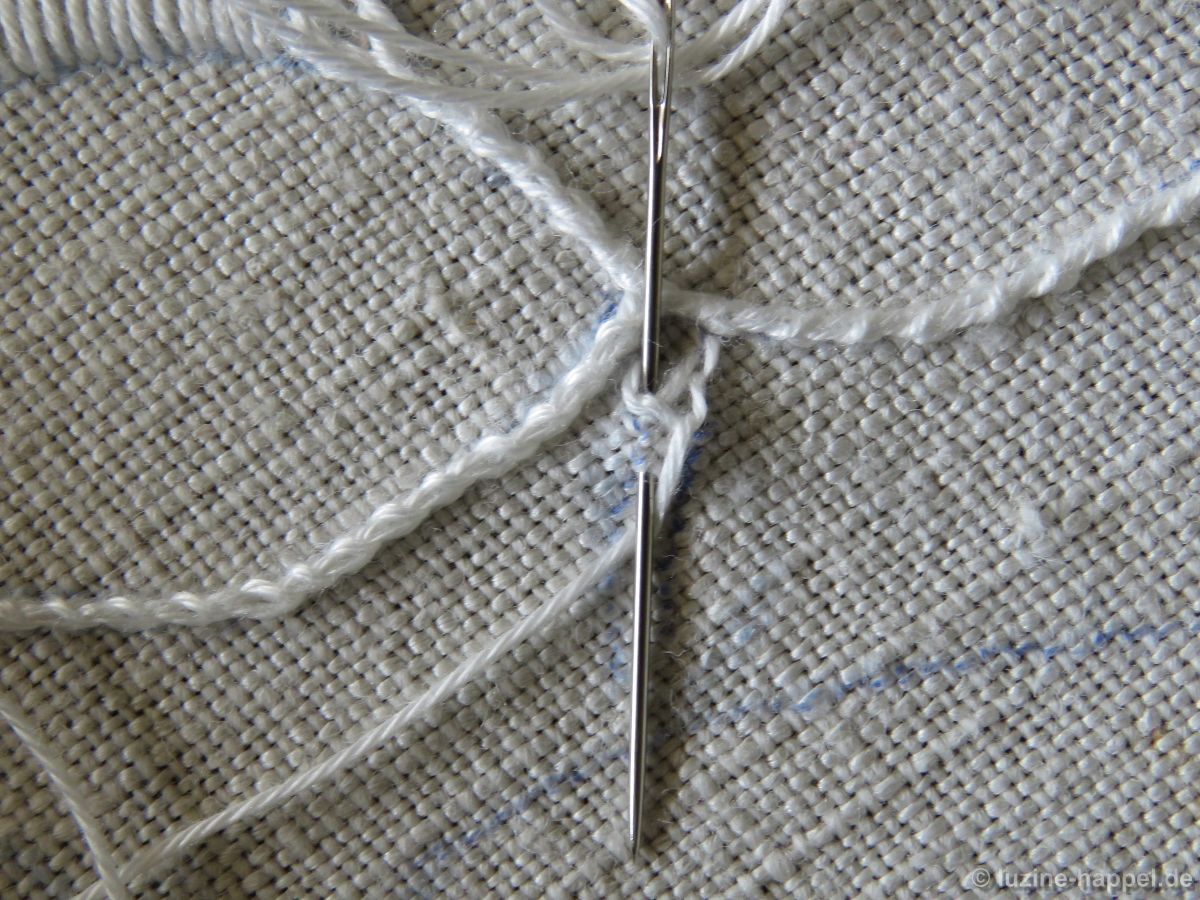
Both the warp and weft threads could be pulled out easily and without tearing.

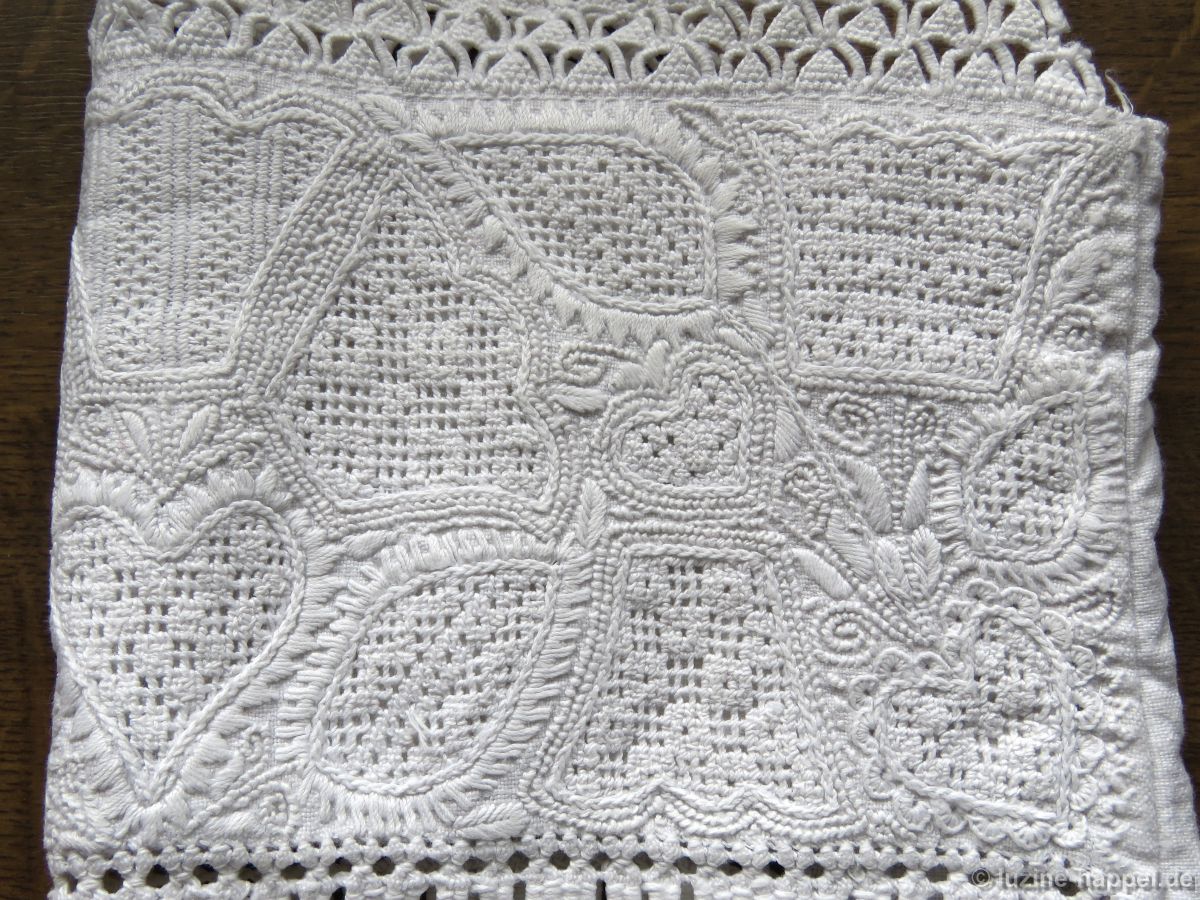
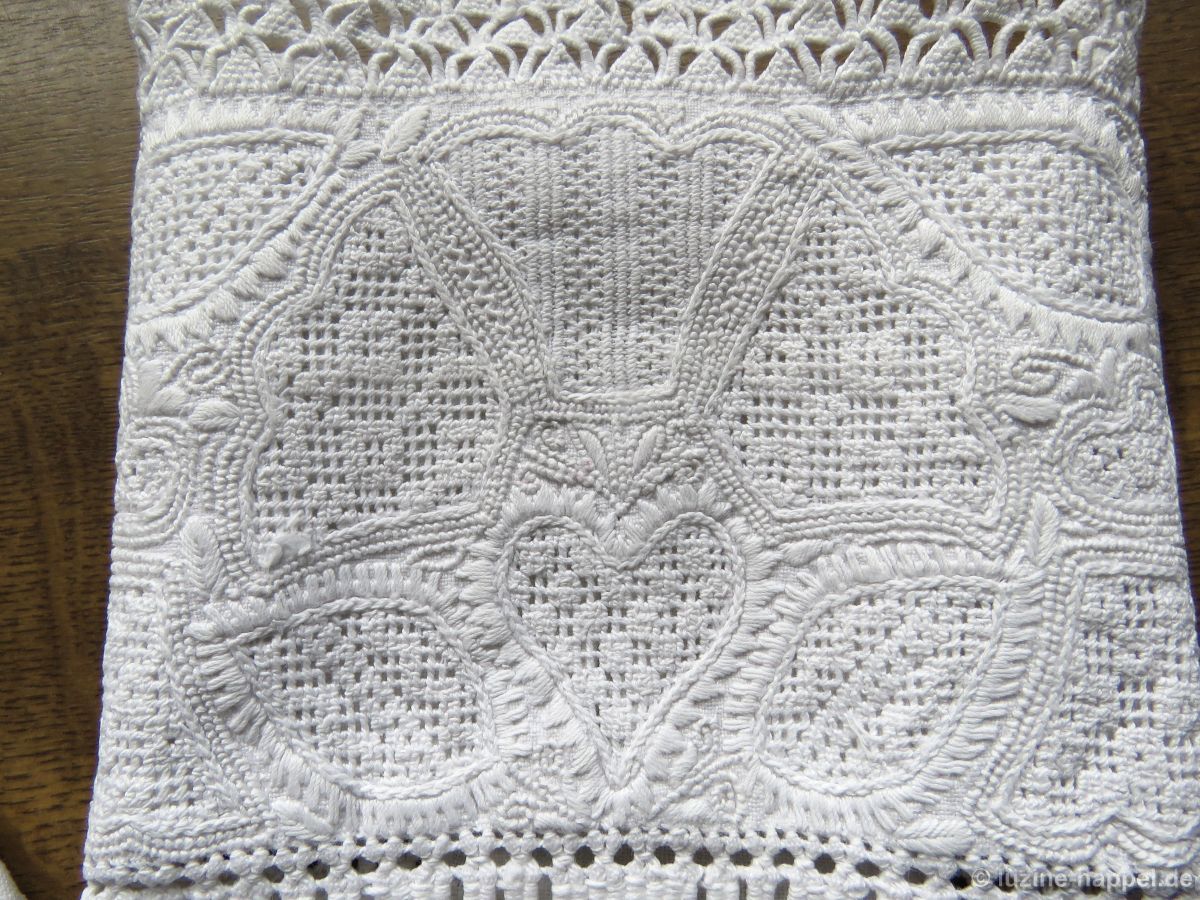
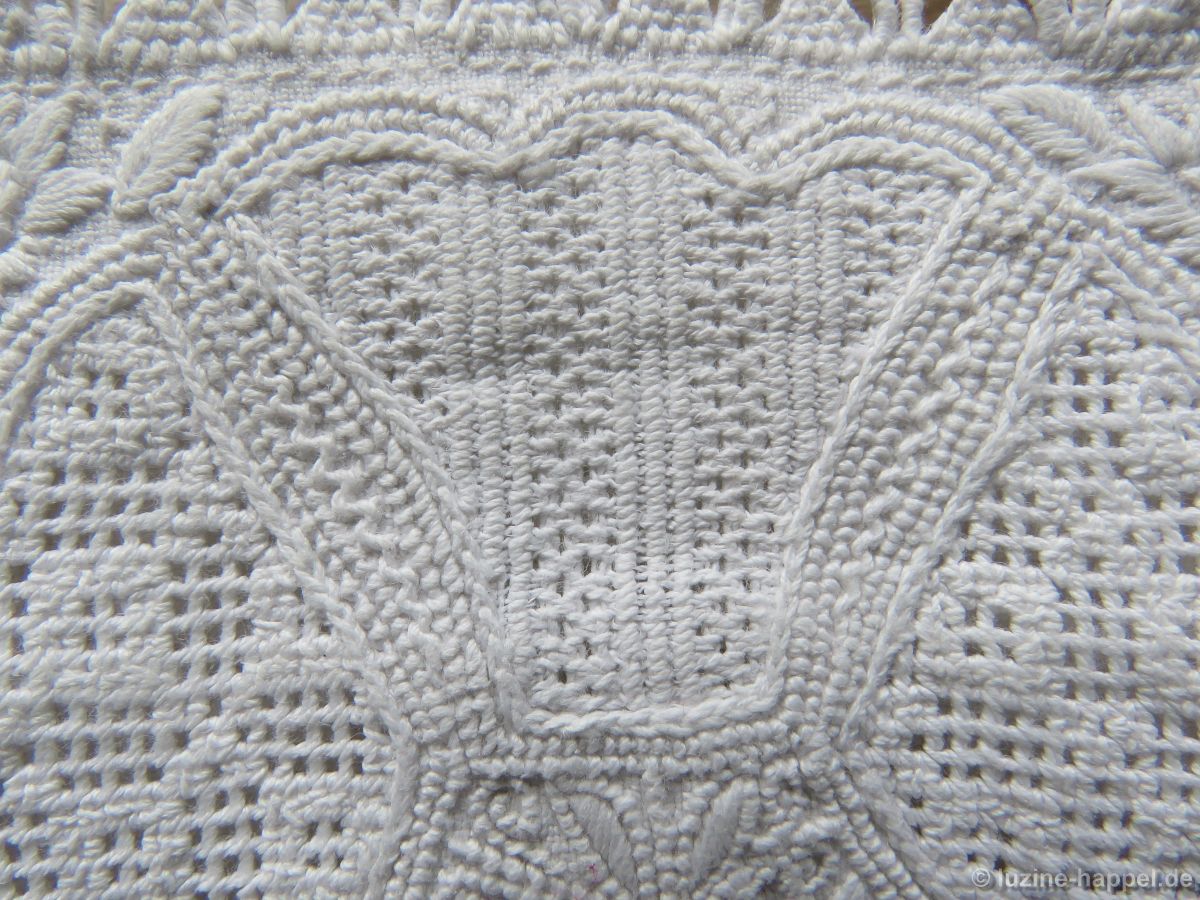
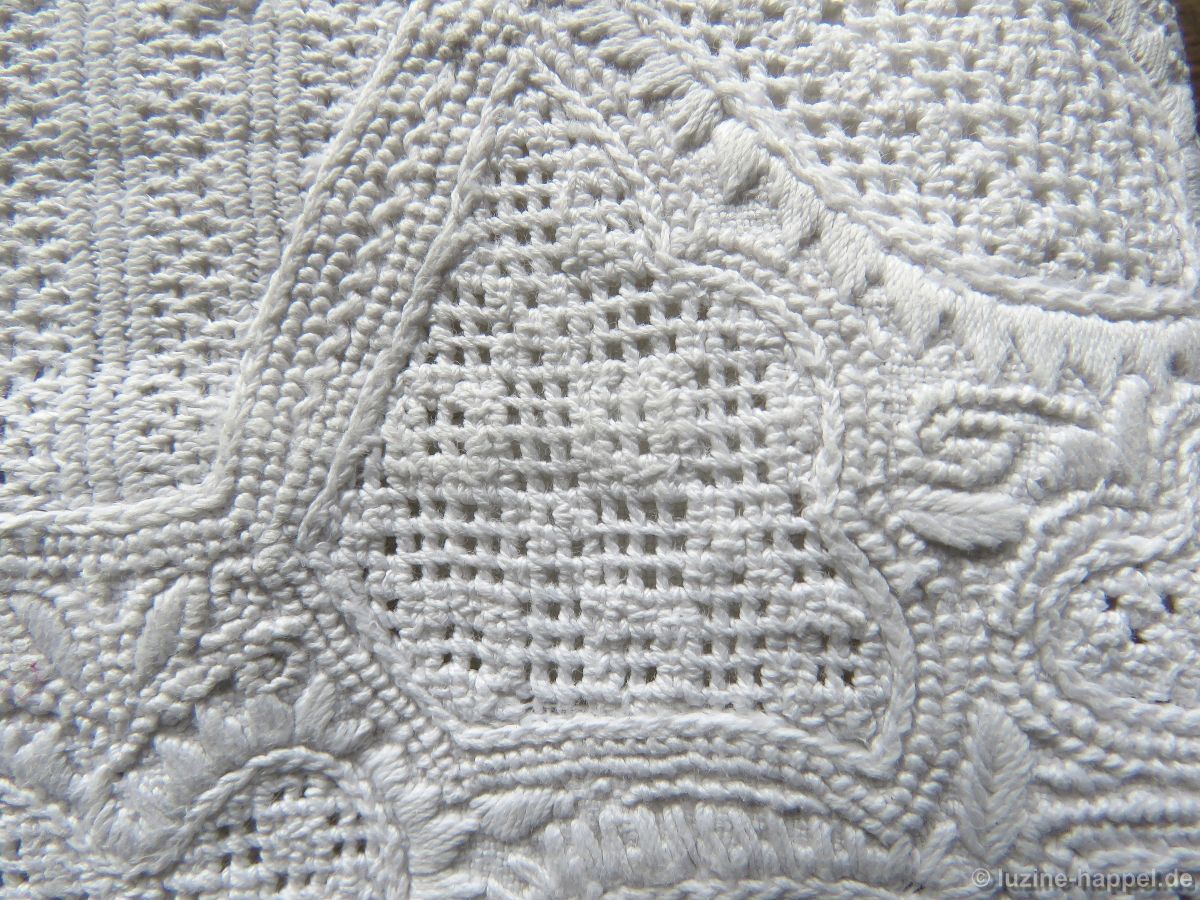
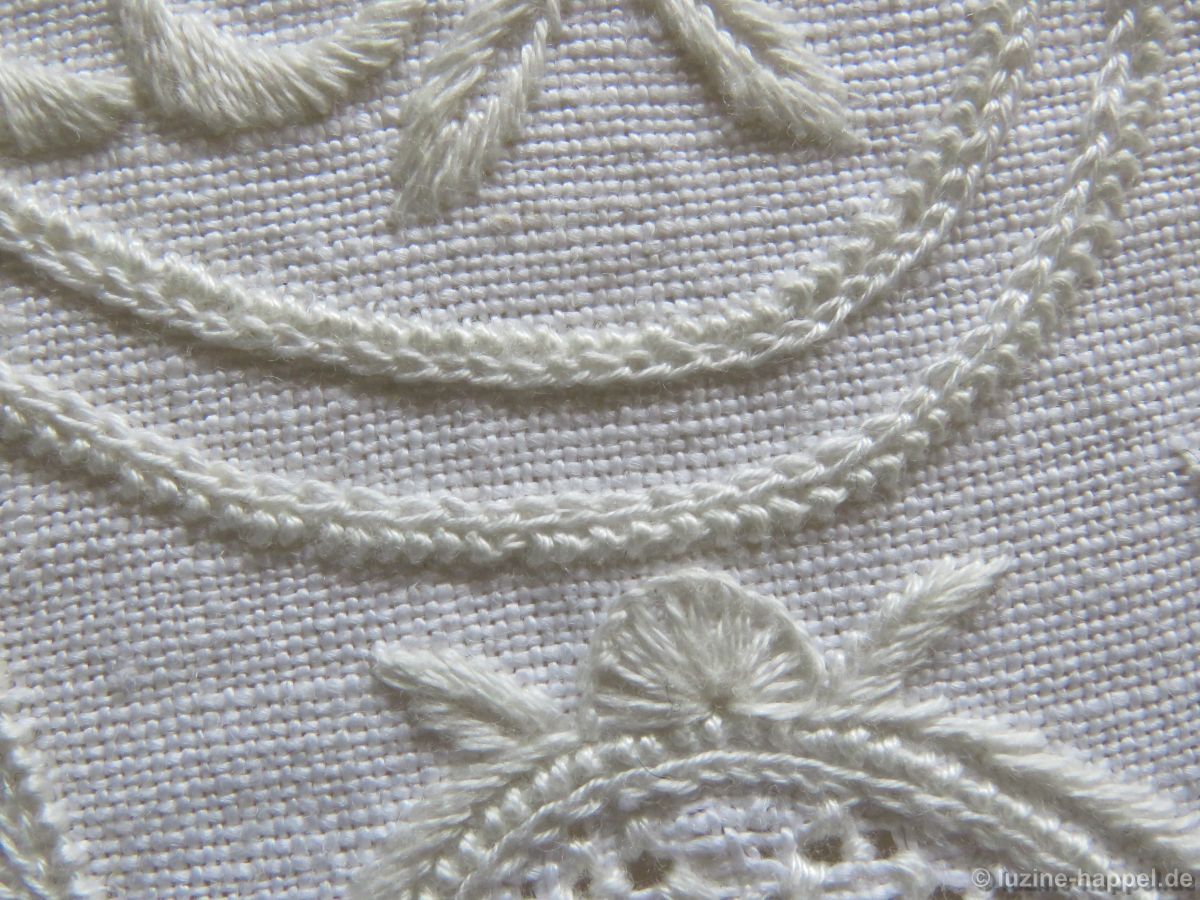
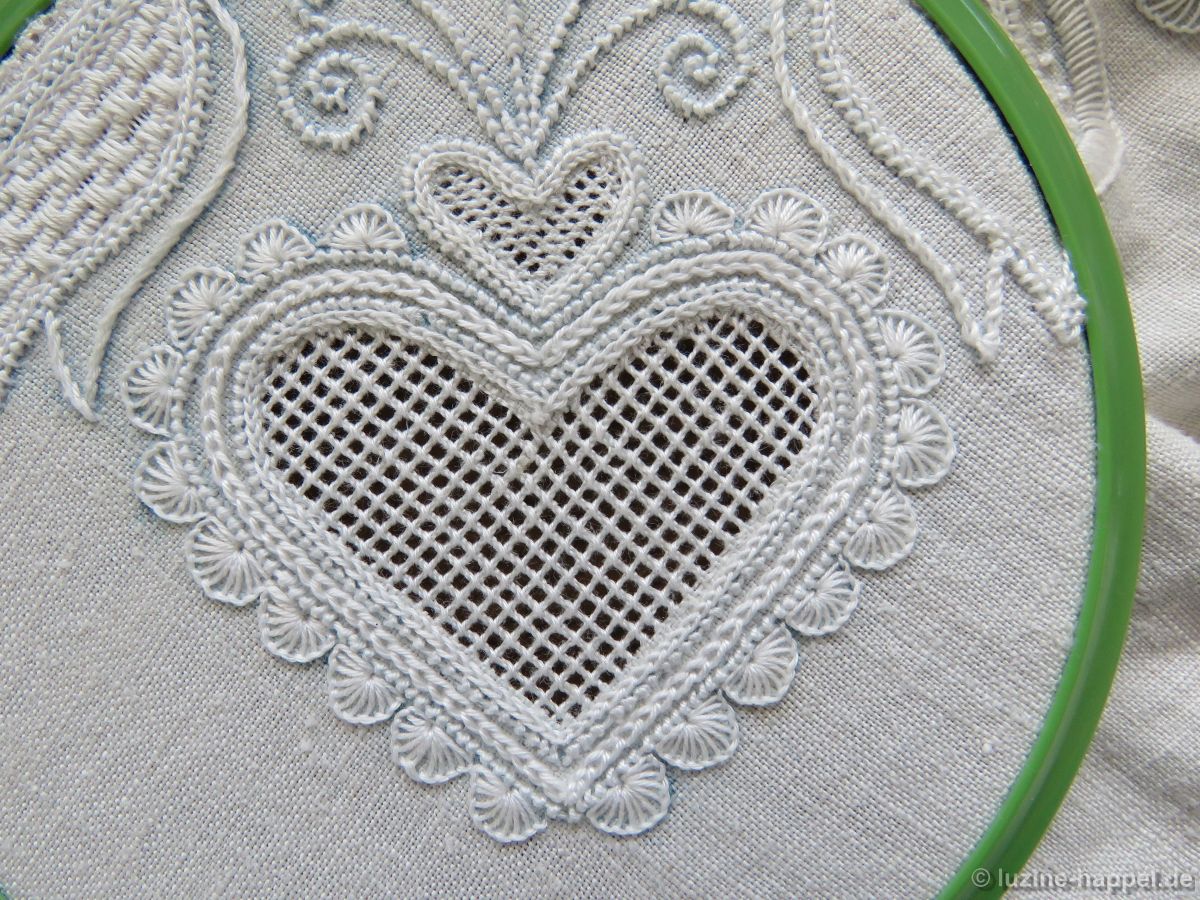
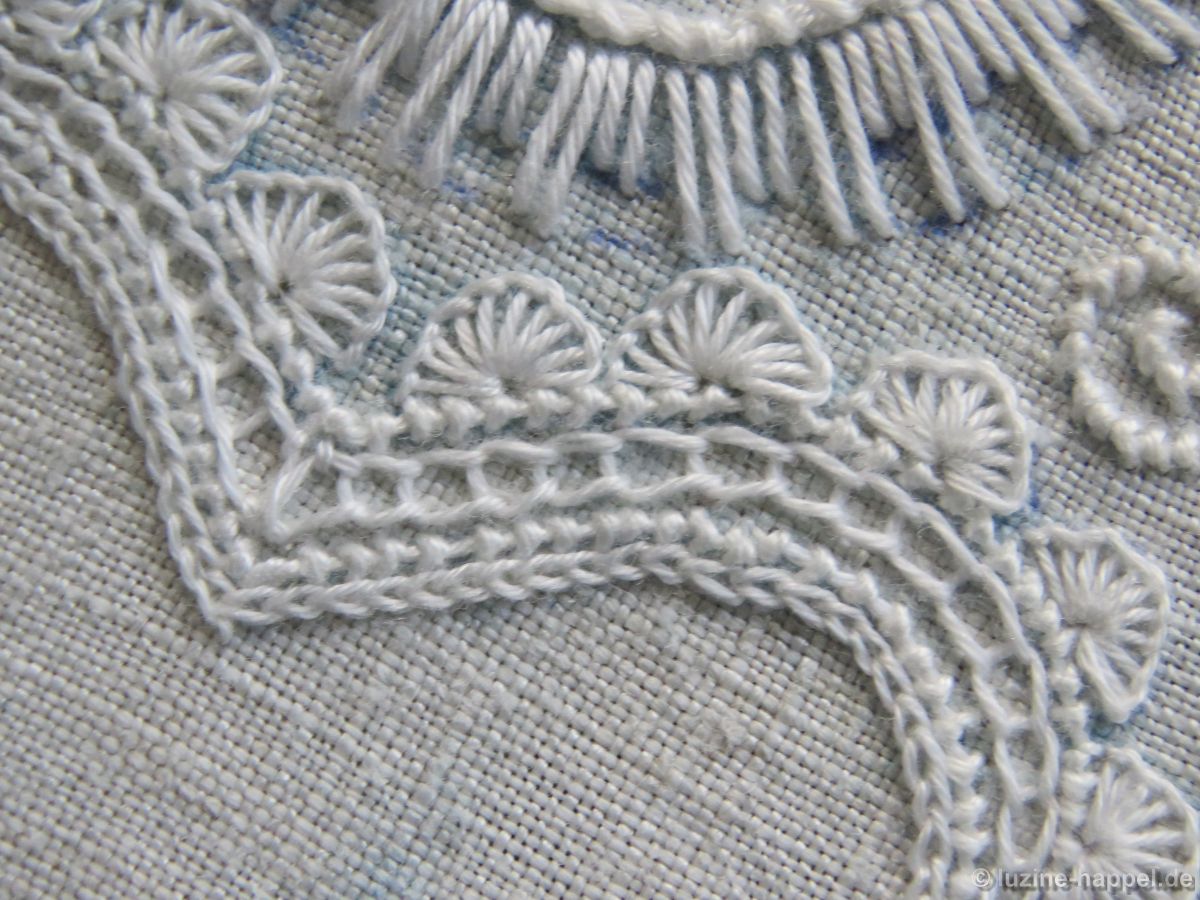
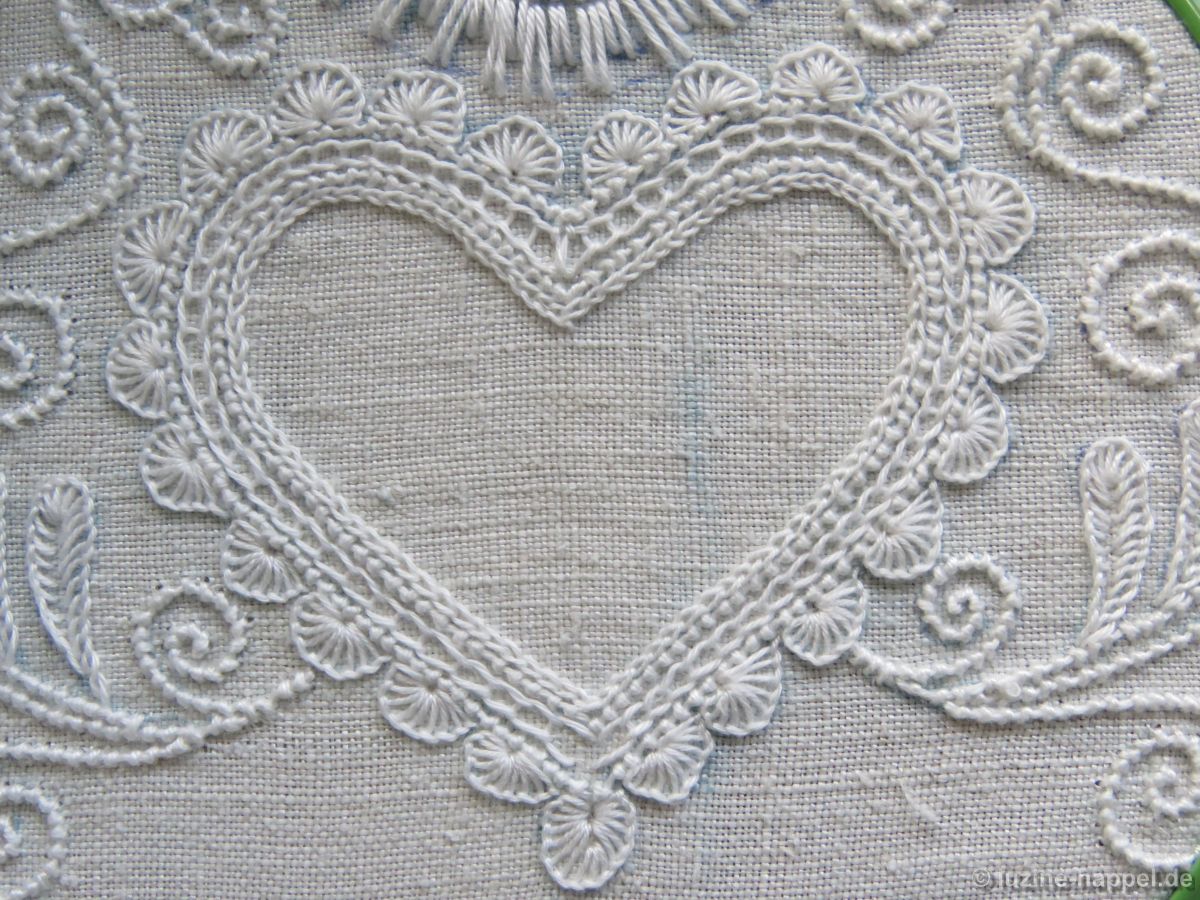
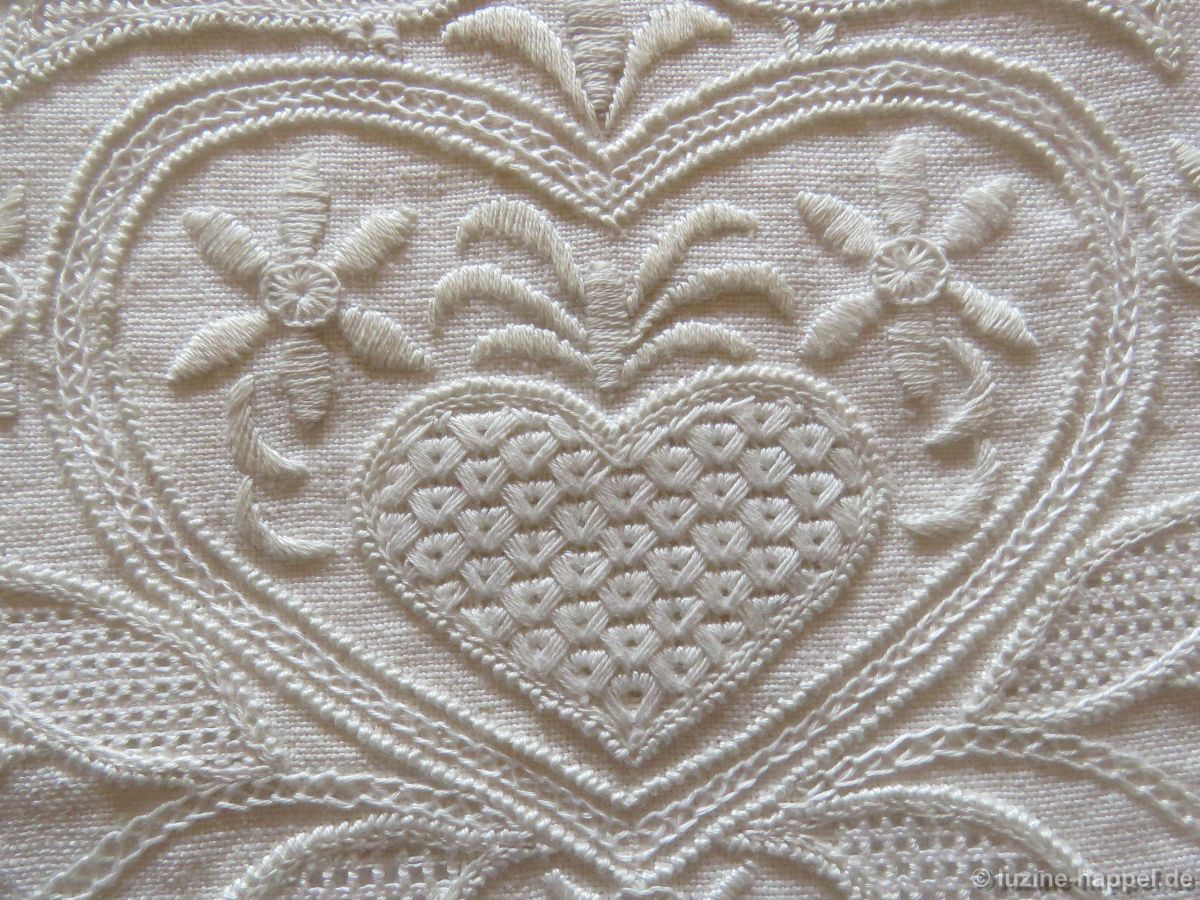
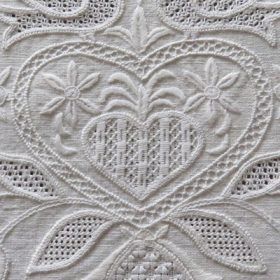
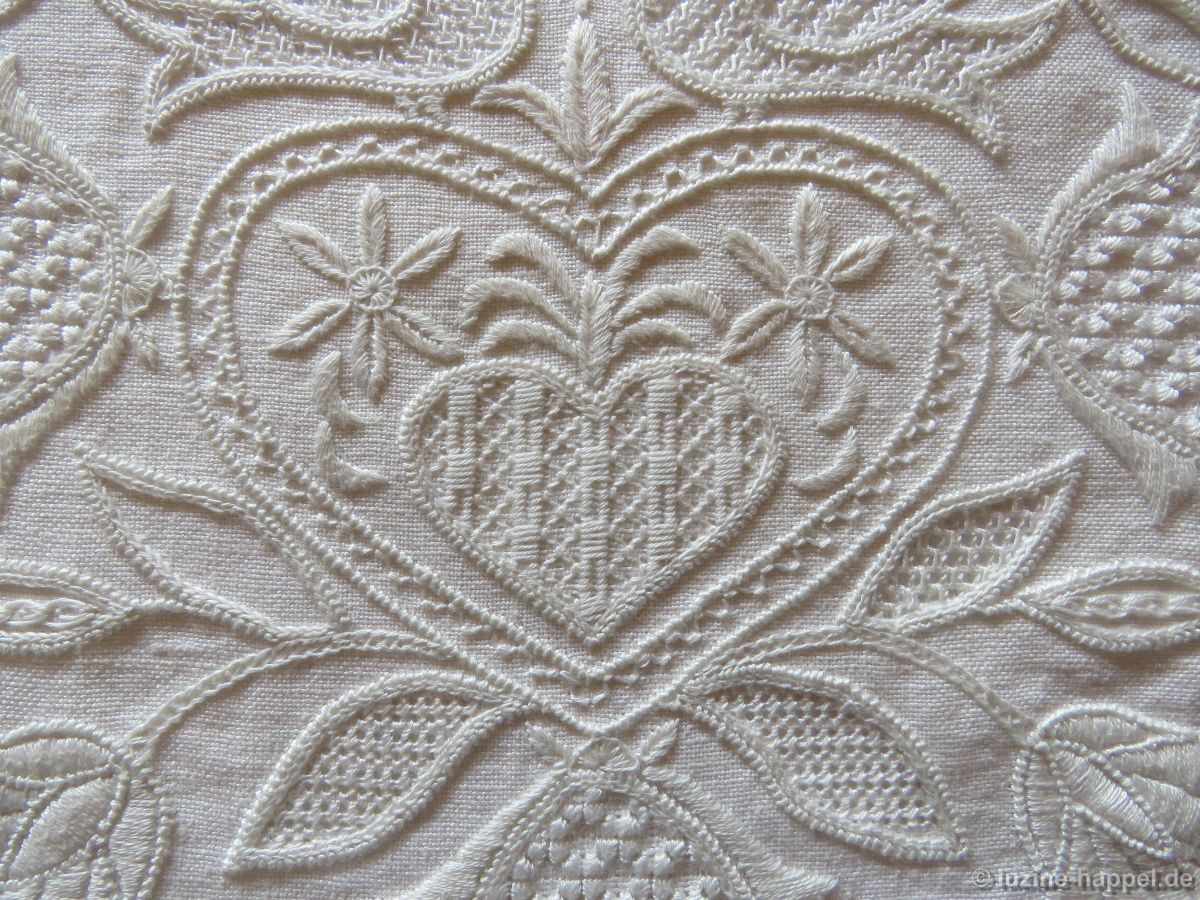
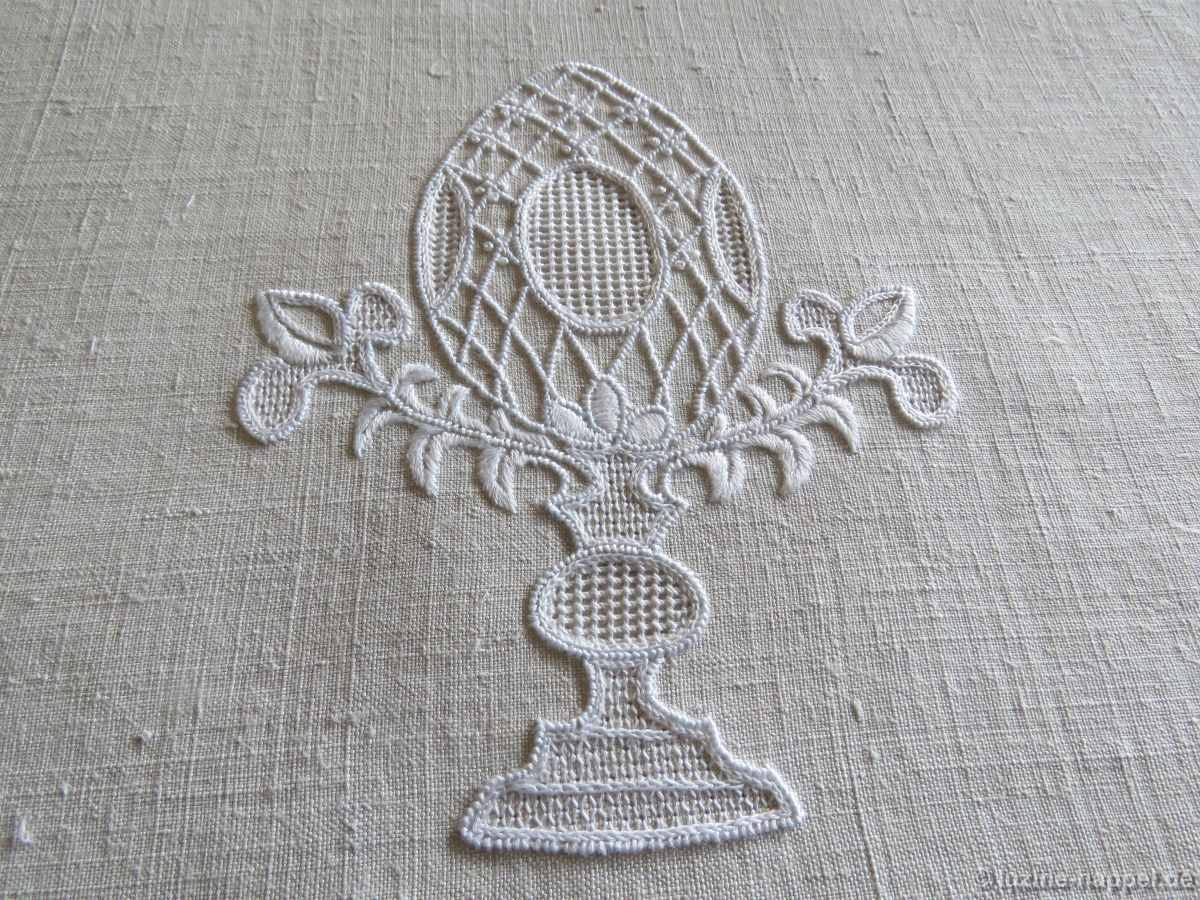
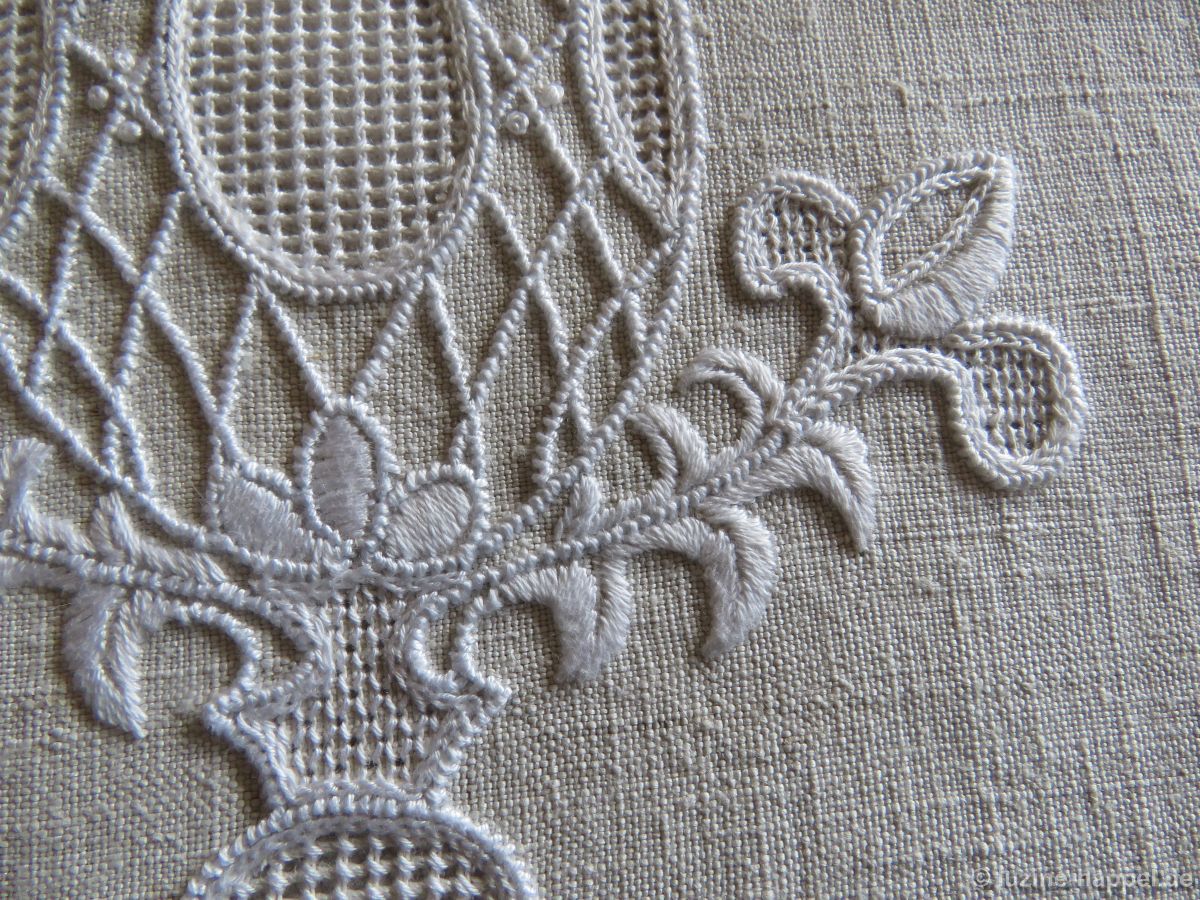
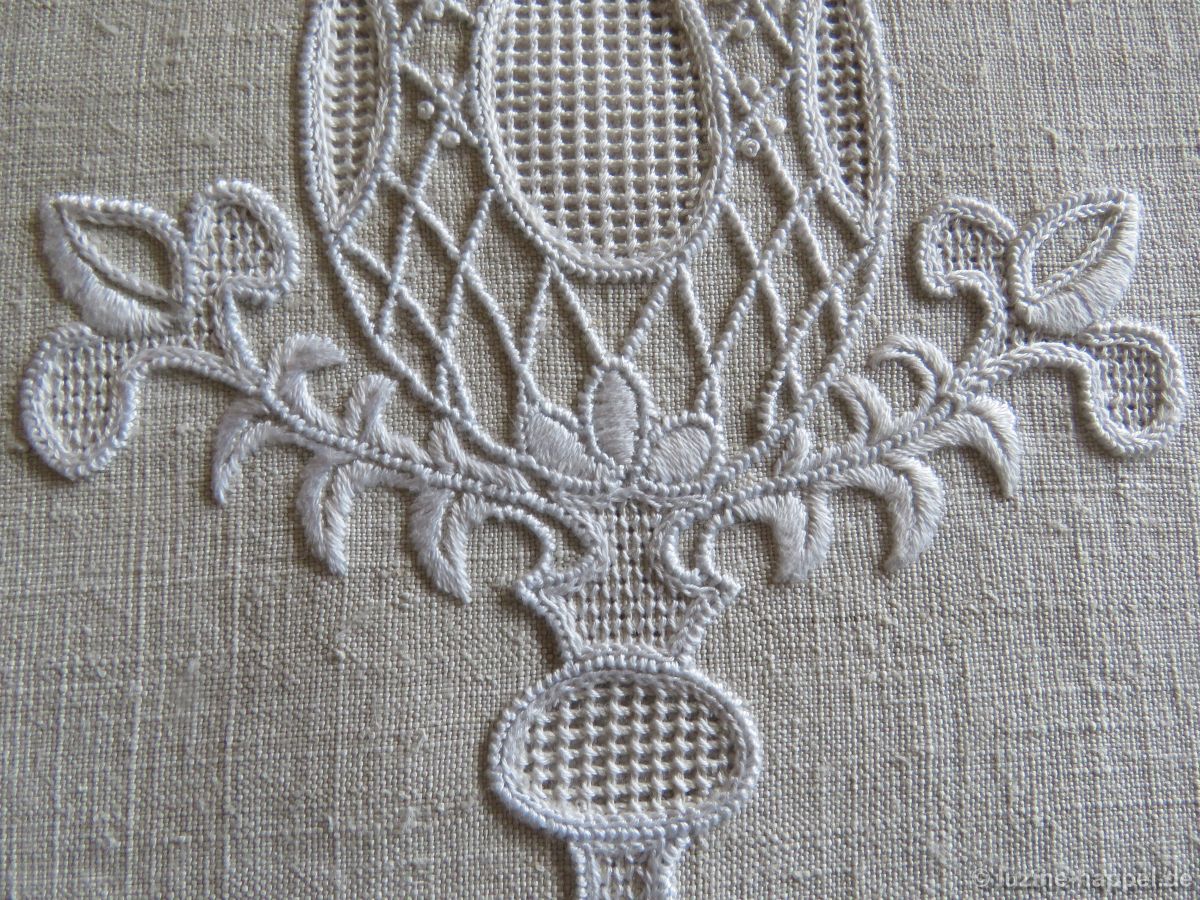
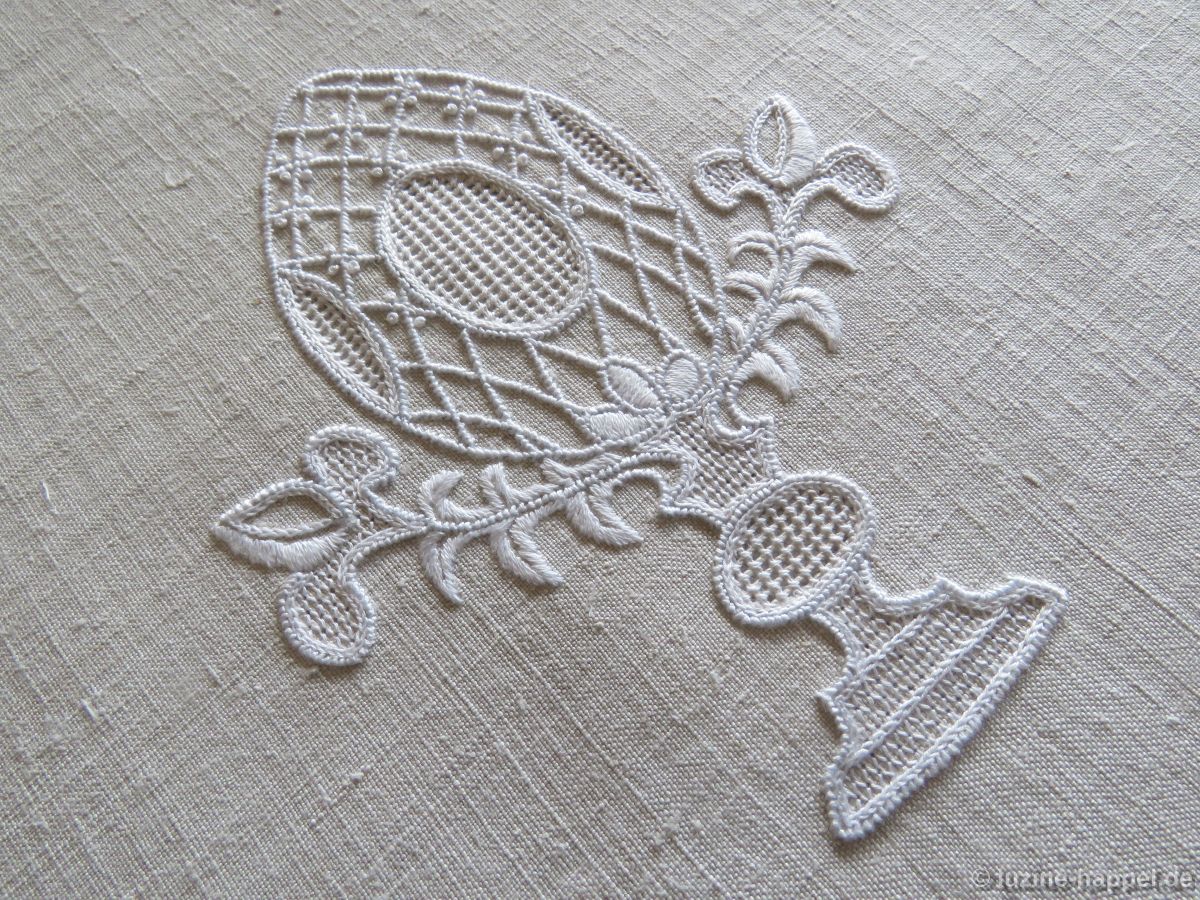
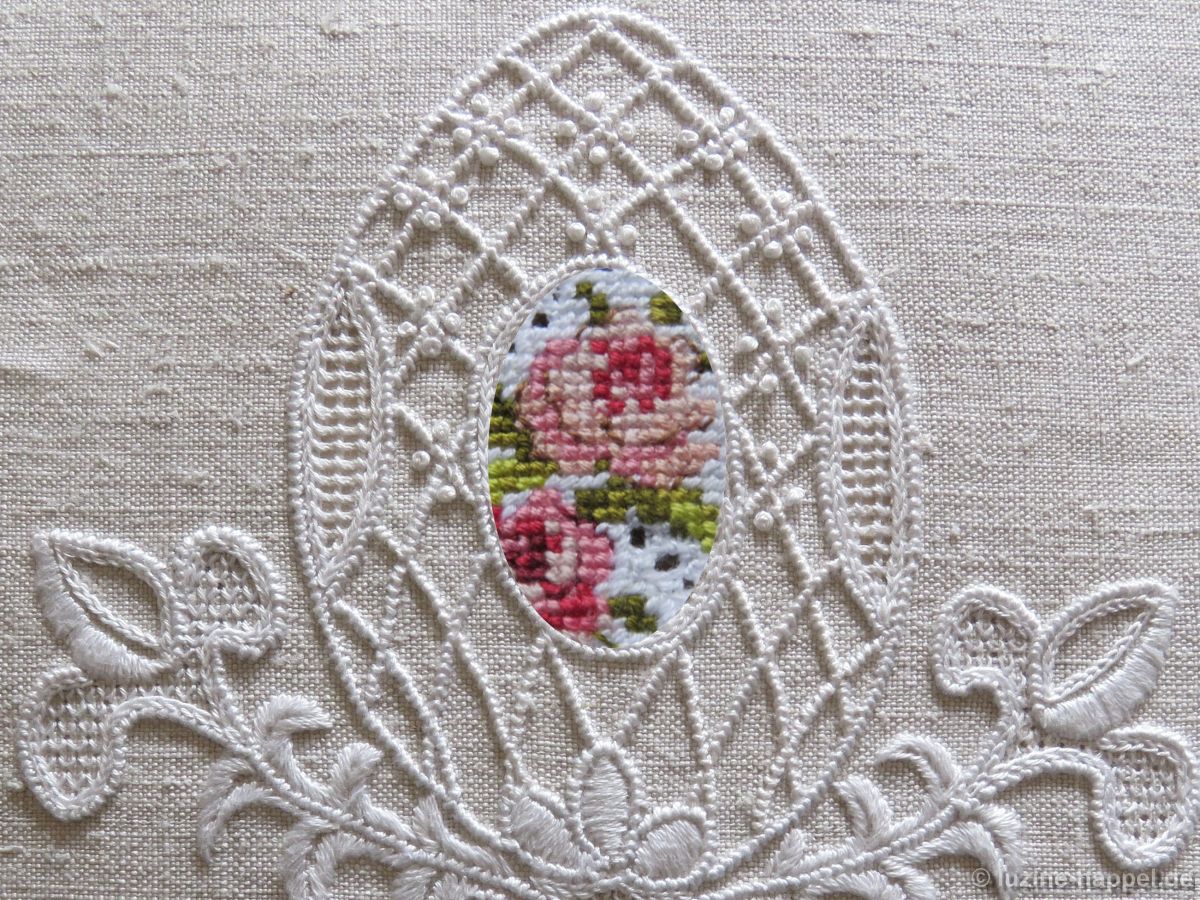
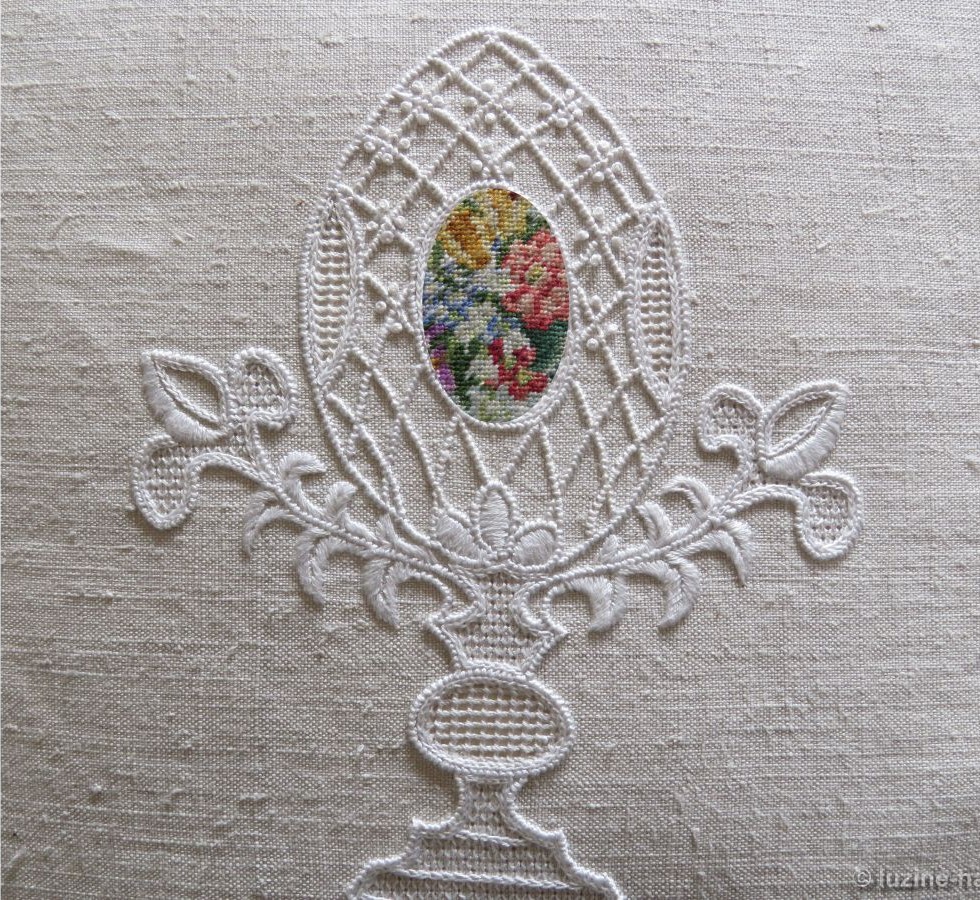
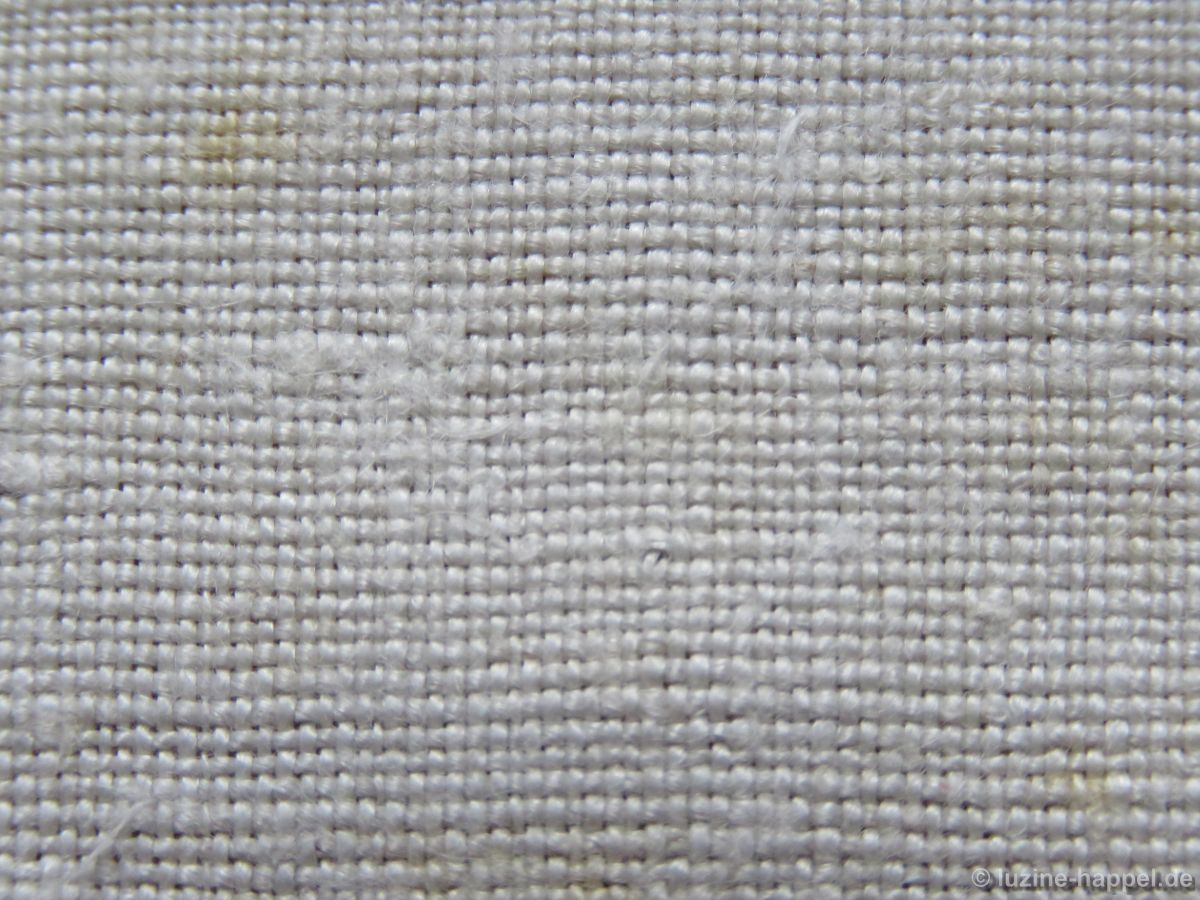
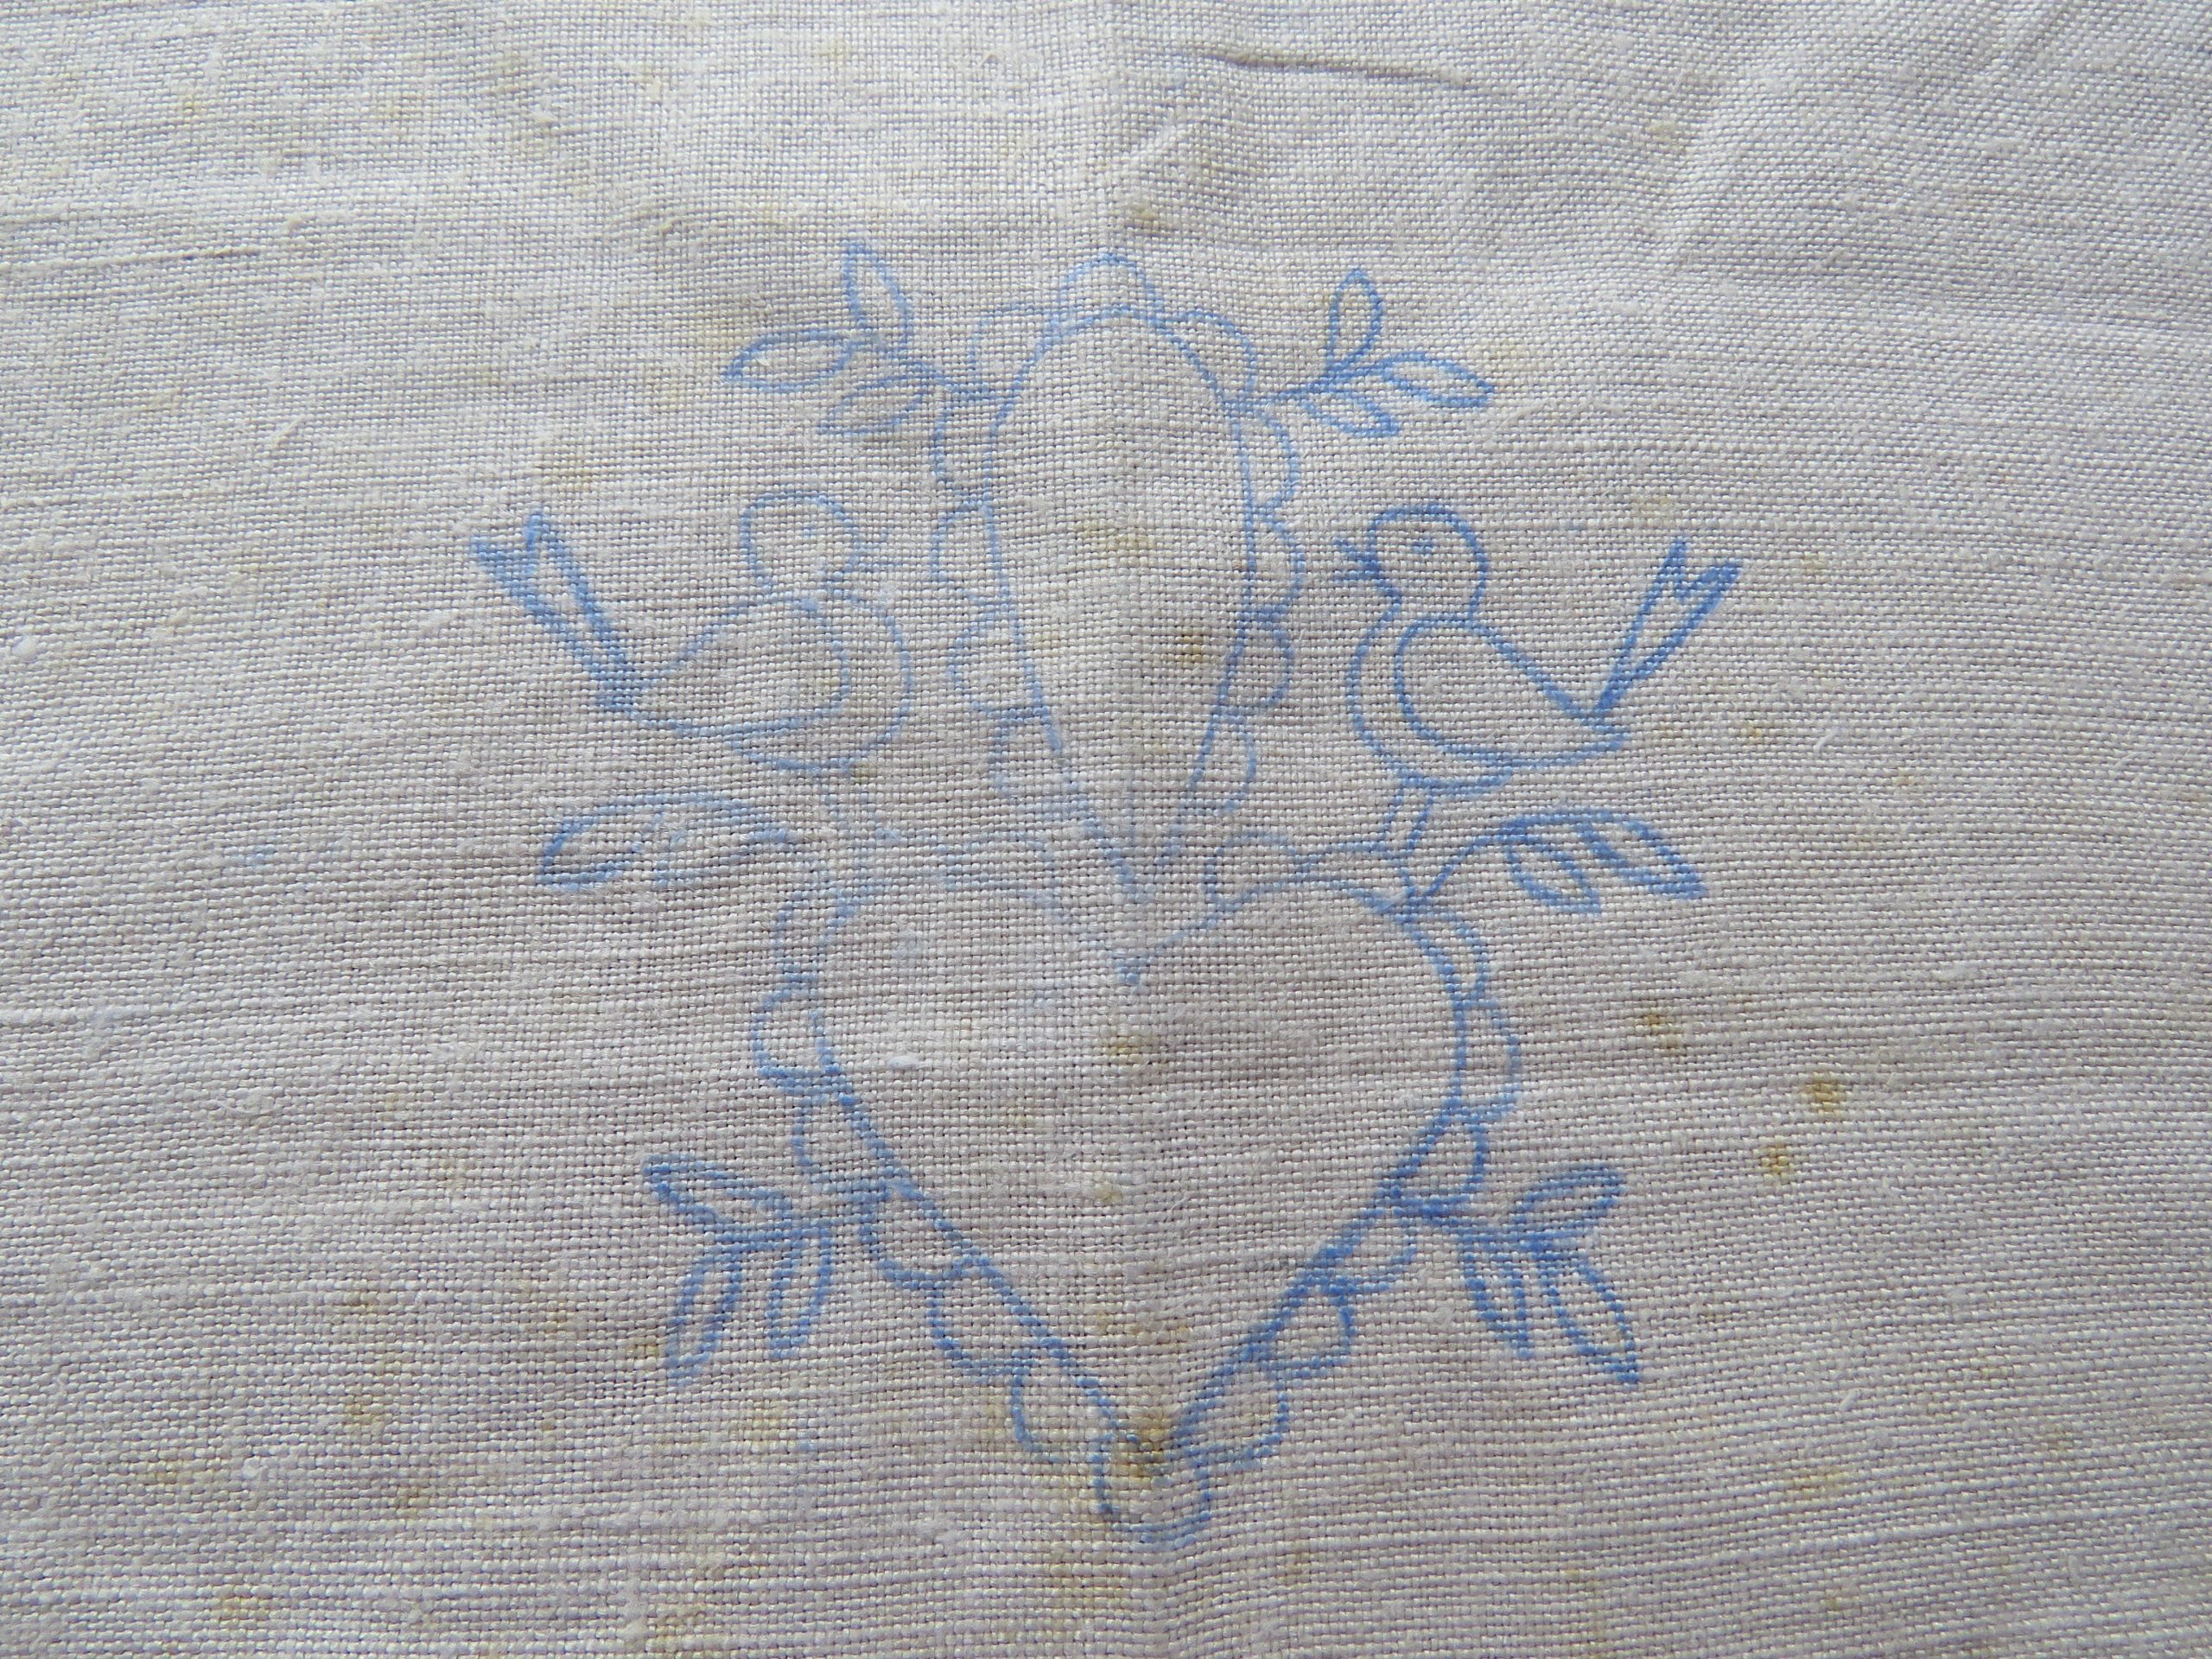
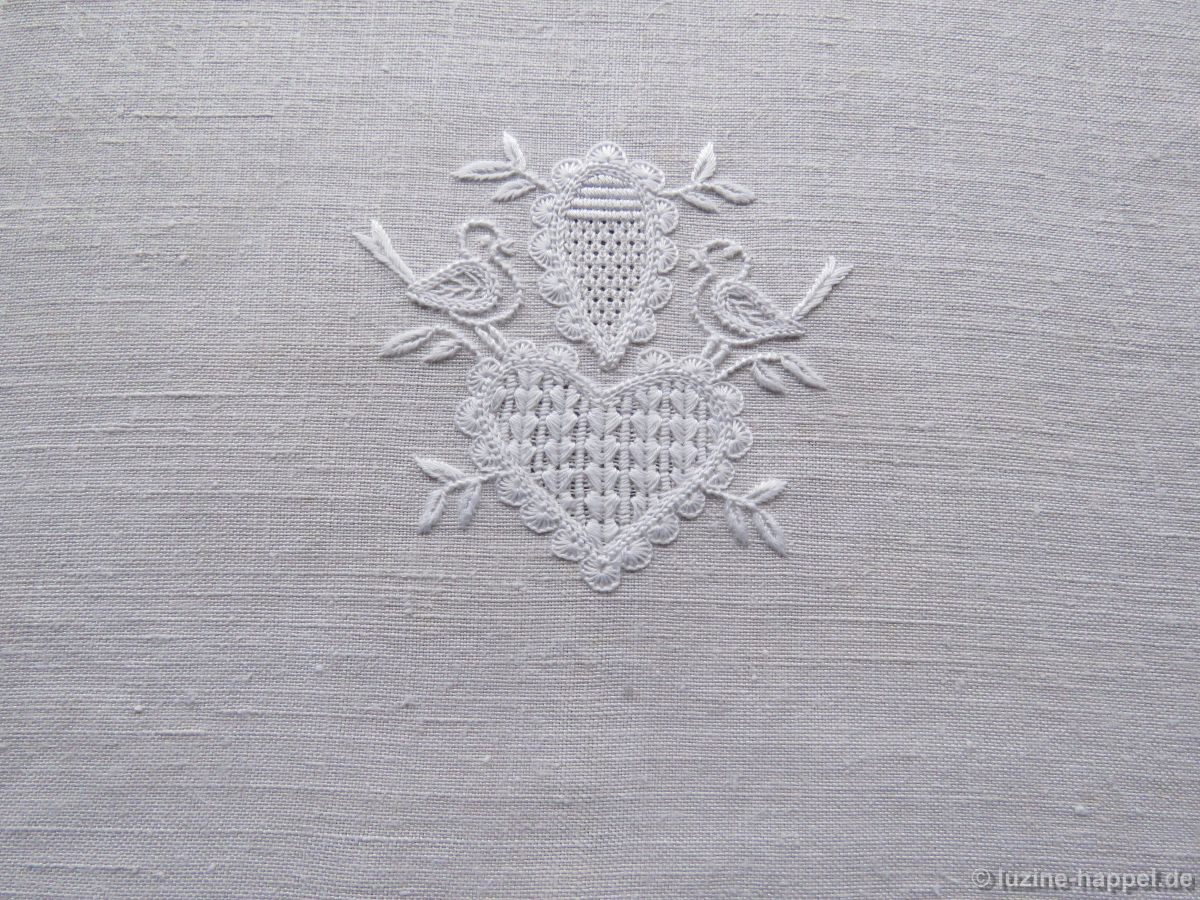
To test the linen for embroidery, a small motif (10 cm x 9 cm) is ironed on and embroidered.

The embroidery process is very pleasant – the linen feels good in the hand and the needle glides easily through the fabric.

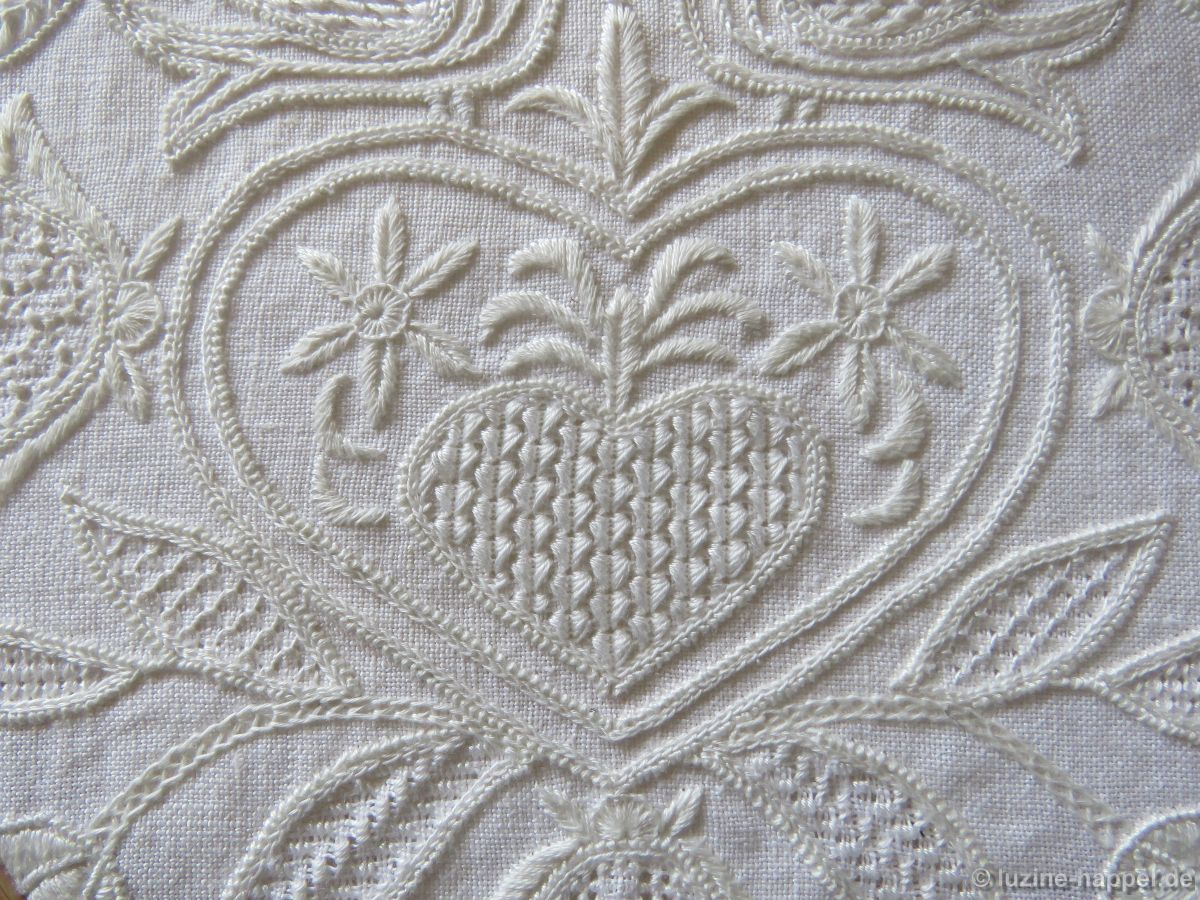
Although the linen is not quite as densely woven as linen F I 25394, the stitches can be placed relatively precisely.

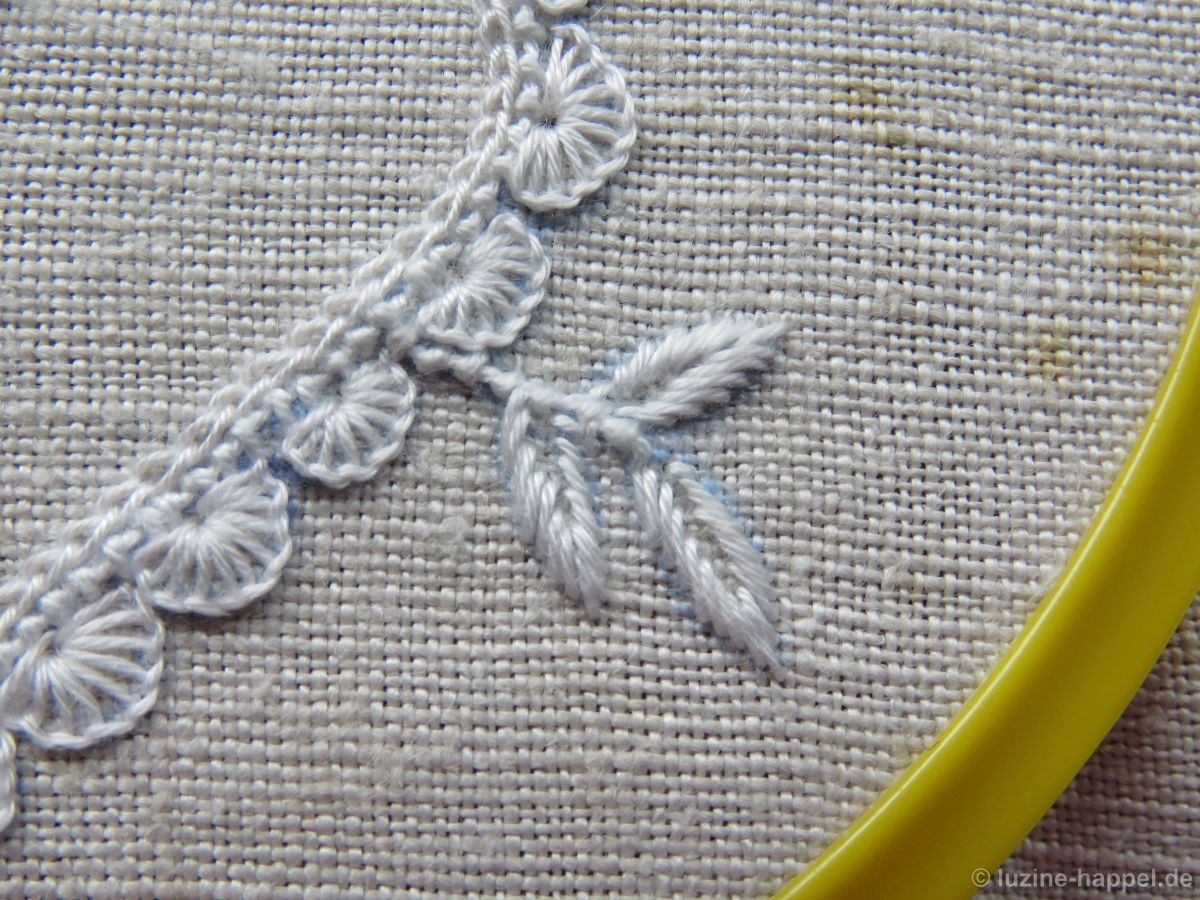
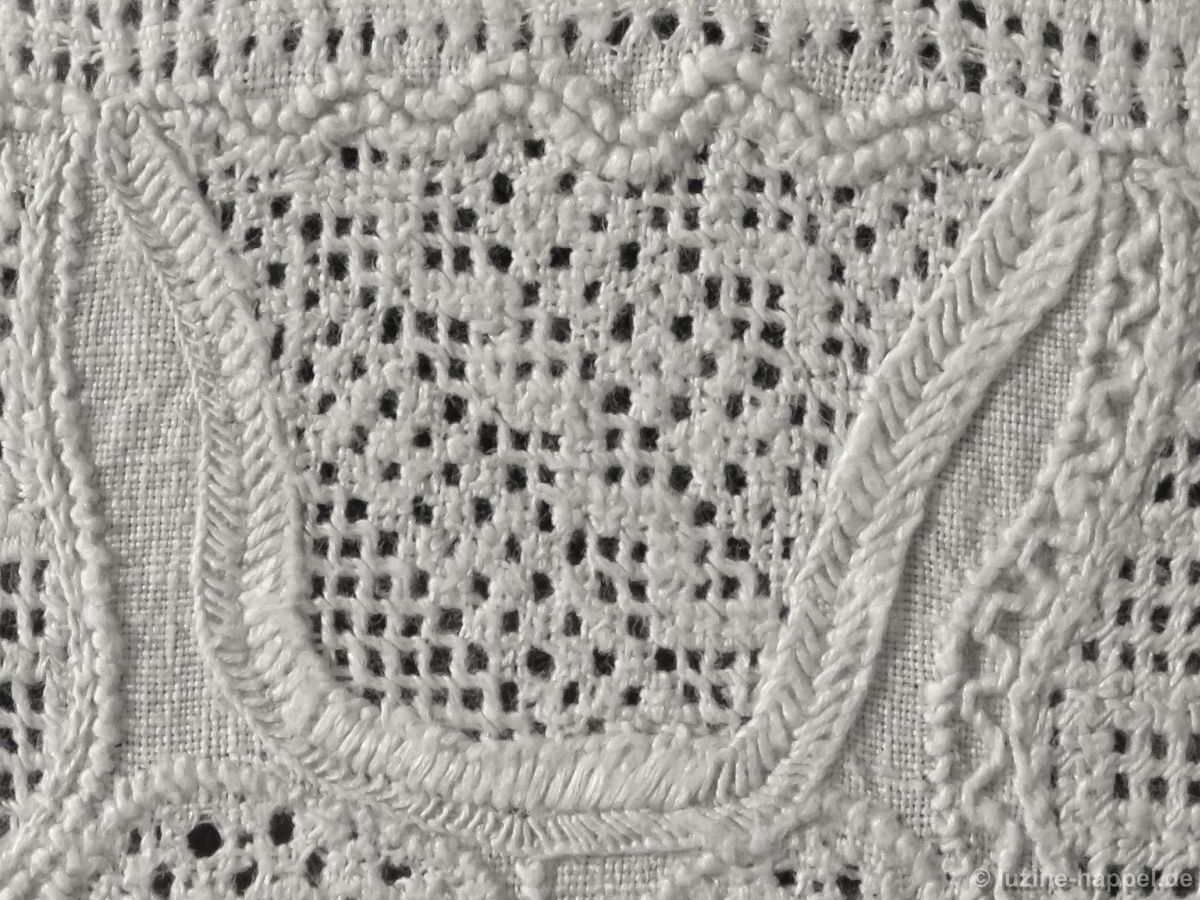
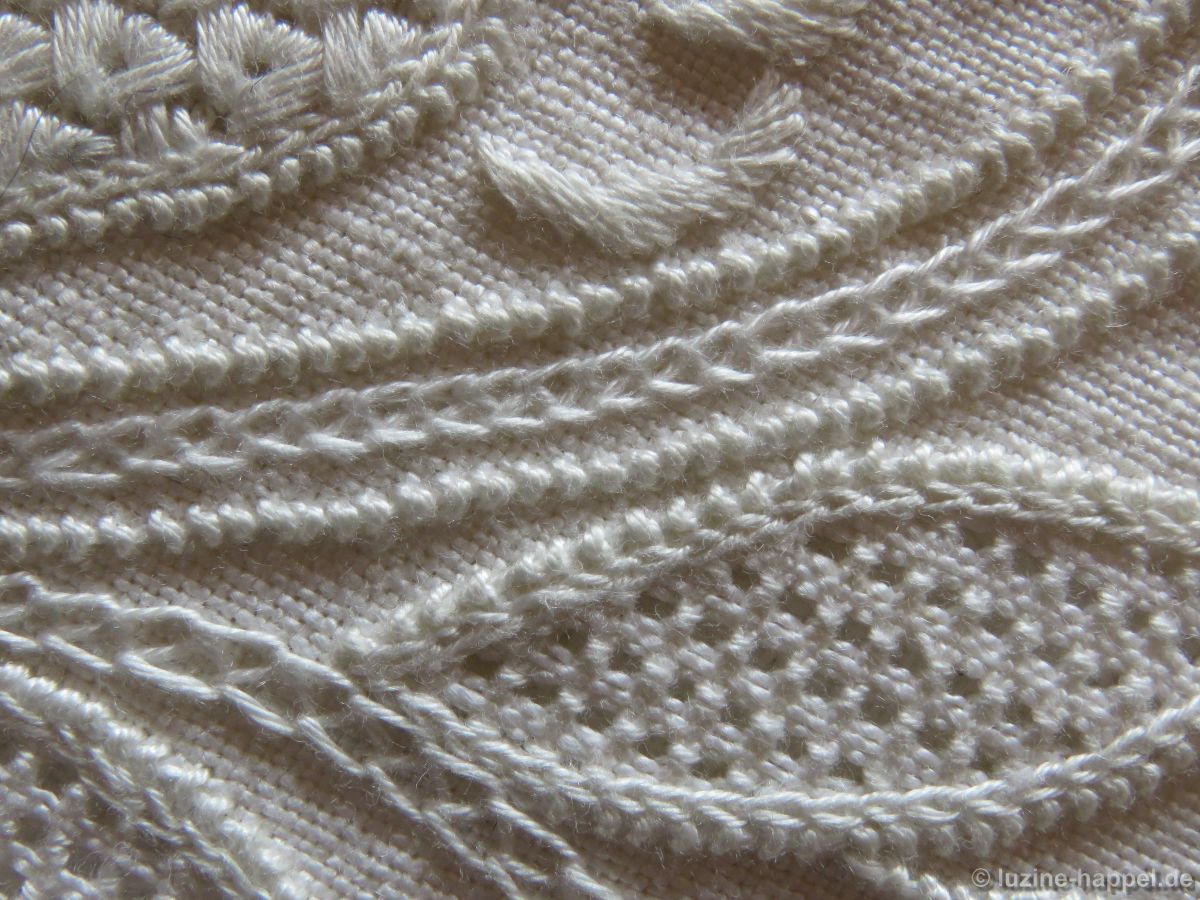
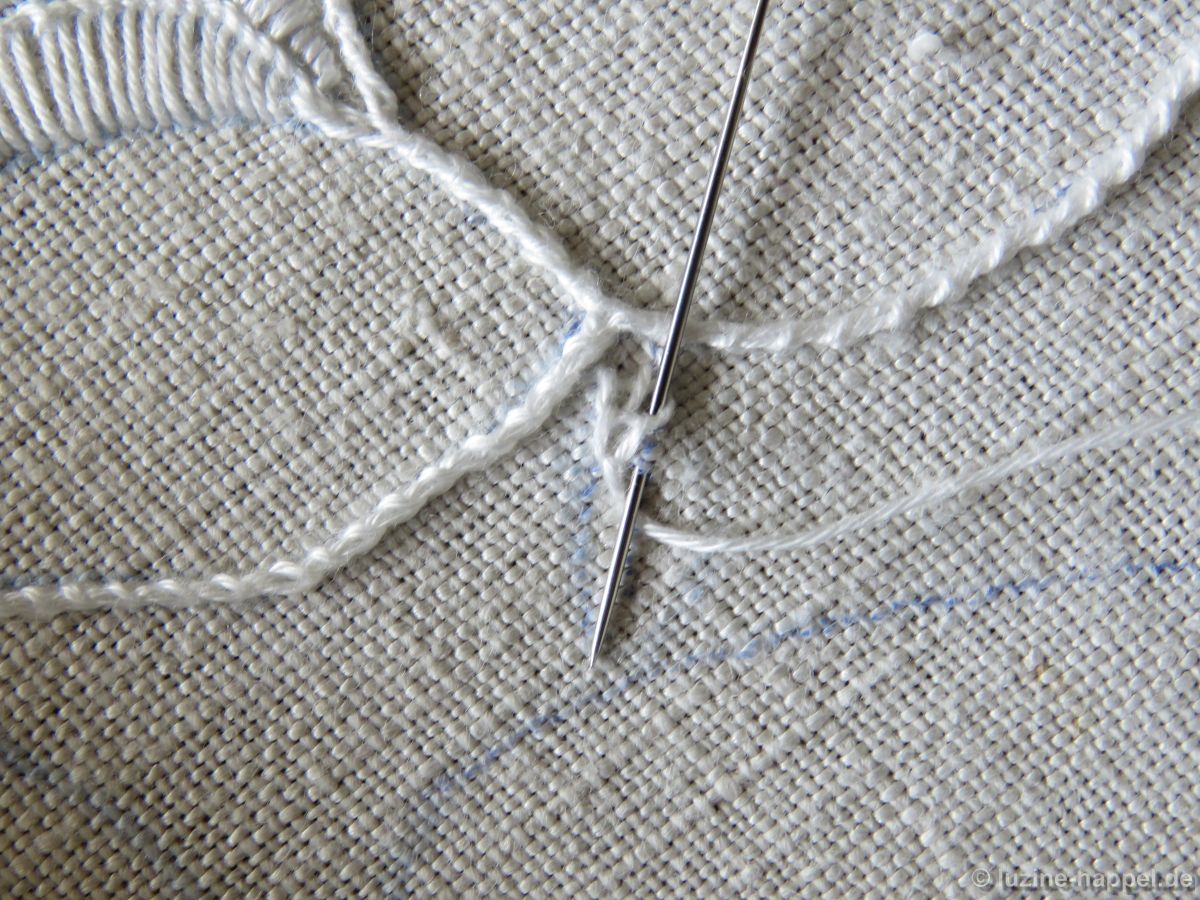
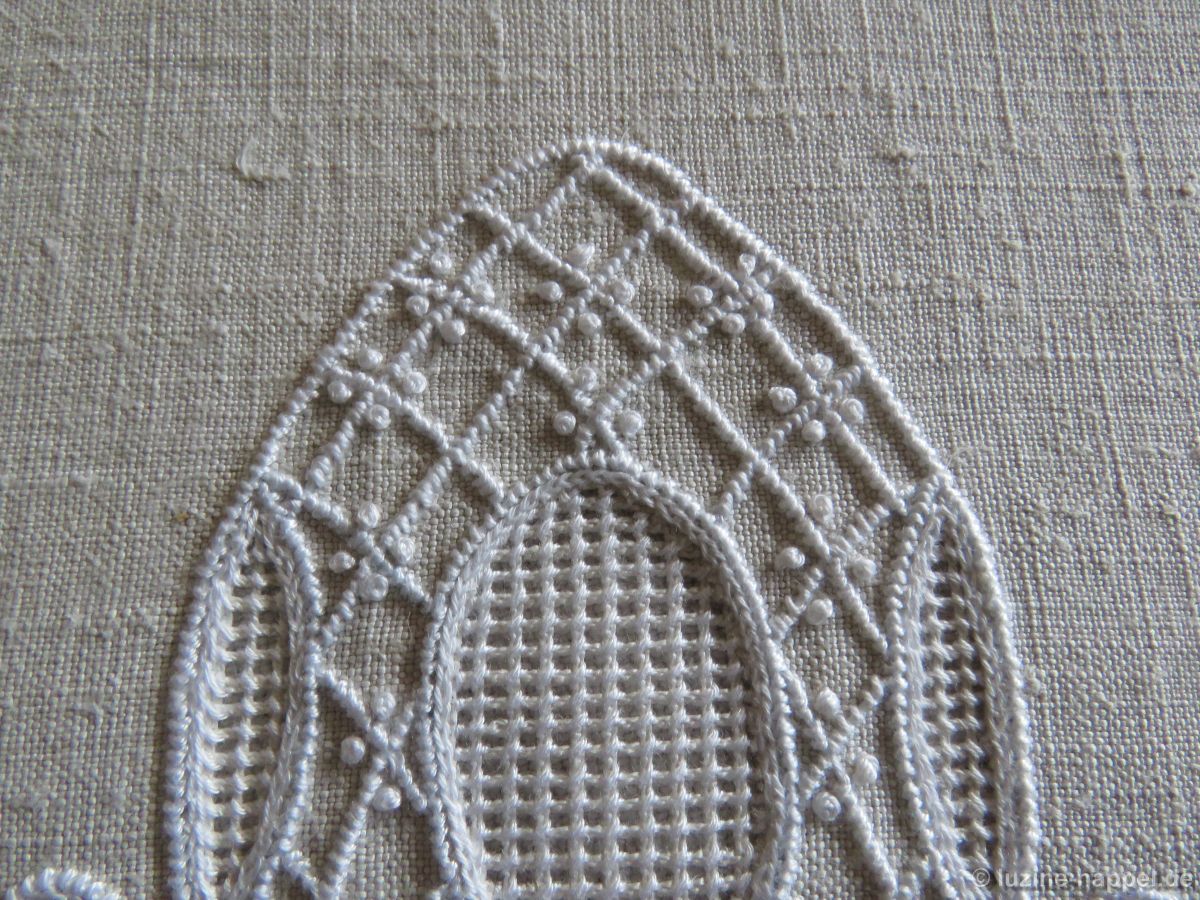
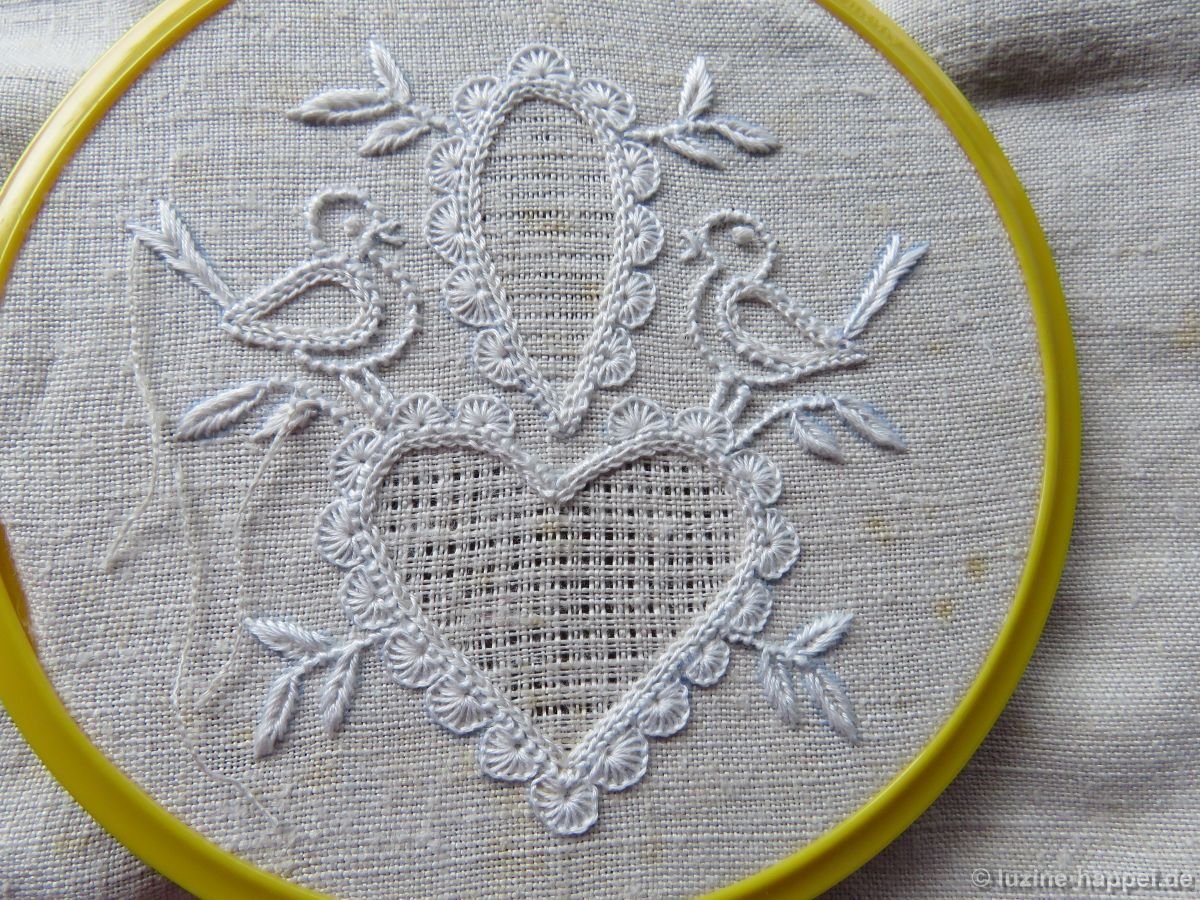
The thread pull-out in the motif areas was successful.

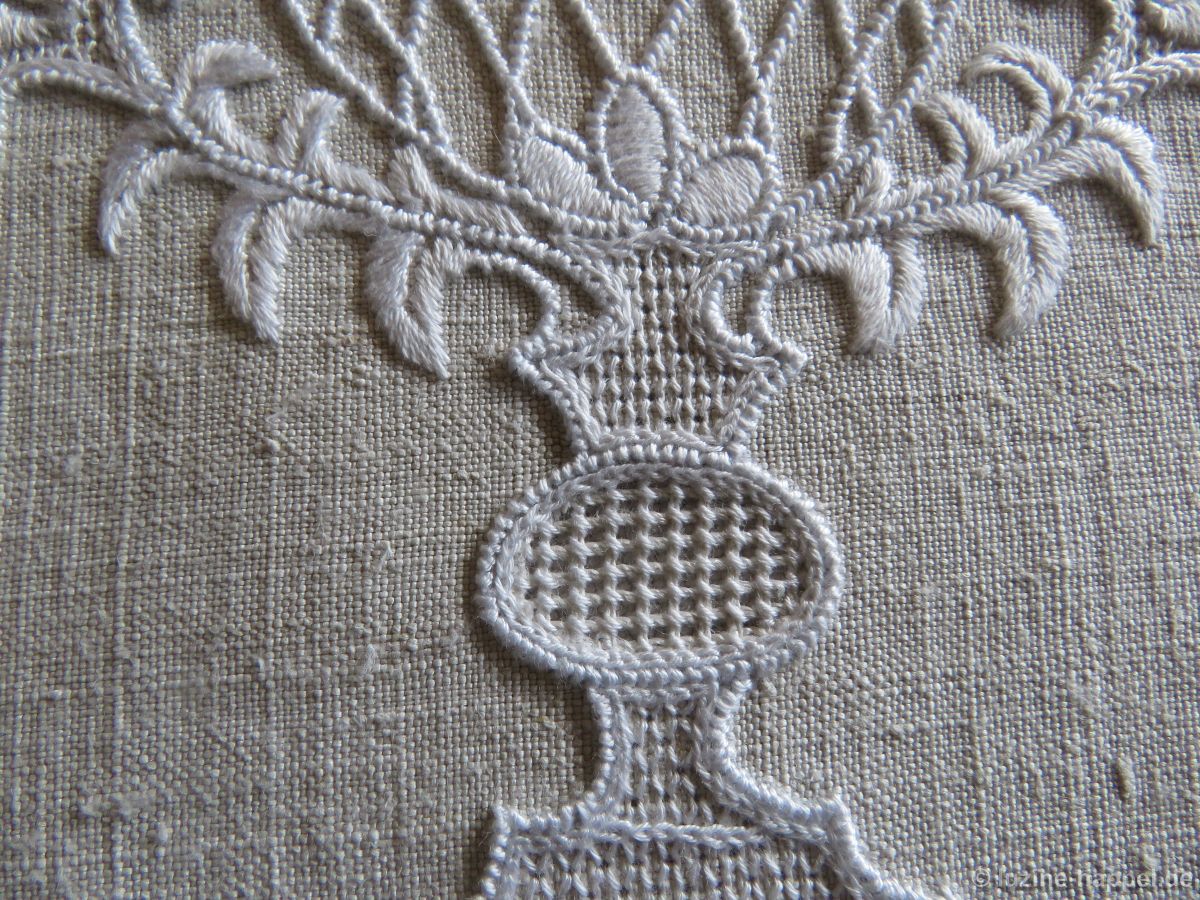
Despite the varying thickness of the fabric threads, the Limet thread grid appears relatively uniform.

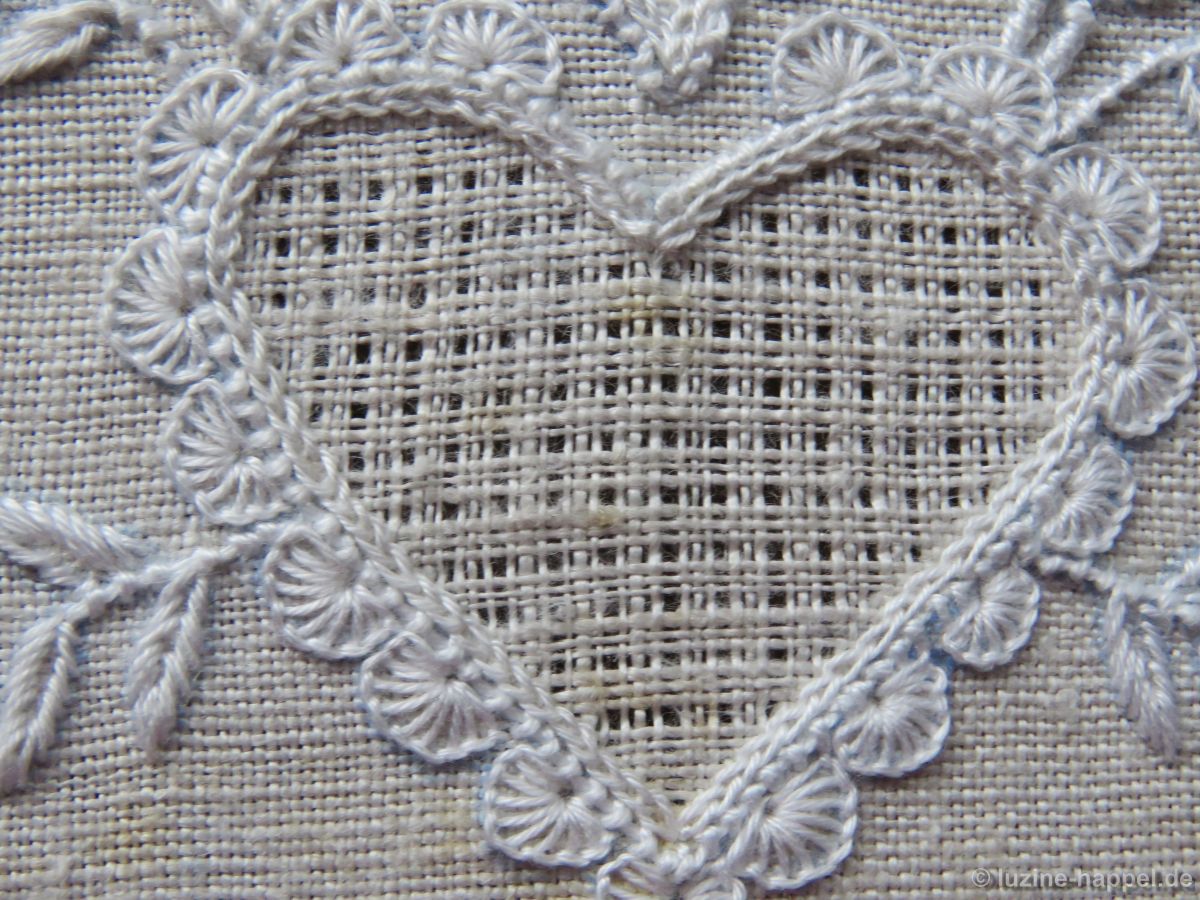
However, many beautiful filling patterns can be embroidered in the relatively small heart-shaped area of ​​4 cm width.

The small embroidery stands out well on the linen.

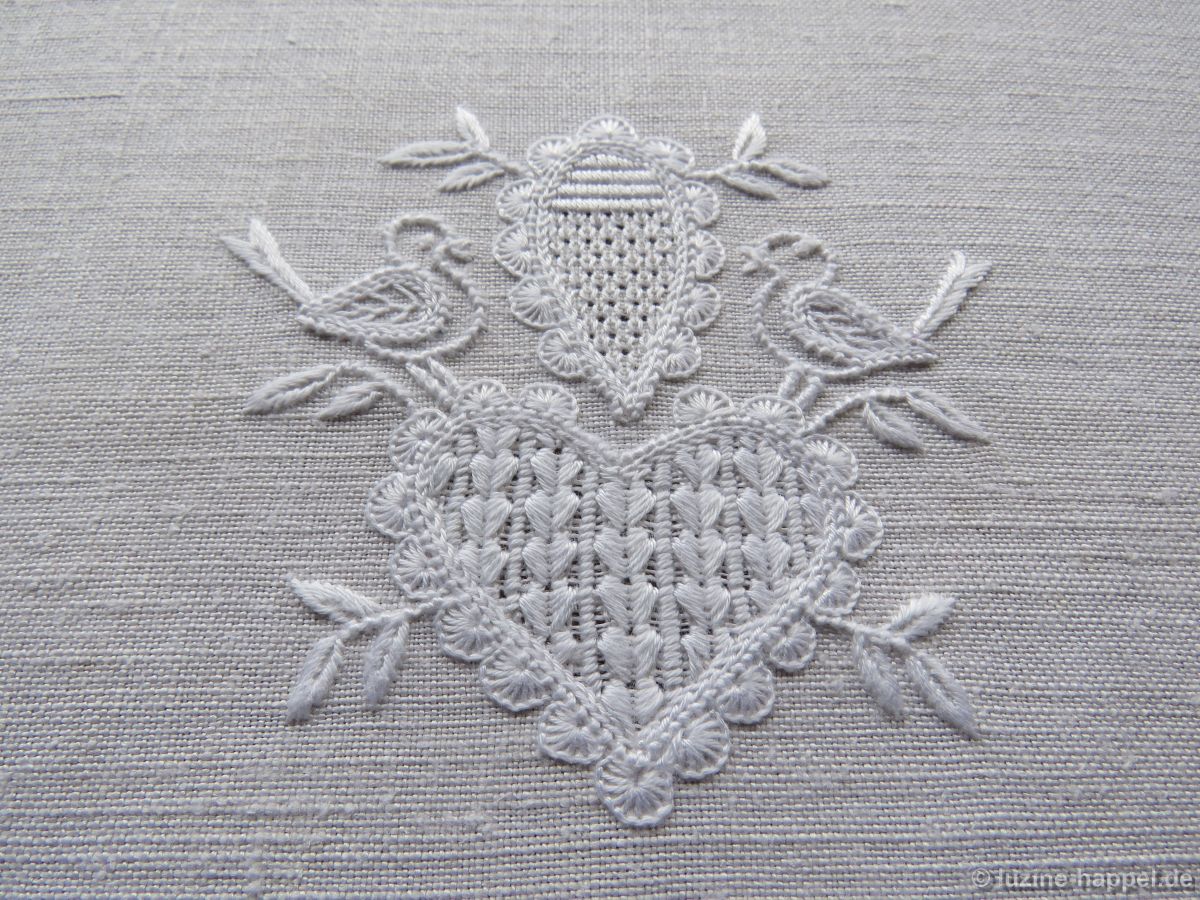
All stains have completely disappeared. The thickened threads do not detract from the overall appearance. A slightly irregular structure is typical of handwoven linen and contributes to the fabric’s charm.

However, the linen shrank by approximately 3.5% in the warp direction, while it retained the same width in the weft direction.

This linen—tested and approved—I am selling for €20.00 per meter. If you are interested, please send me an email.

See also:
Selling Handwoven Linen (1)
Testing Fabric Suitability for Schwalm Whitework
Linen: Embroidery Fabric from Flax Fibers
Fault in the Linen – what to do? (1)

Double Outlines (9) – Coral Knot Stitches

Another way to emphasize motif edges with double outlines is to embroider adjacent rows of coral knot stitches.

This variant can be found in many traditional models from the end of the 18th century onwards.

Many motifs were designed using this alternative on a densely embroidered bodice sleeve border.

The detailed photos show,

that a row of chain stitches with thick thread was often worked within the coral knot stitches.

These not only ensure a clean finish to the filling patterns, but also accentuate the edge.

However, there are also examples where the coral knot stitch double row forms the only border decoration.

Sometimes only part of the motif’s border is decorated in this way. The remaining edges are given a different design, as seen here with blanket stitches and – partially visible to the right – Interlaced Straight Stitches

See also:
Double Outlines (1) – Remaining Free Areas
Double Outlines (2) – Interlaced Straight Stitches
Double Outlines (3) – Interlaced Herringbone Stitches
Double Outlines (4) – French Knots
Double Outlines (5) – Bullion Knots Knots
Double Outlines (6) – Blanket Stitches
Double Outlines (7) – Honeycomb Darning Stitches
Double Outlines (8) – Chain Stitch Variations

Double Outlines (8) – Chain Stitch Variations

For large designs, the border is often finished with double lines spaced more or less widely.

Chain stitches are very well suited for filling the narrow space between two such lines. They are easy to stitch, very flexible, and offer a wide range of variations. Many variations can be achieved by using different thread weights and choosing the stitch length. Pay particular attention to these two characteristics in the following images.

In a parade cushion border from 1814, there are simply two adjacent rows of chain stitches around the edge of the motif.

Chain stitches, each stitched tightly within the coral knot stitches and with unworked space in between,

create a simple border decoration.

A single row of chain stitches in the middle between the coral knot stitches

fills the empty space.

Wide chain stitches, where the inserting and emerging points are not at the same point but slightly apart,

result in a different appearance.

A similar effect can be achieved with crossed chain stitcesh.

The emerging point of one chain link coincides with the inserting point of the following loop.

The working threads are alternately laid into loops to the left and to the right.

The crossed is more ample than the wide chain stitch.

It can also be used effectively to work with wide stems. One can vary the thread thickness, stitch width, and stitch length particularly well.

See also:
Double Outlines (1) – Remaining Free Areas
Double Outlines (2) – Interlaced Straight Stitches
Double Outlines (3) – Interlaced Herringbone Stitches
Double Outlines (4) – French Knots
Double Outlines (5) – Bullion Knots Knots
Double Outlines (6) – Blanket Stitches
Double Outlines (7) – Honeycomb Darning Stitches

Double Outlines (7) – Honeycomb Darning Stitches

Many designs with large motifs decorate their edges with double lines spaced more or less widely. One such design features a smaller heart placed inside a larger one. Its filling pattern also consists of Honeycomb Darning stitches.

It is therefore a good idea to also work Honeycomb Darning stitches between the outlines of the large heart. The distance between the lines is large enough to accommodate two rows of embroidery stitches.

It is advisable to start at one point and embroider the first row over half of the free area.

The second row is worked beside adapted to the shape.

This creates a pretty border decoration.

It adorns one of the “Apron Square Designs” on the edge of a tablecloth.

The Apron Square Designs are very diverse in design and are suitable for many different uses.

See also:
Double Outlines (1) – Remaining Free Areas
Double Outlines (2) – Interlaced Straight Stitches
Double Outlines (3) – Interlaced Herringbone Stitches
Double Outlines (4) – French Knots
Double Outlines (5) – Bullion Knots Knots
Double Outlines (6) – Blanket stitches

Egg à la Fabergé

An egg, embroidered in the style of Fabergé, adorns the Easter-decorated apartment.

The artist Gudrun Hartwig’s design is implemented into embroidery on handwoven linen.

The terraced base is decorated with wave stitches, while the oval shape features the cable stitch grid.

Only these two patterns are used for all areas of the design.

Leaves and small fillings are worked with satin stitches, whereby the continuation of the stitches from one leaf to the next along the coral knot stitches makes the stem subtly more distinctive.

The relatively small areas require small filling patterns, whose subtle effect

underlines the magnificent overall picture.
French knot stitches, placed between the coral knot stitch lines, create an attractive pattern in a simple way.

This results in an extraordinary and unusual Easter embroidery.

Anyone who wants to make it a truly special, magnificent jewel can decorate the “window” with small, colorful cross-stitch motifs

or fill them with tapestry motifs, as the photomontages suggest.


Happy Easter 2026!

More designs of the artist Gudrun Hartwig:
Embroidered Easter Egg Wreath
A Very Special Easter Egg
Horizontal Bird Border (1)
Tendrils – Practice Exercises (2)
Tendrils – Practice Exercises (3)
Fabulous Pictures in Whitework
Winter Tree with Berry Bowl