Kategorie: Limet-Muster
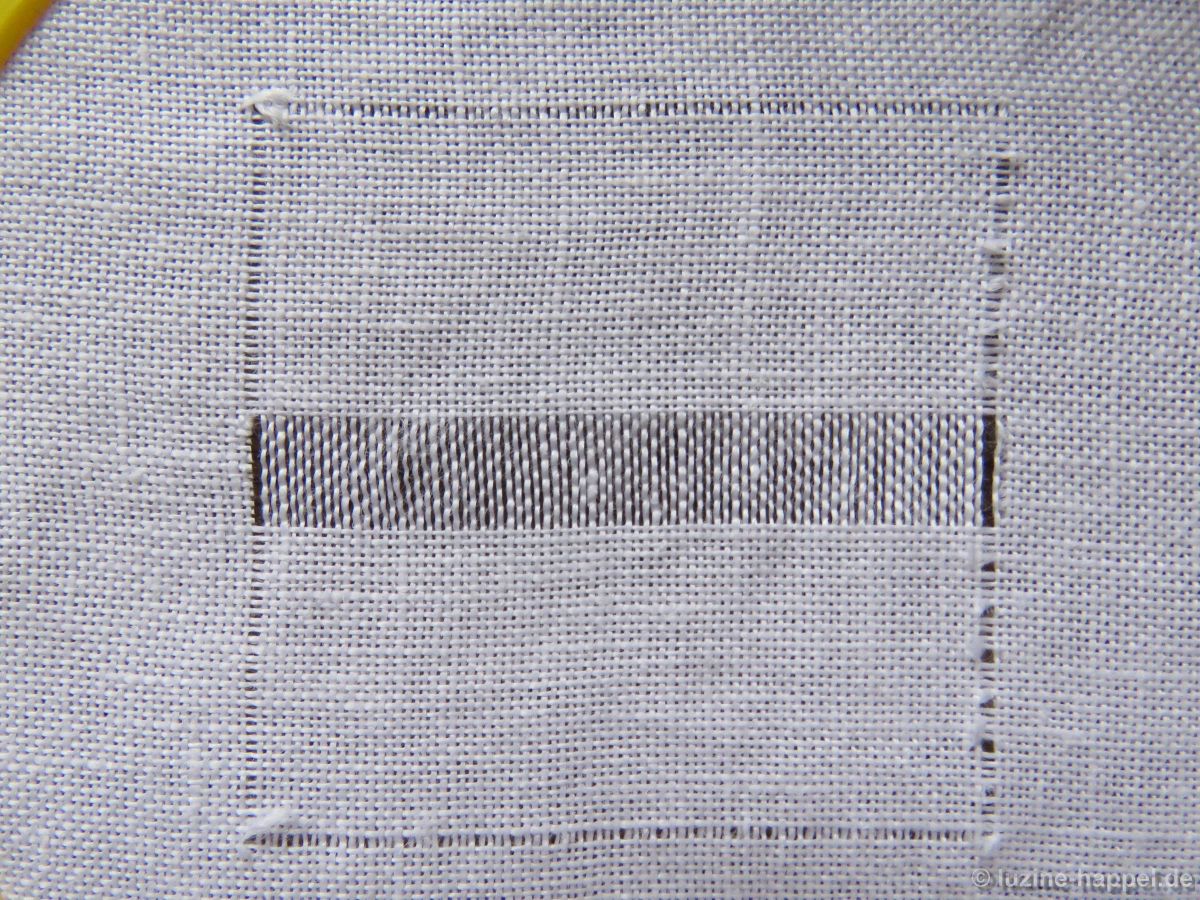
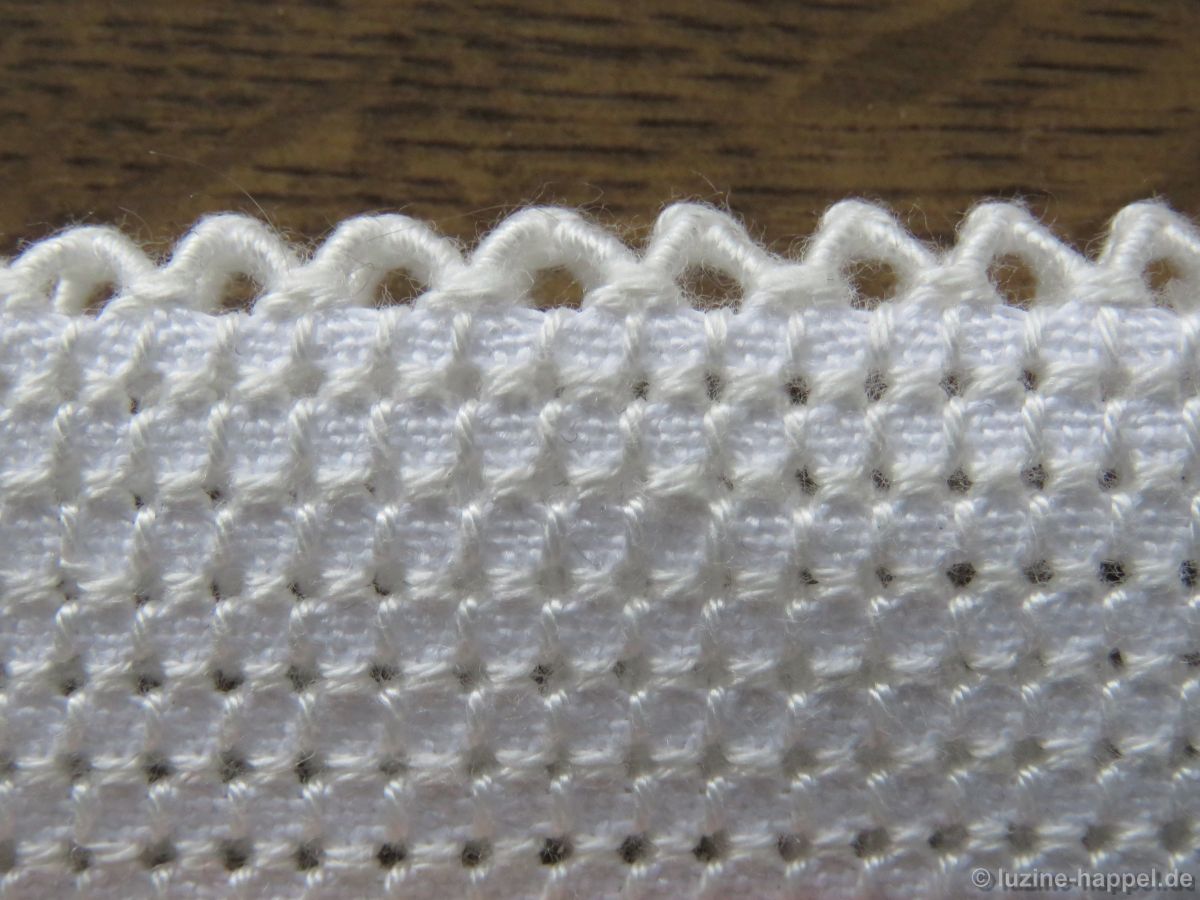
verwendetes Leinen: 13.5-fädig
verwendetes Garn: Vierfachstickgarn Nr. 20
angewandte Stiche: Rosen- und Grundstiche
Mitte: Kreuzung zweier Fadenrinnen (in anderen Konturformen: mittlere Längsachse = Fadenrinne)
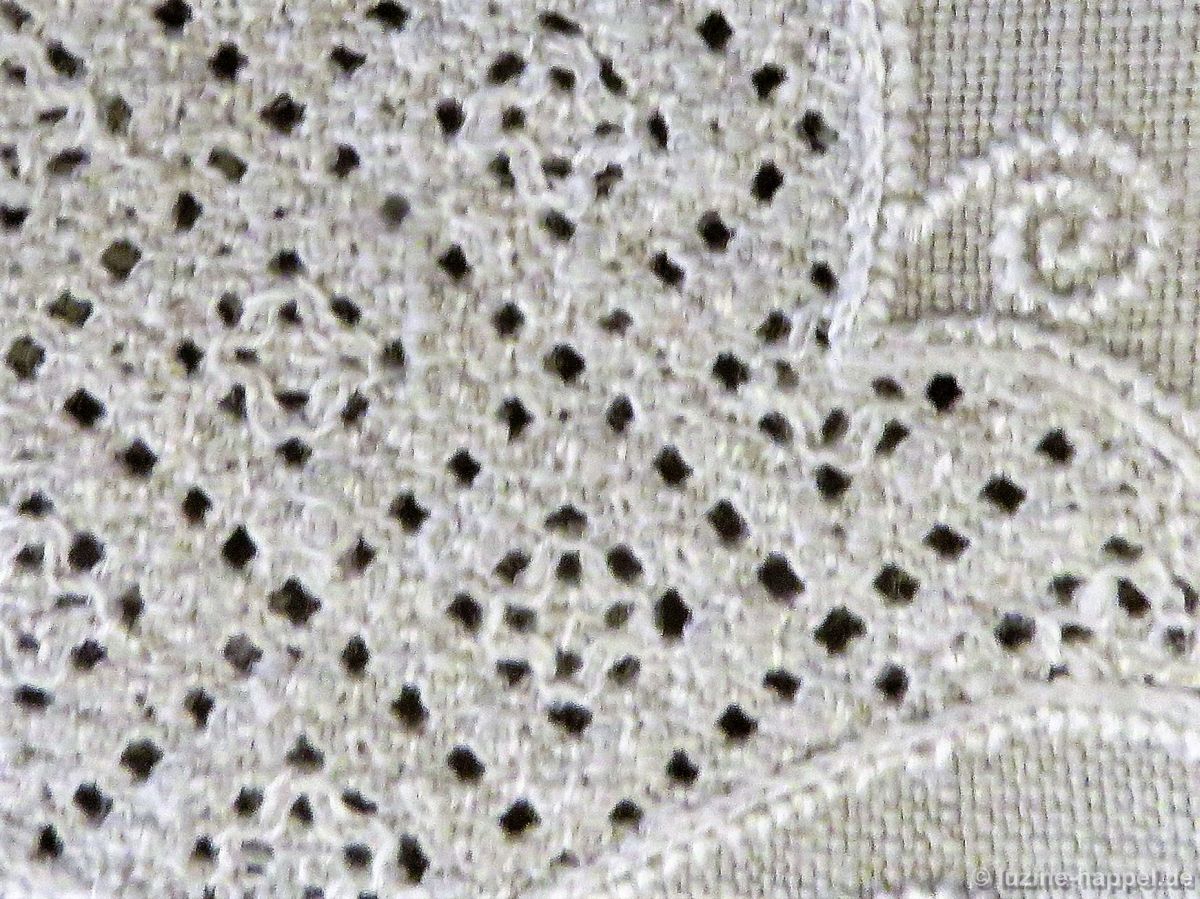
Breite eines Mustersegmentes = 48 Gewebefäden
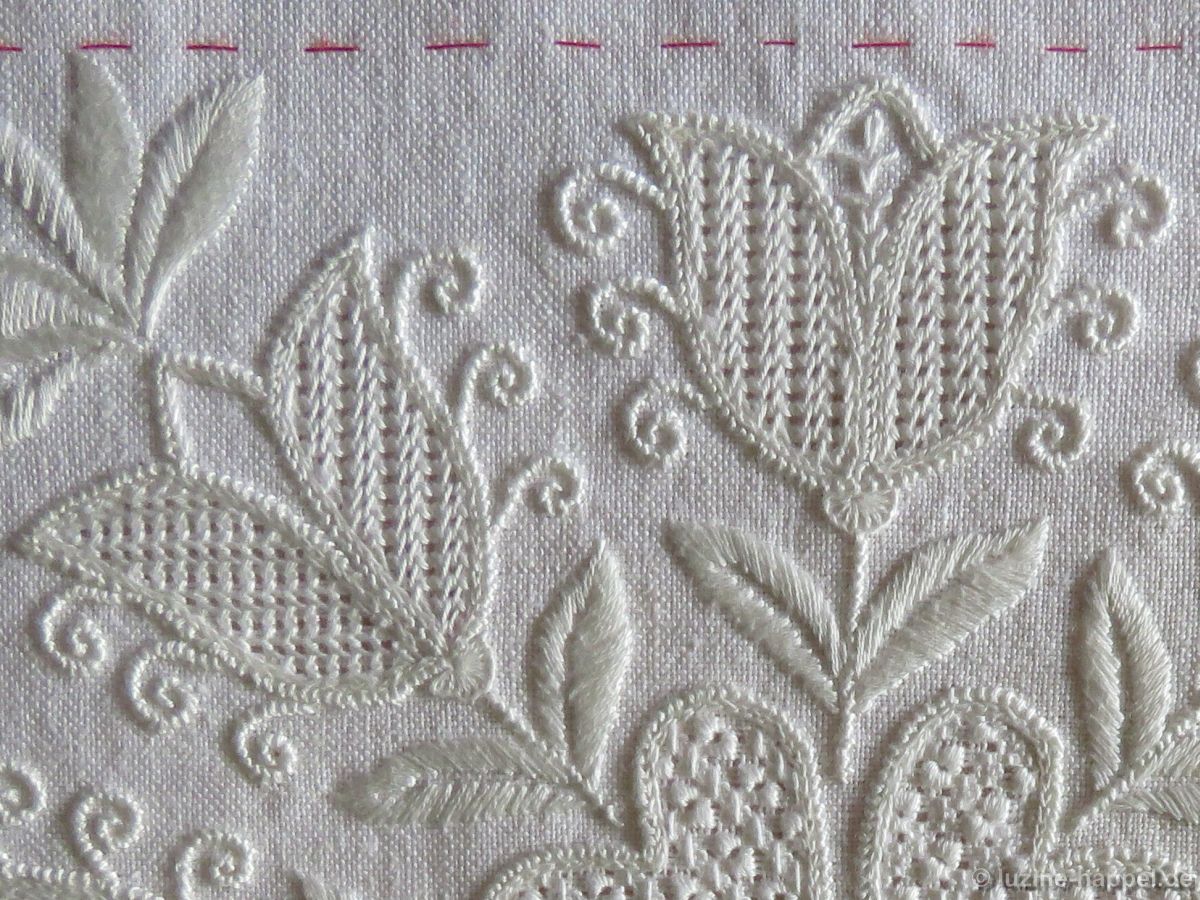
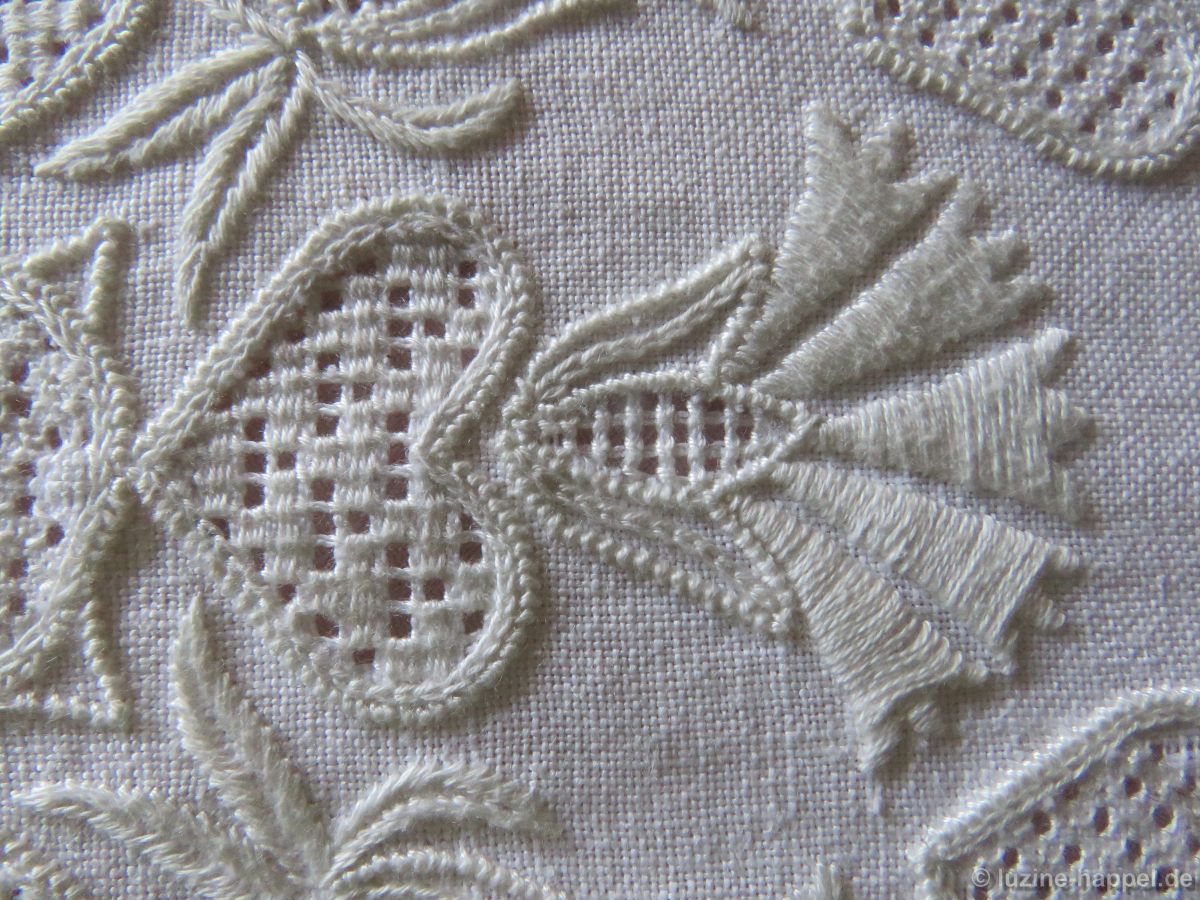
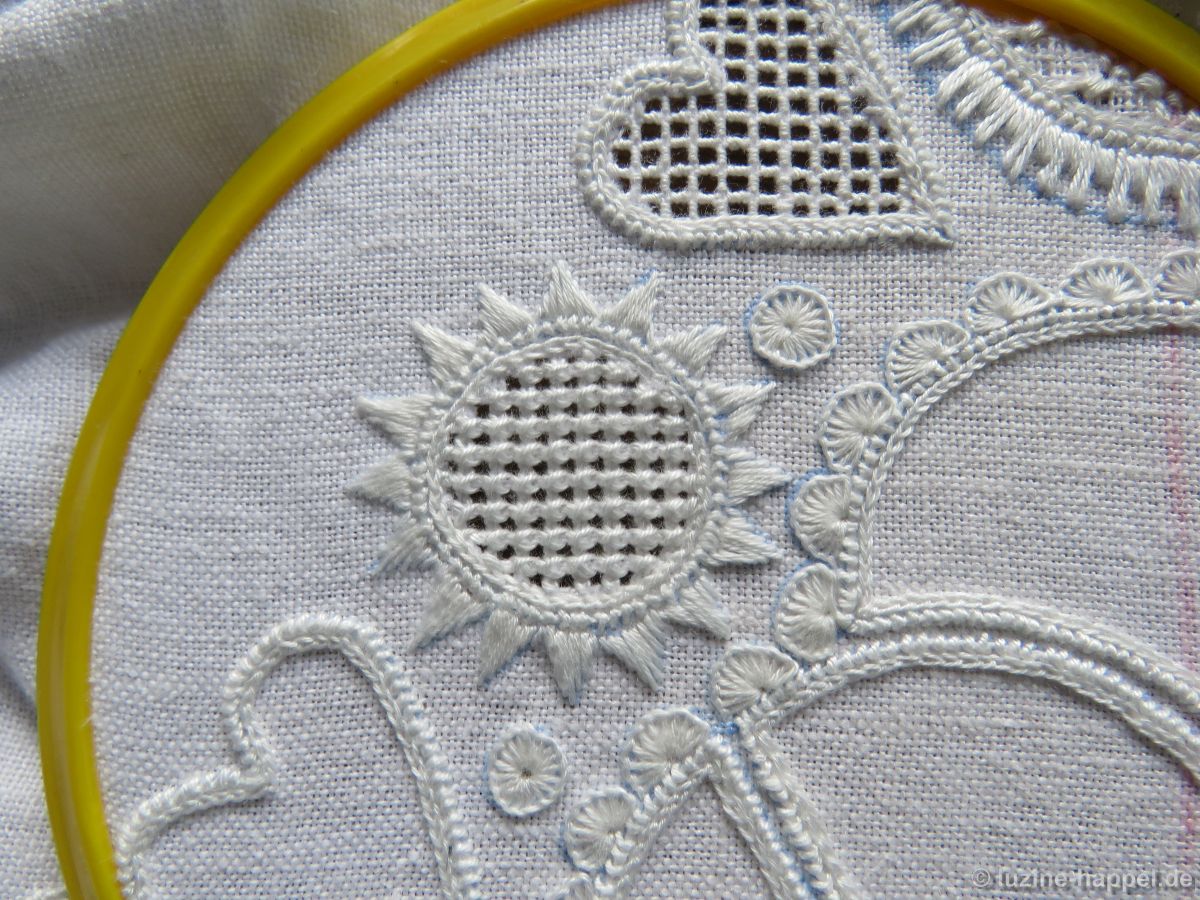
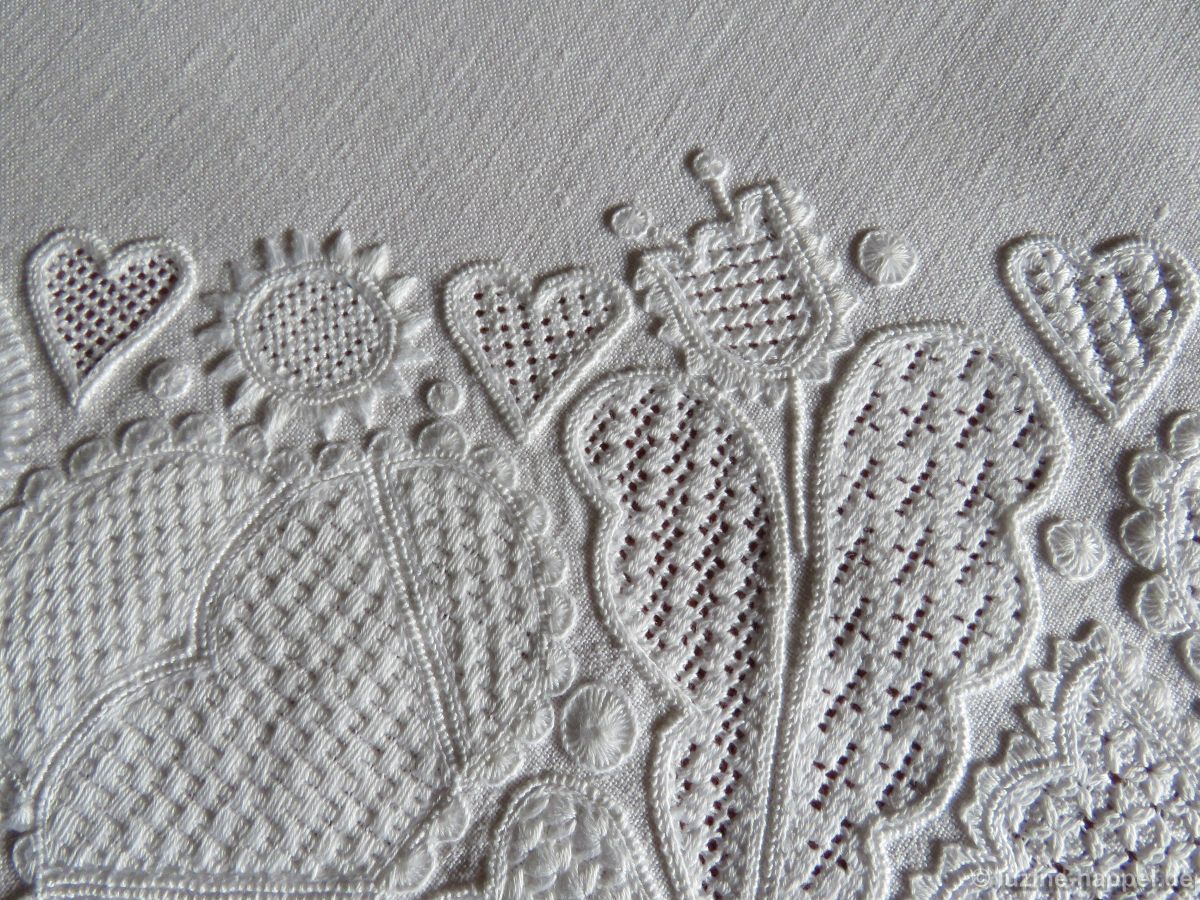
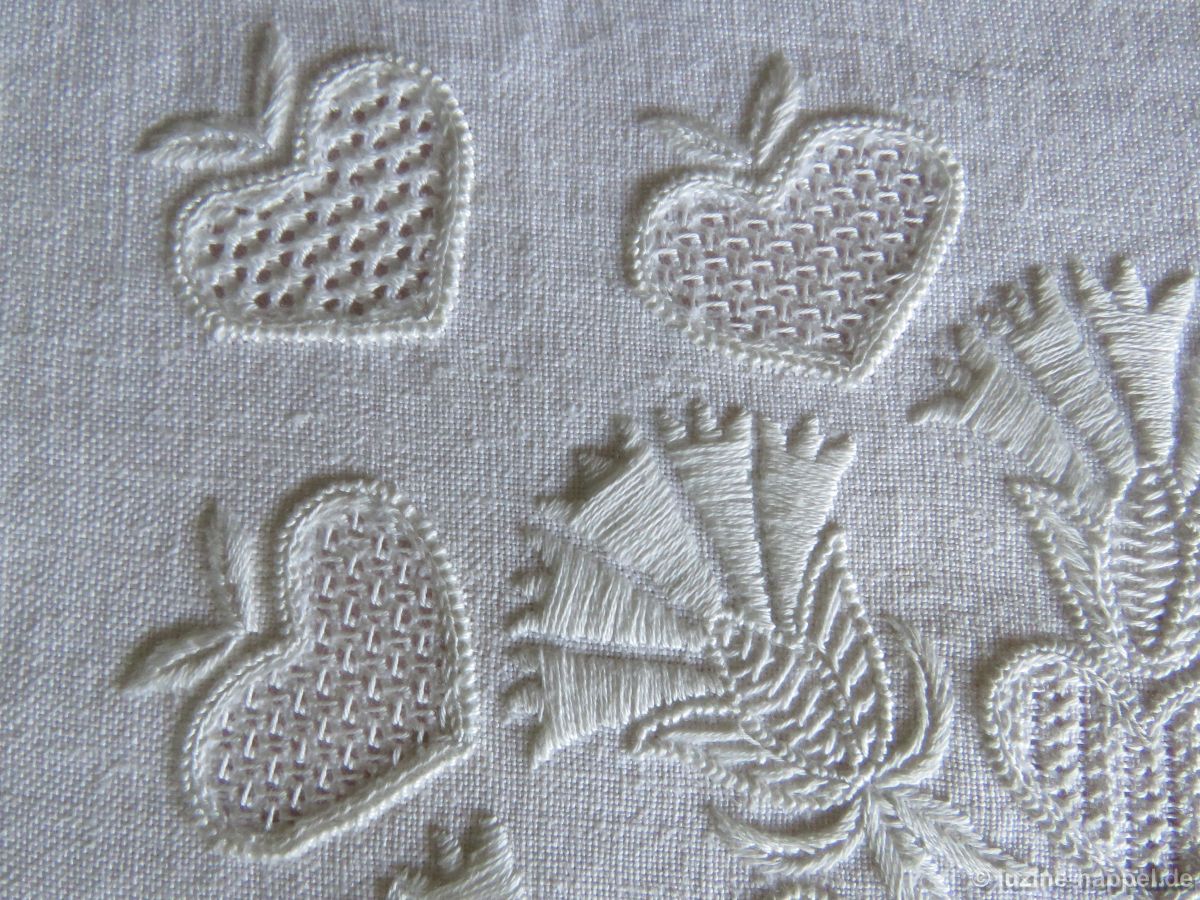
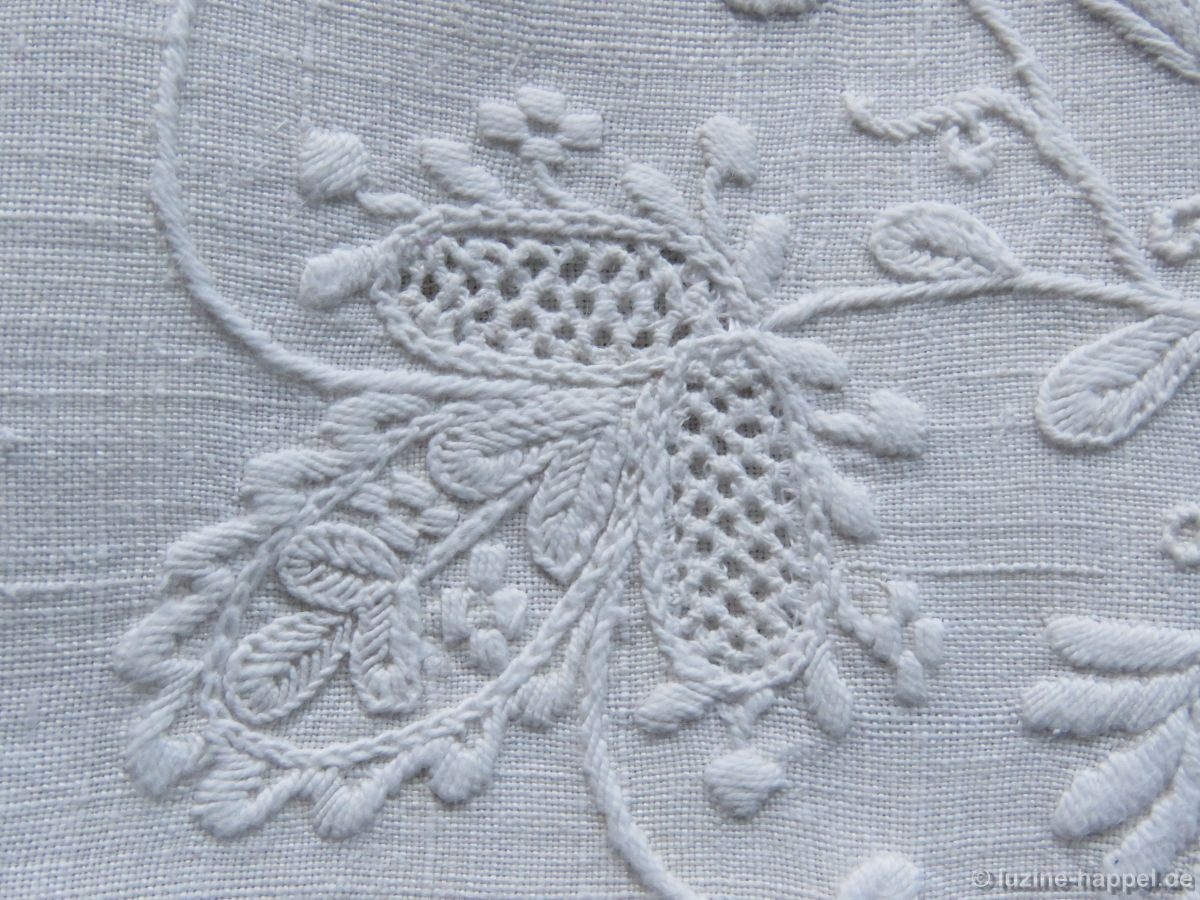
In der Schwälmer Weißstickerei ist es üblich, gegenüberliegende bzw. schräg gegenüberliegende Motive mit den gleichen Flächenfüllmustern zu besticken. Erfahrene Stickerinnen, die über einen sehr großen Musterschatz verfügen, nutzen allerdings auch gerne unterschiedliche, jedoch ähnliche Flächenfüllmuster.
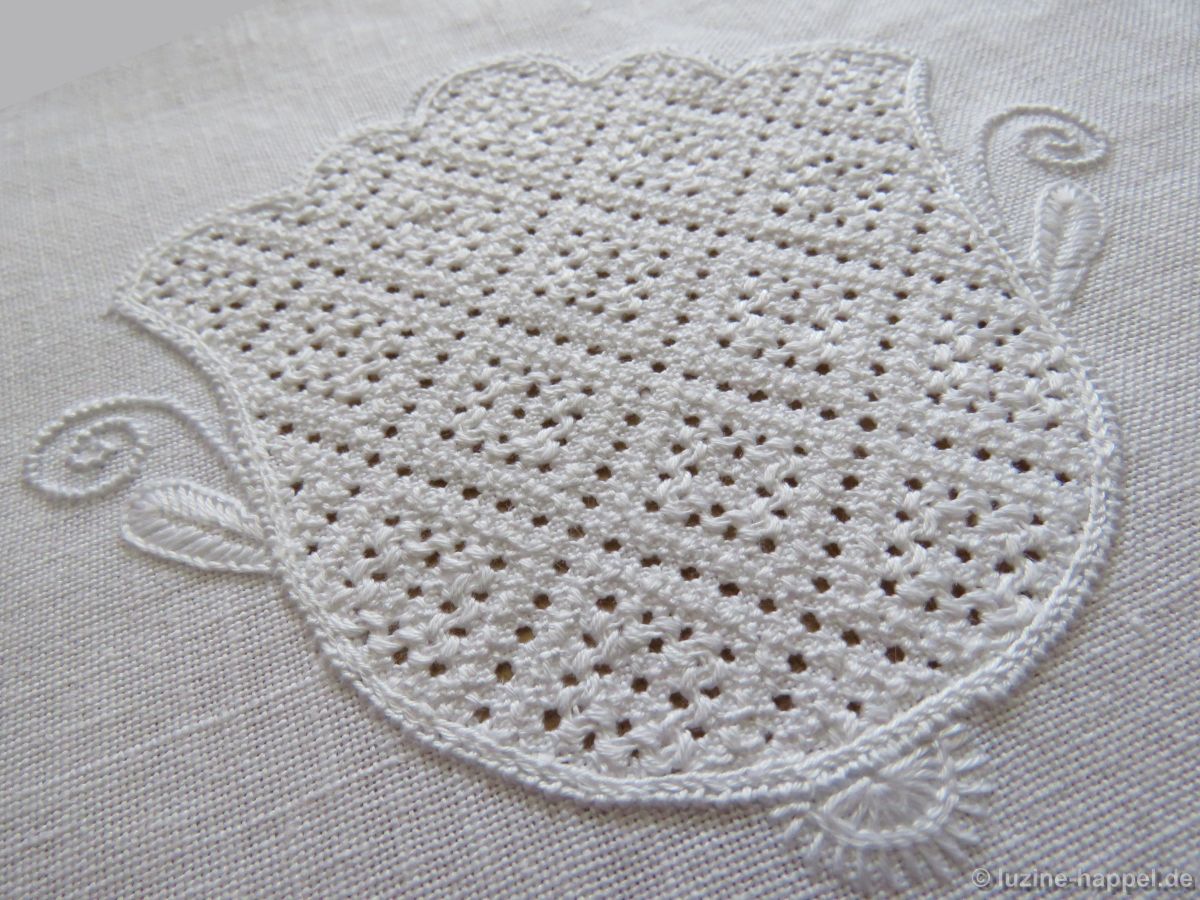
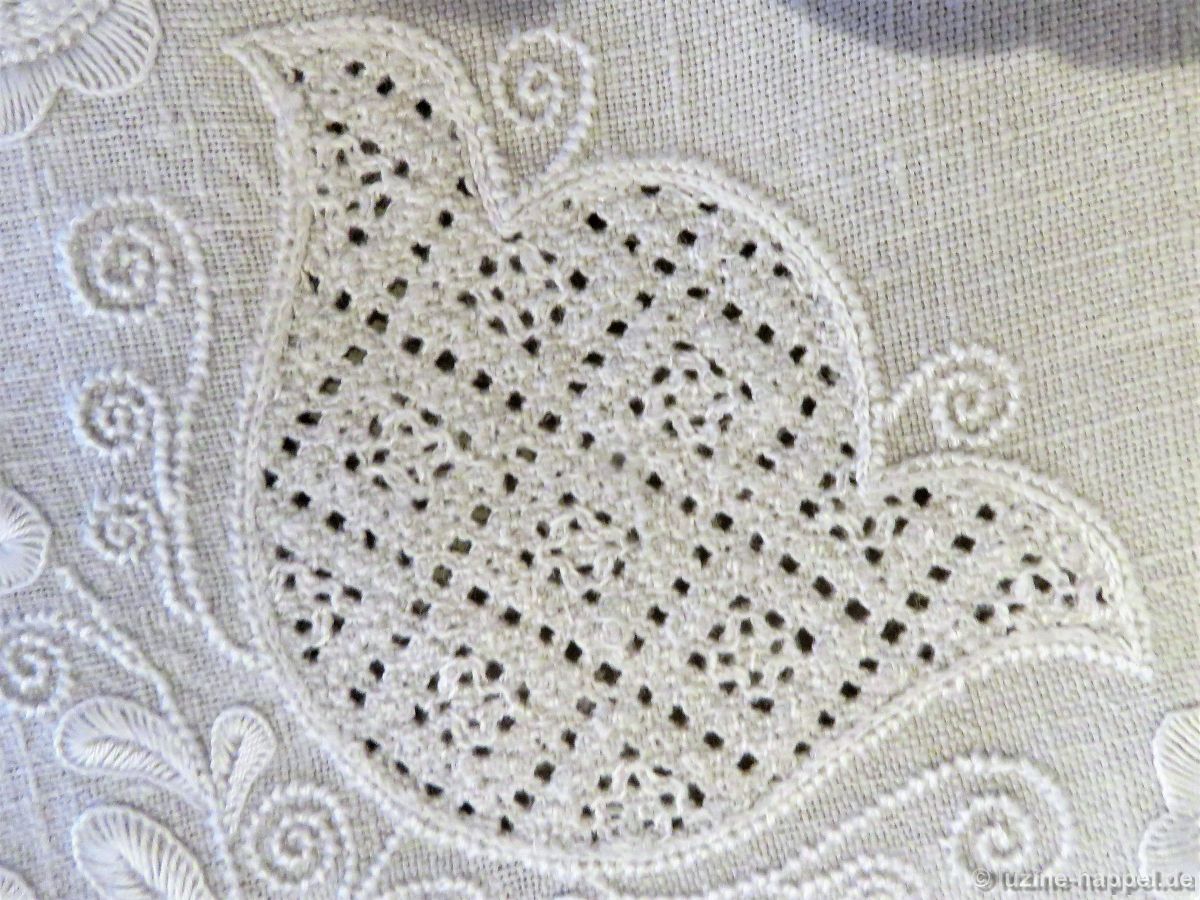
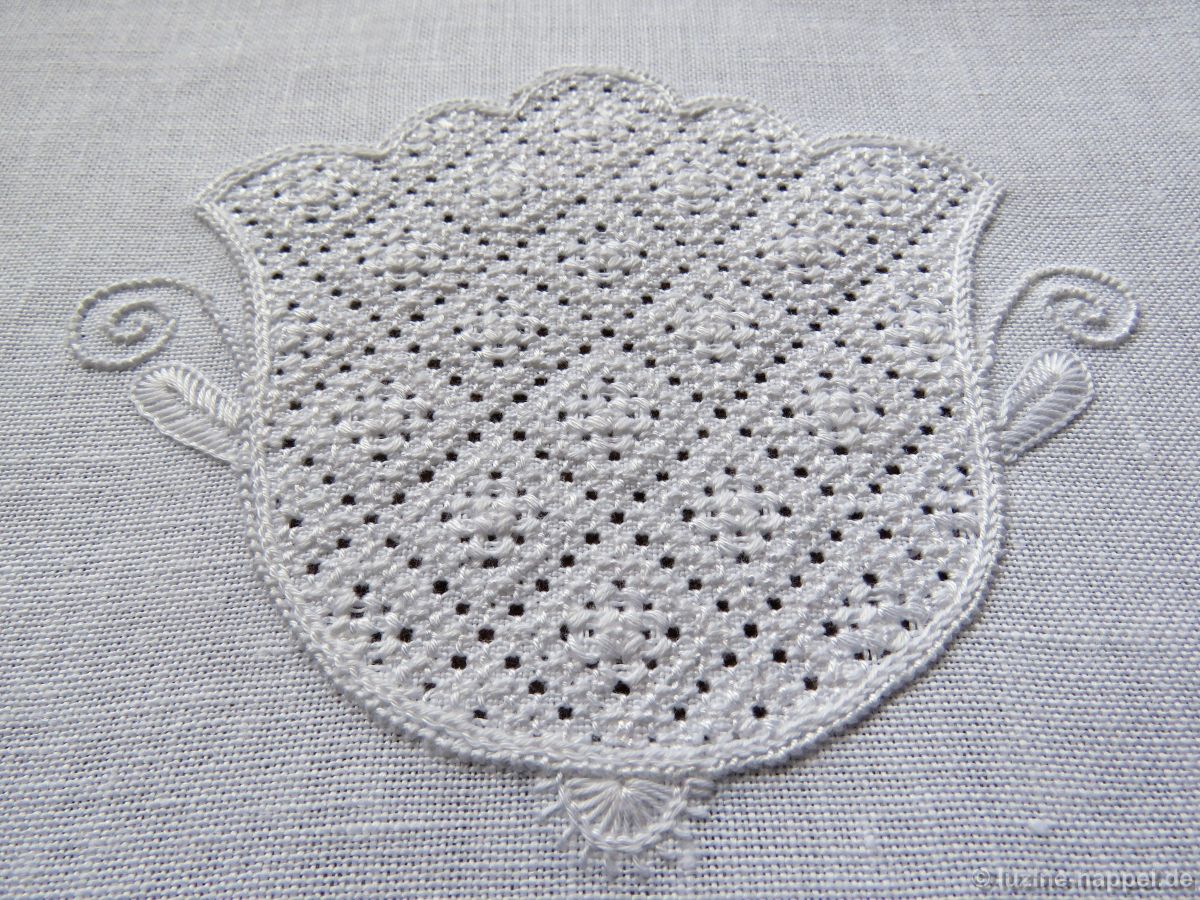
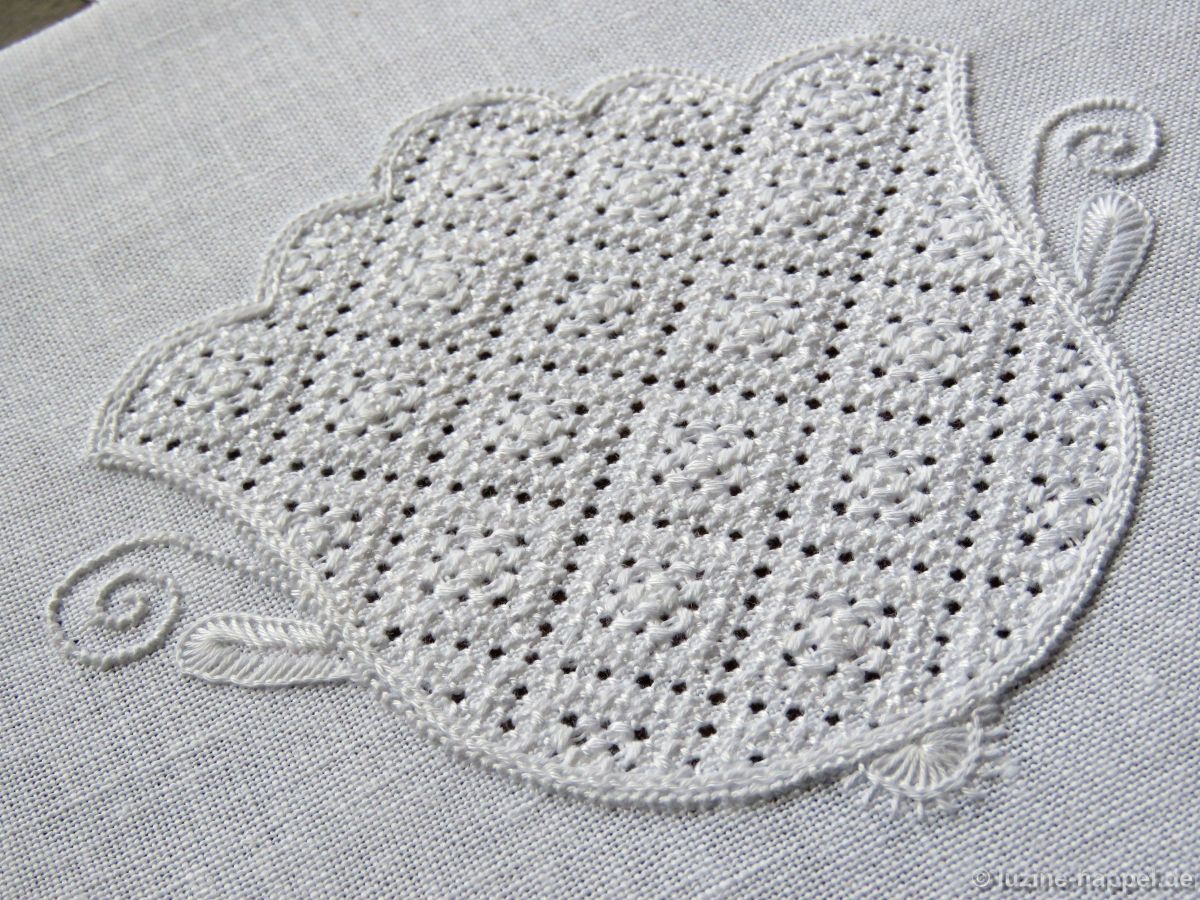
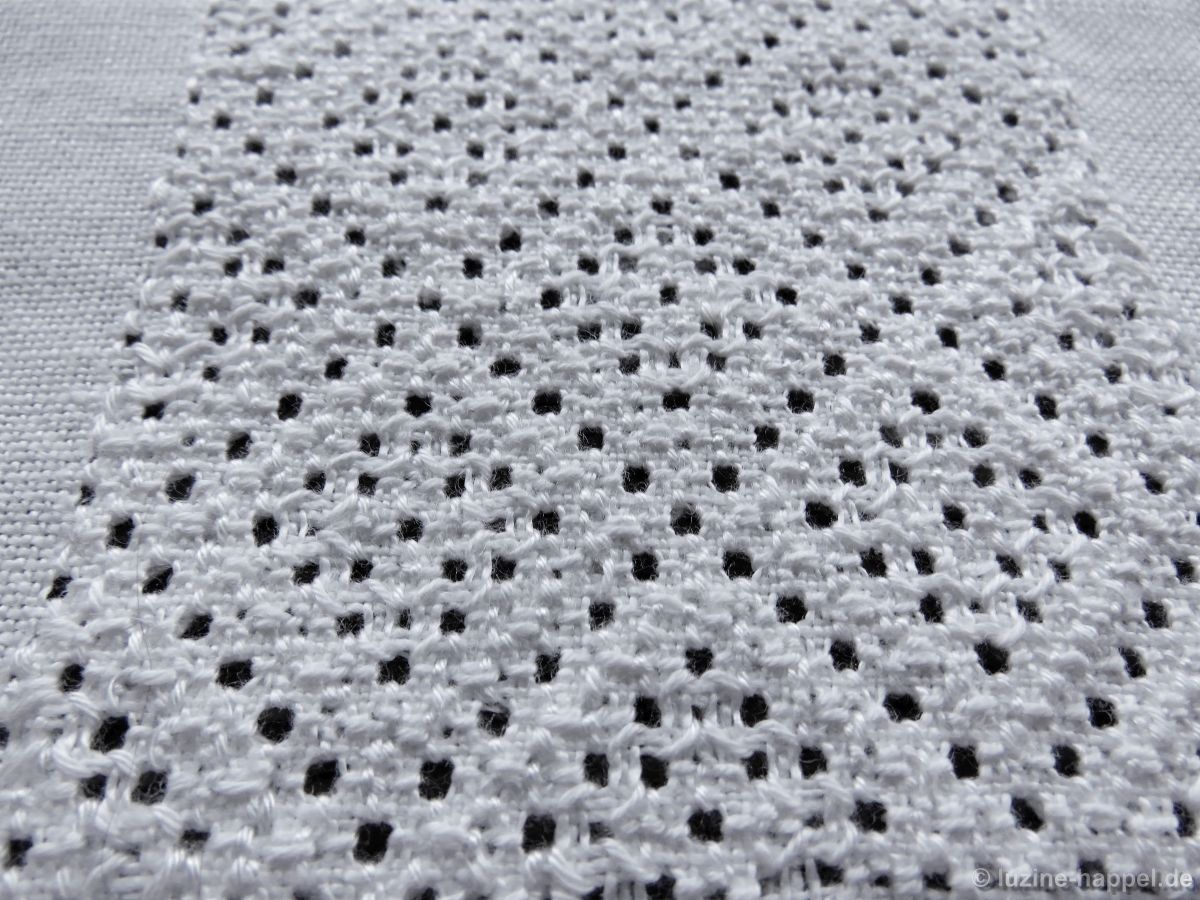
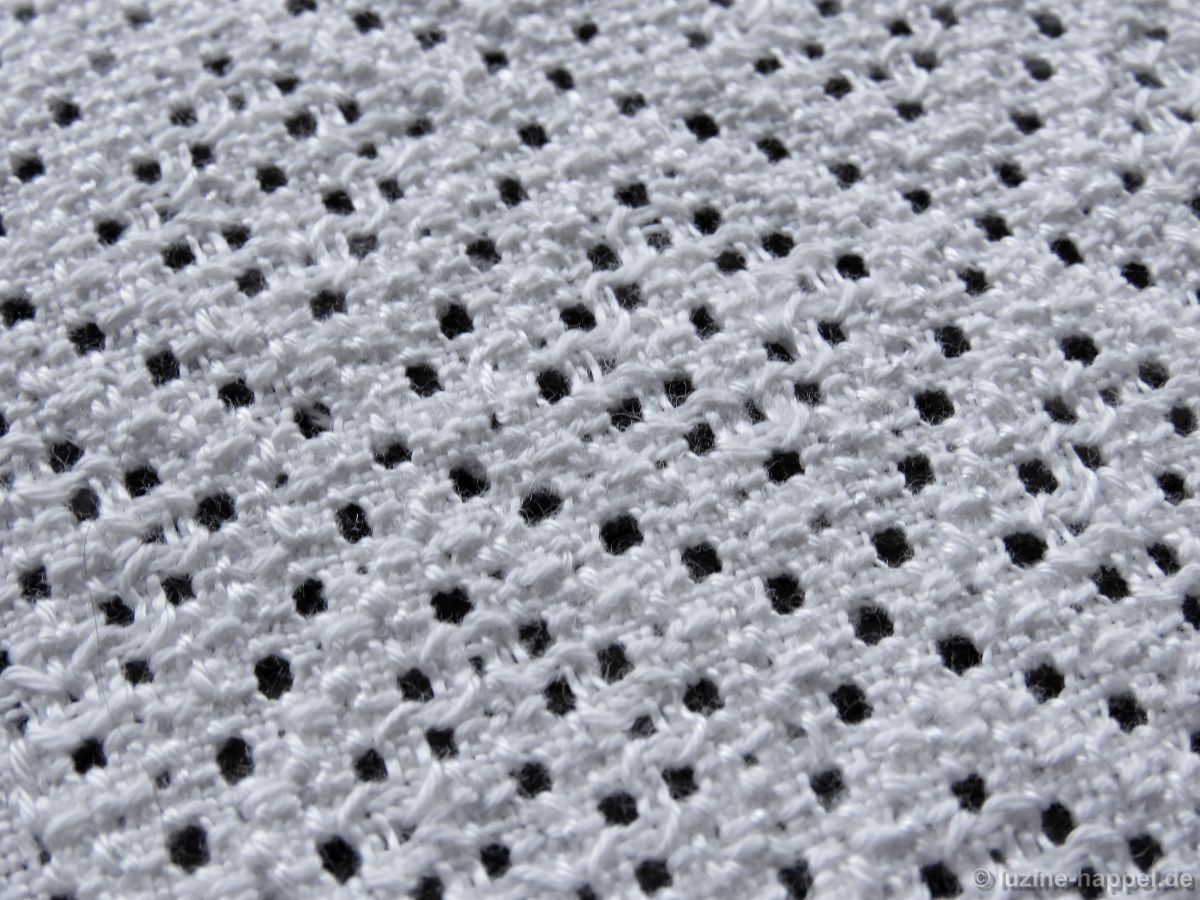
Die beiden folgenden Fotos zeigen zwei gegenüberliegende Ecken einer Mitteldecke. Eine Haupttulpe wurde mit dem Füllmuster Nr. 563 verziert,

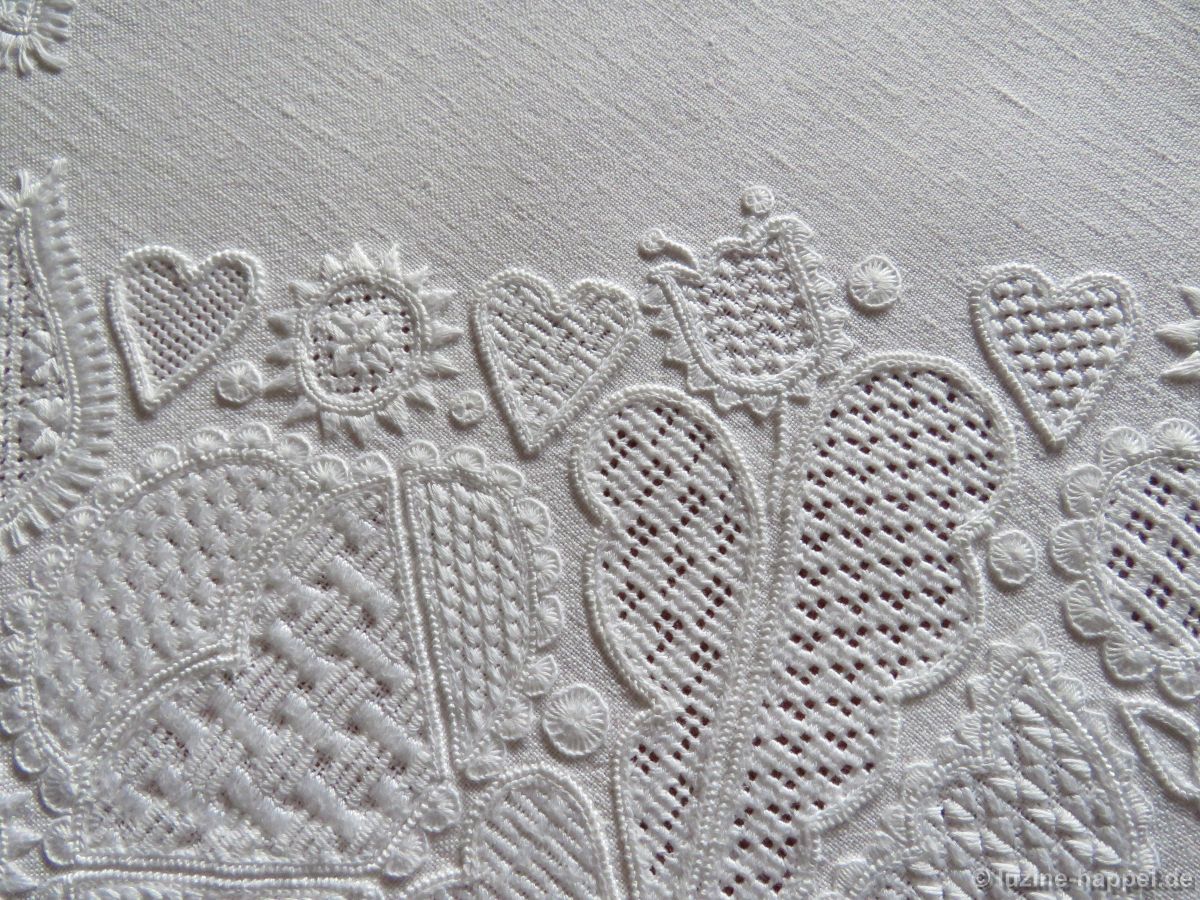
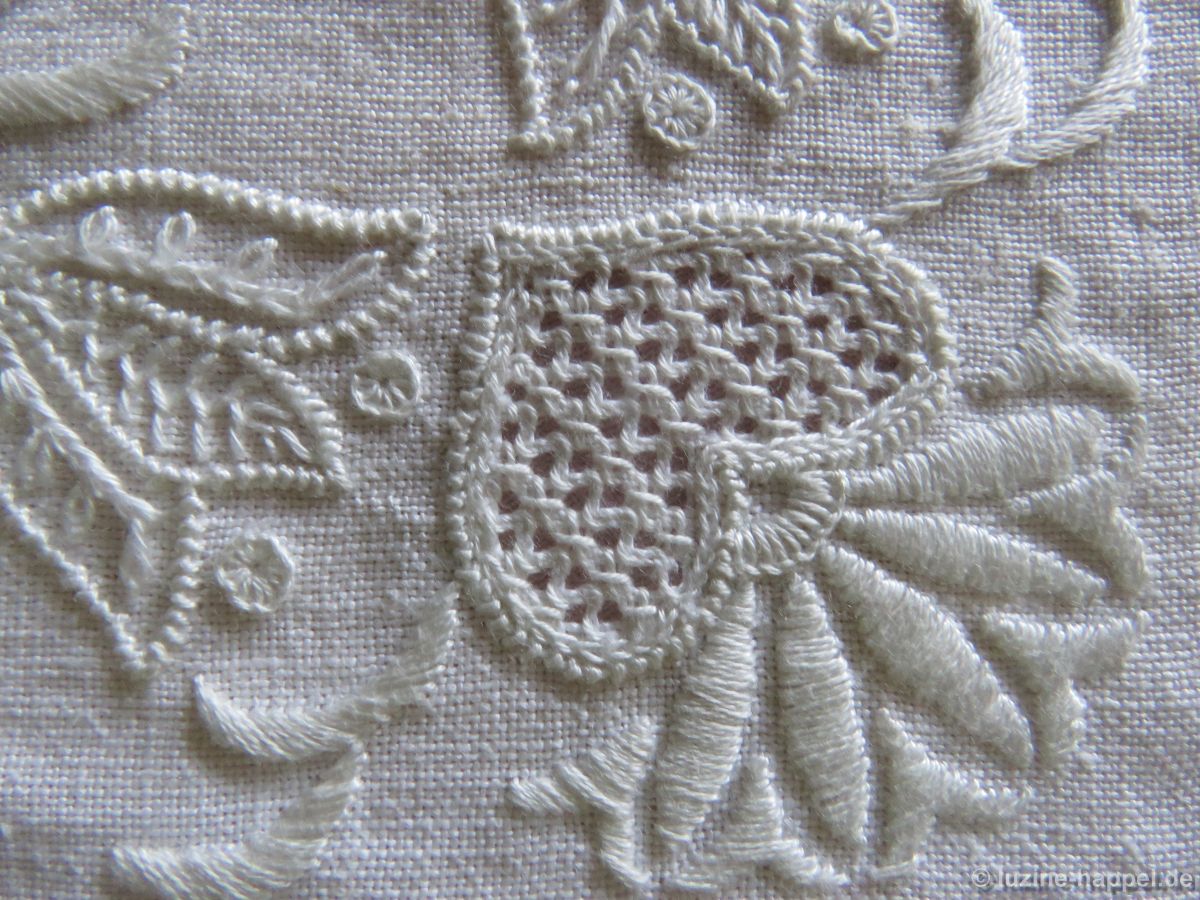
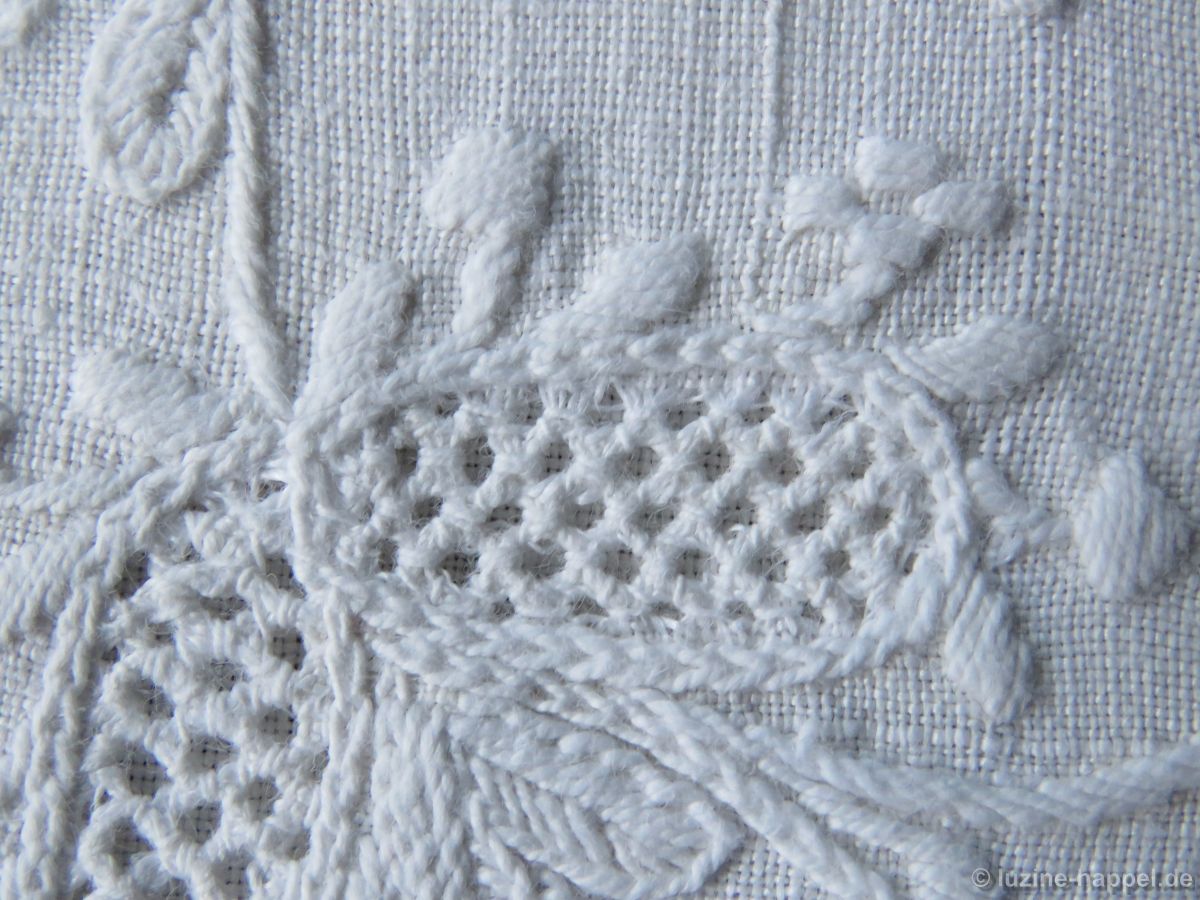
die gegenüberliegende mit dem in folgenden gezeigten Füllmuster Nr. 564. Dieses Muster ist ähnlich, aber mit einer Segmentbreite von 48 Gewebefäden noch etwas ausladender.

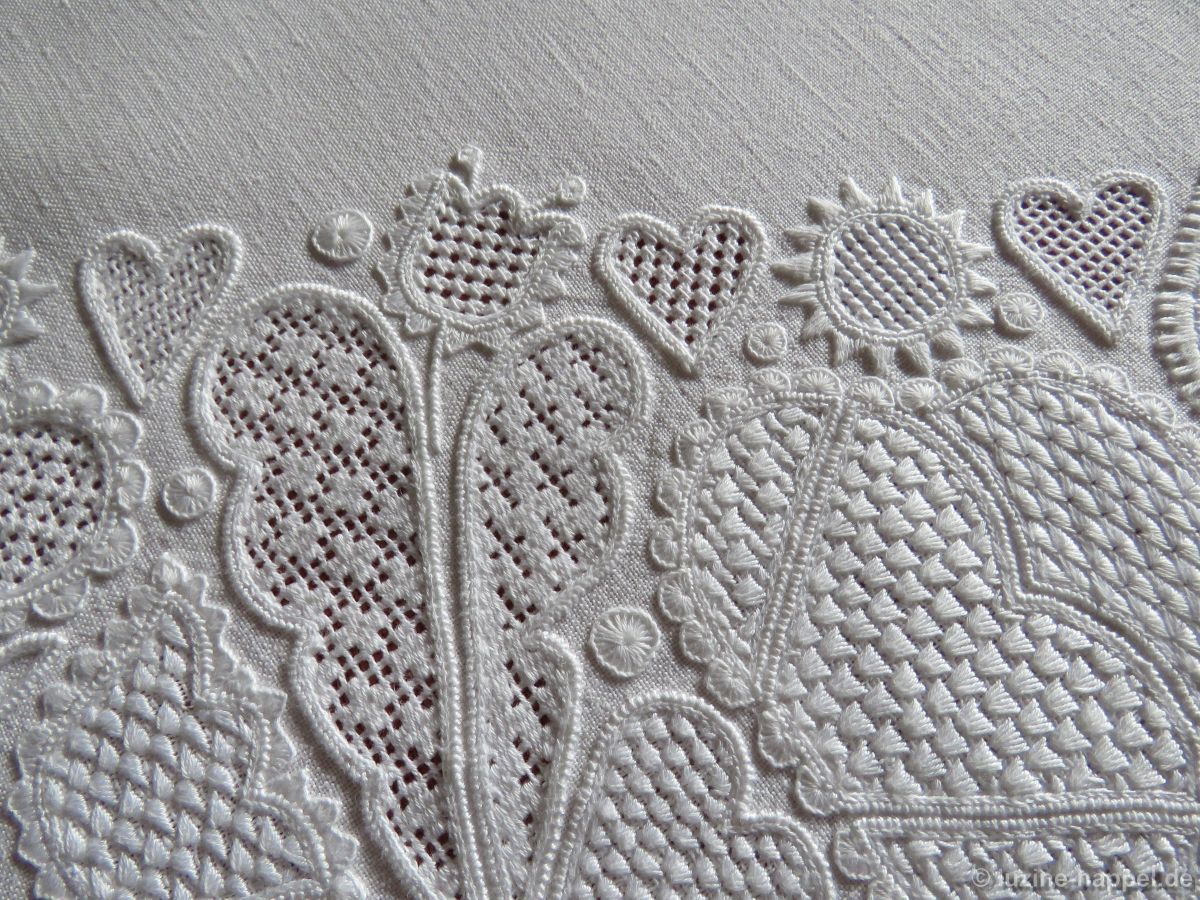
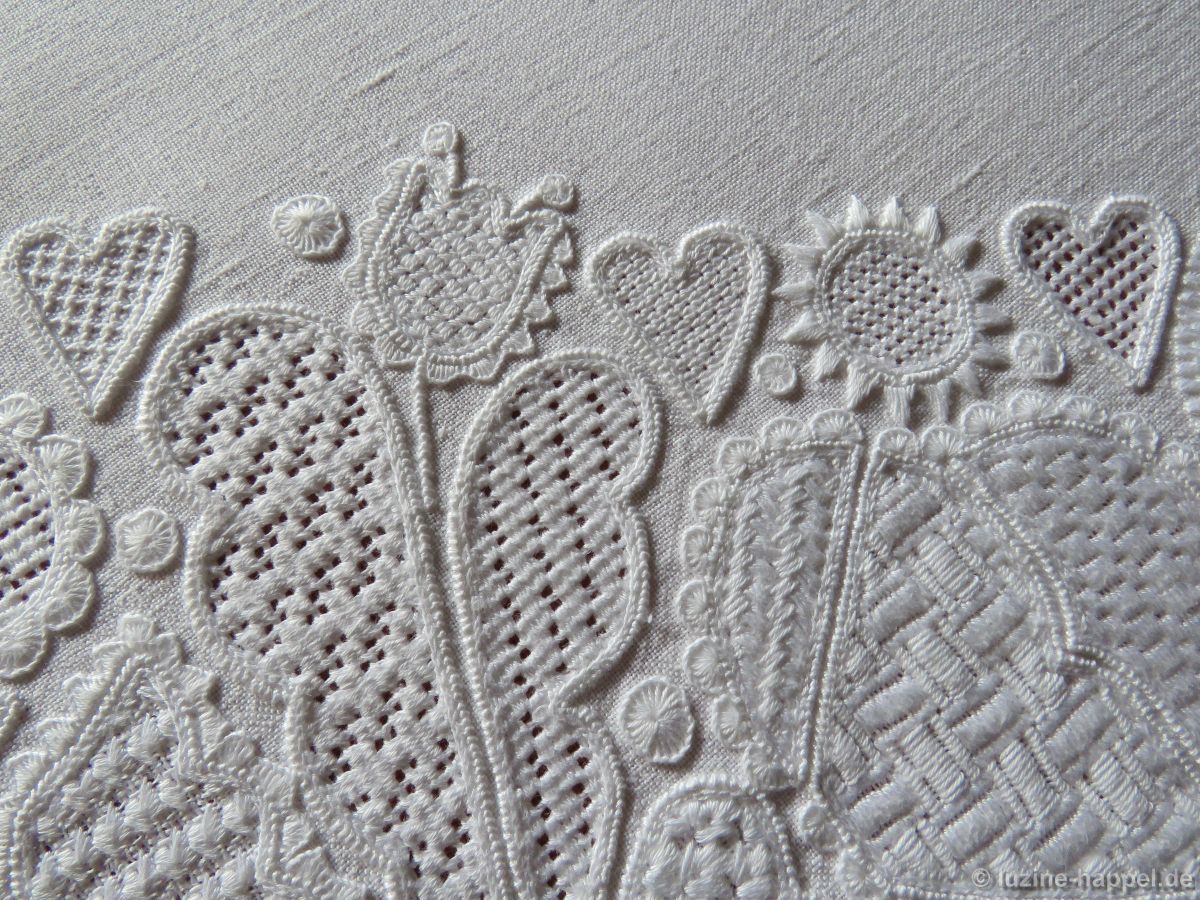
Weitere Beispiele für die unterschiedliche Anordnung der gleichen oder ählicher Flächenfüllmuster finden sich hier:
Vielfalt der Schwälmer Weißstickerei
Eine bildhübsche Schwälmer Mitteldecke
Ein Schwälmer Muster-Bild (Bilder 3 und 4)
Übergang von früher zu späterer Schwälmer Weißstickerei (1) (Bild 1)
Frühe Schwälmer Weißstickerei – Ein wunderschöner Tischläufer (Bild 1)
Historische Schwälmer Miederärmel-Stickerei (B) (Bild 1)
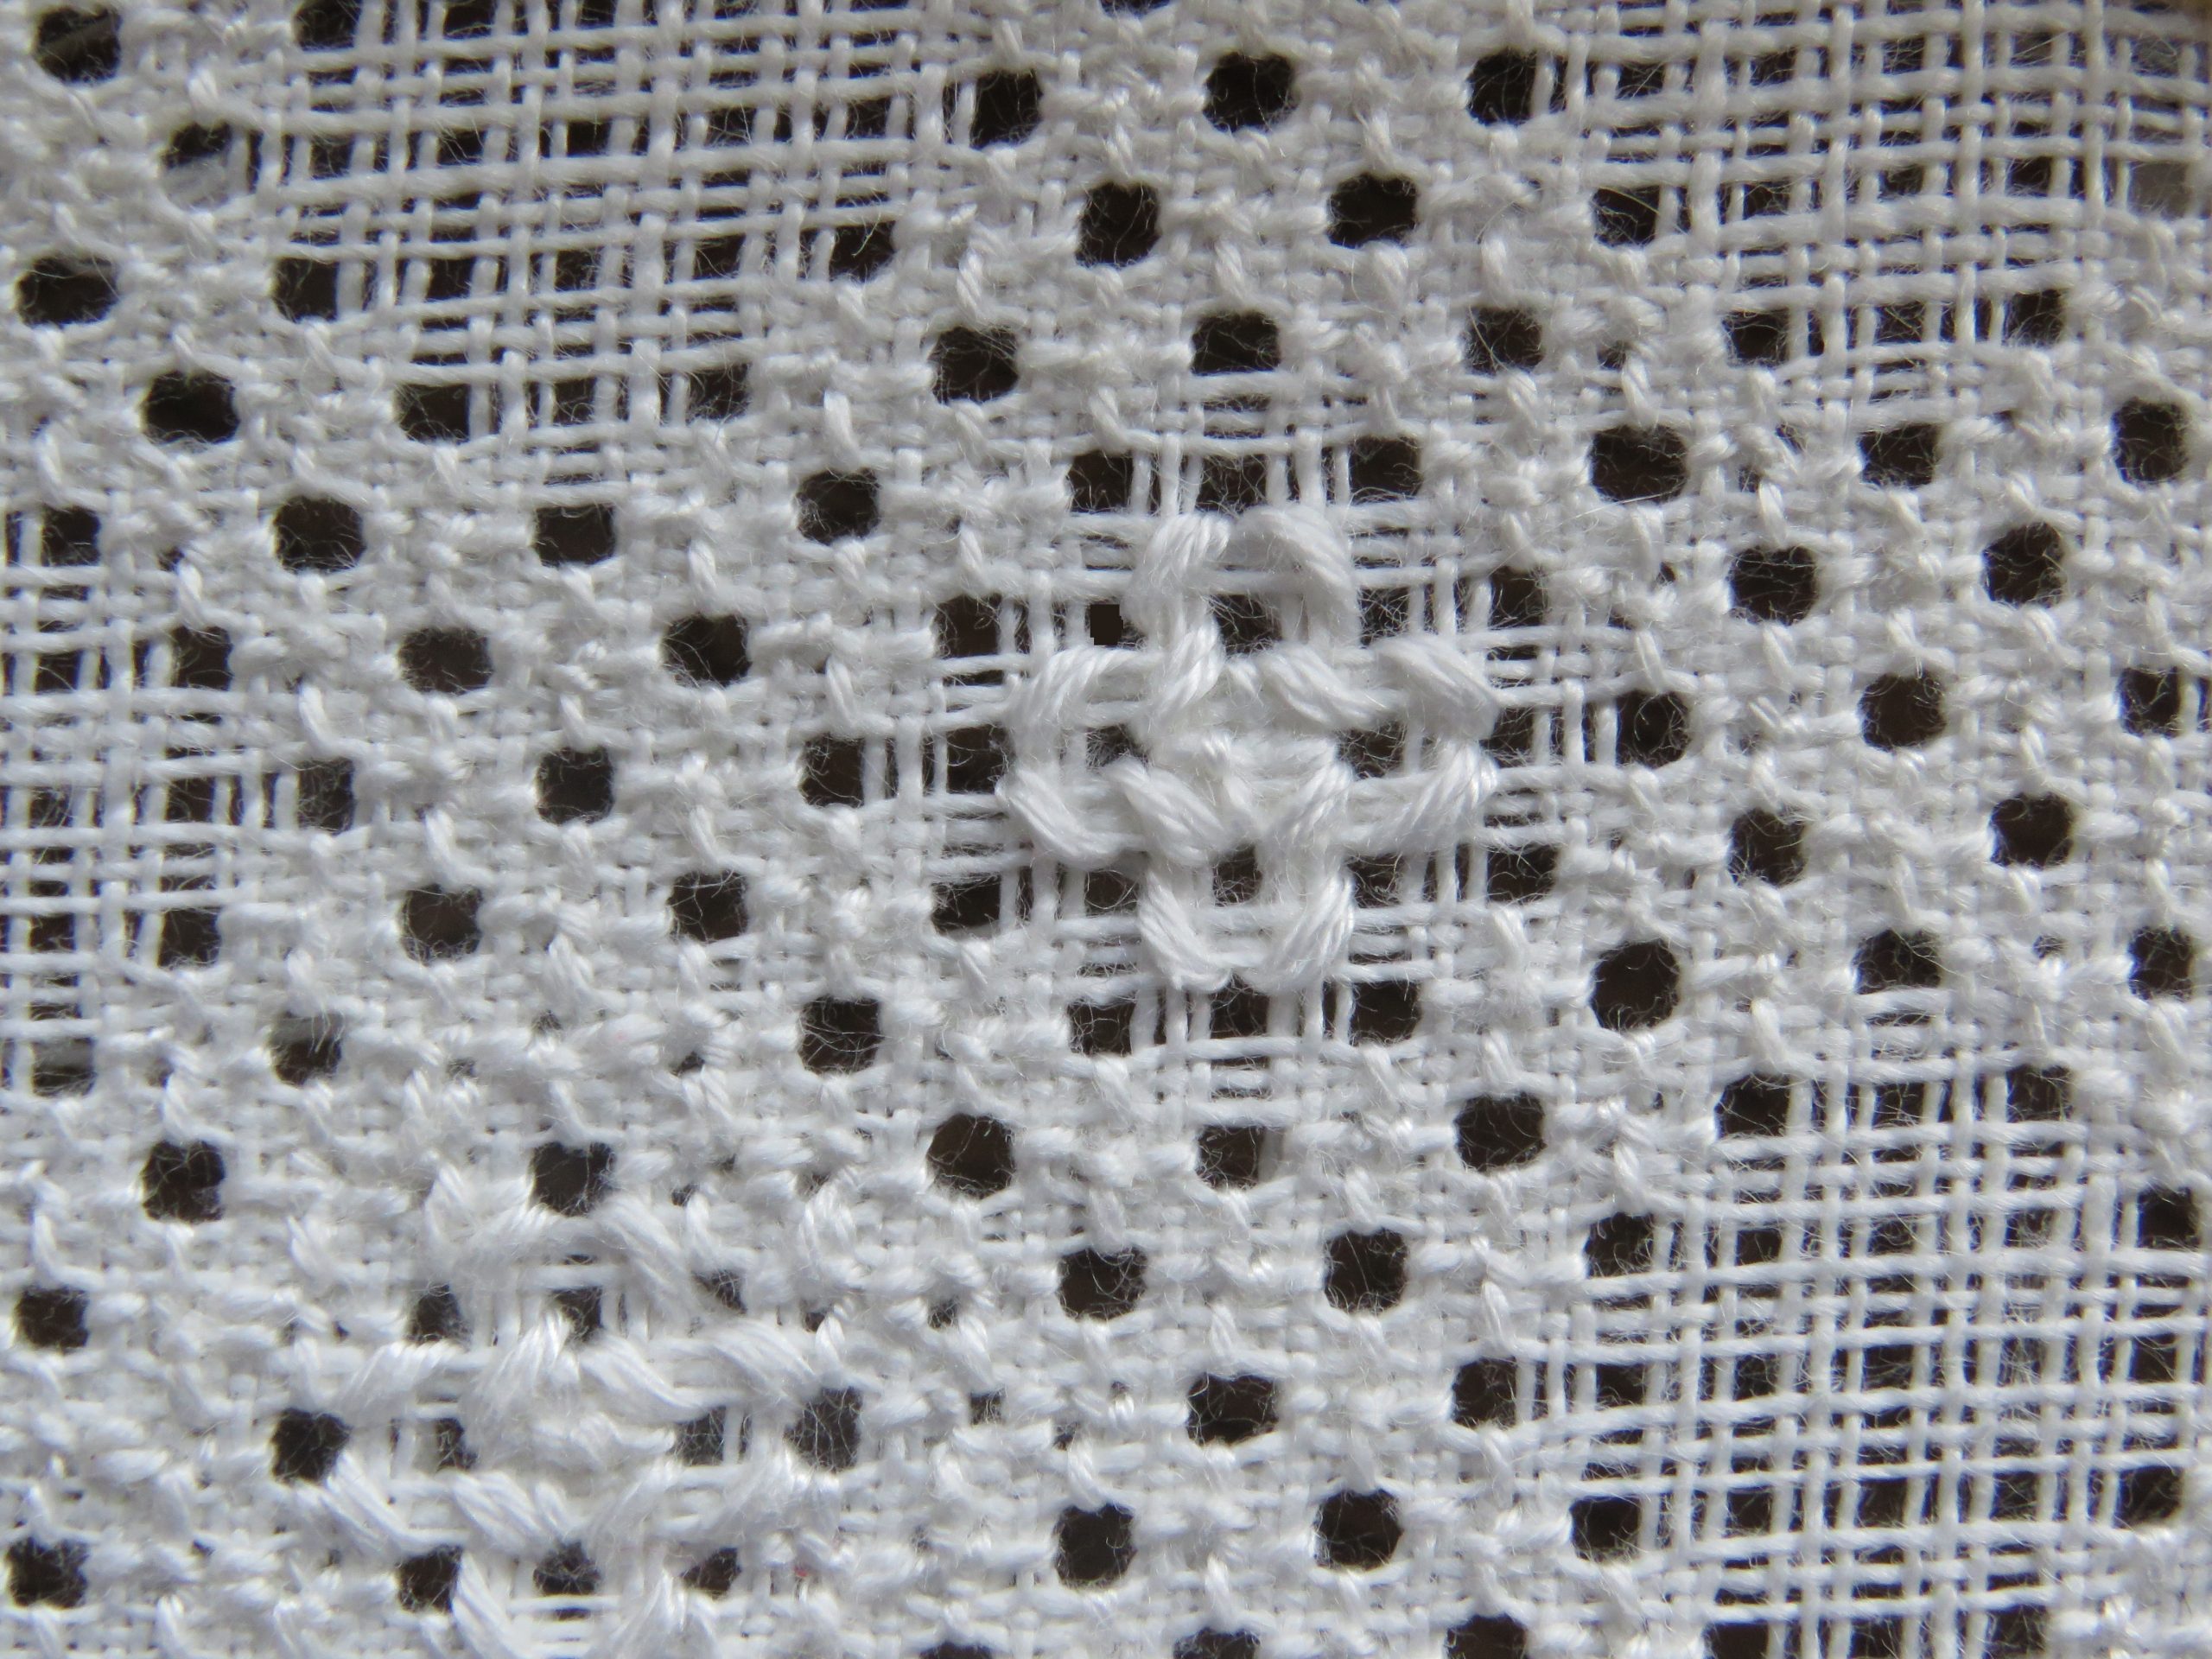
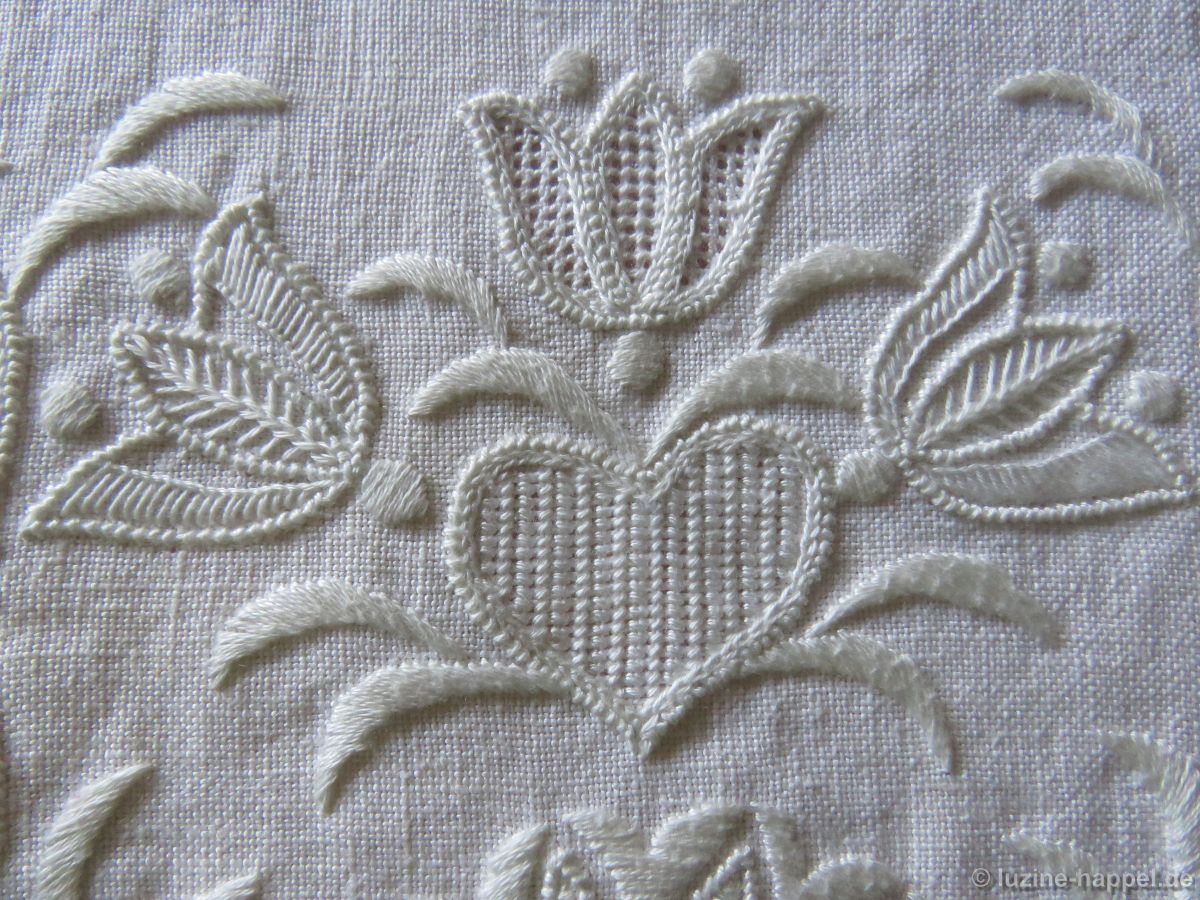
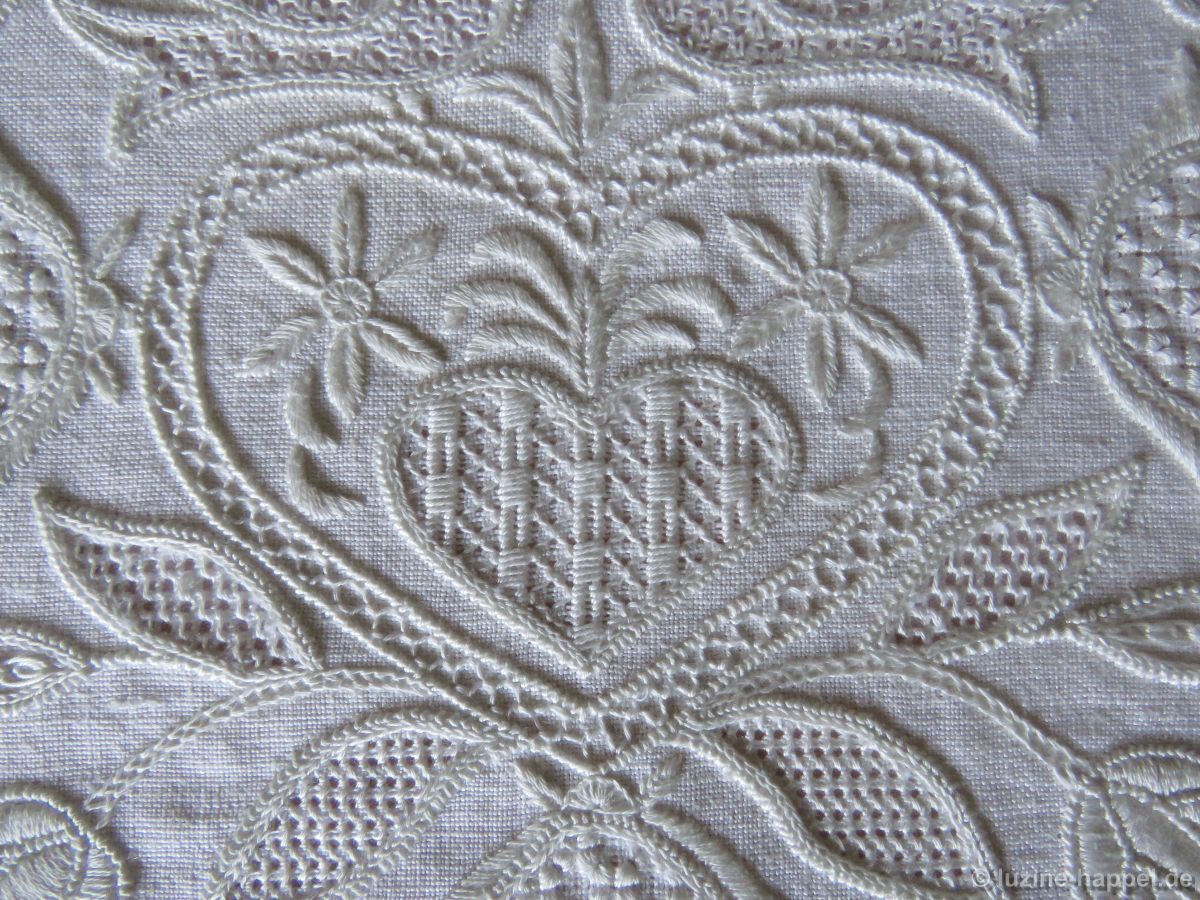
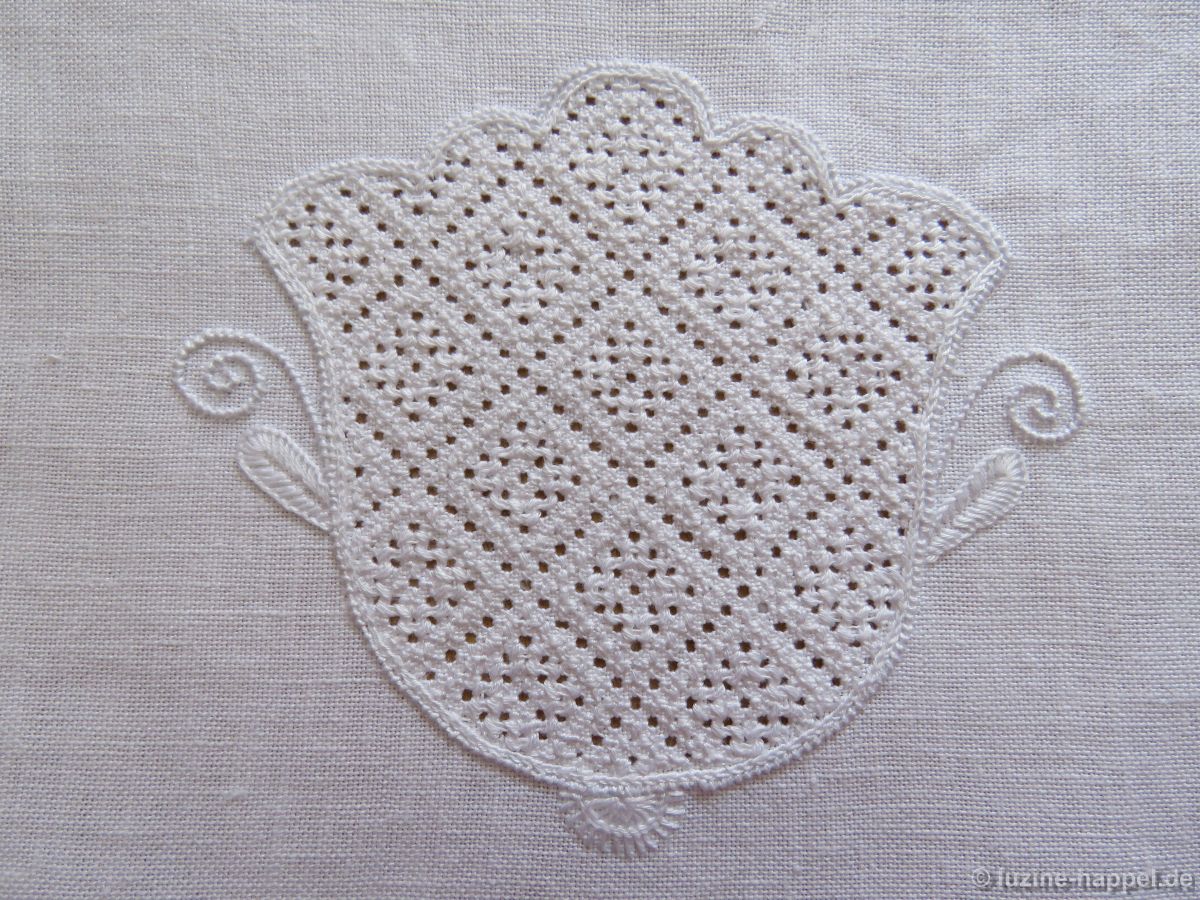
Doch nun zum Muster selbst. Hier gezeigt wird zuerst nur eine Arbeitsprobe. Eingebettet in eine Motivfläche findet man das Muster am Ende dieses Beitrages.
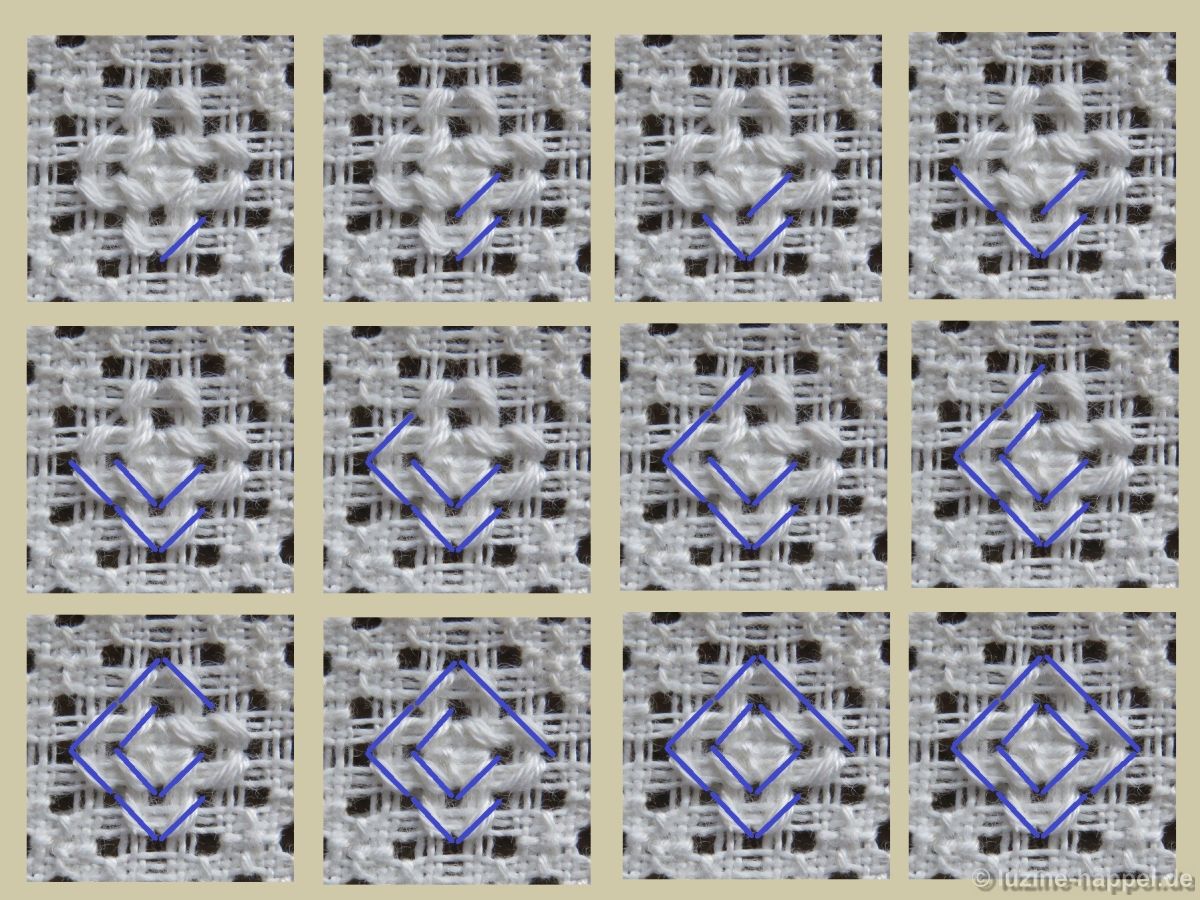
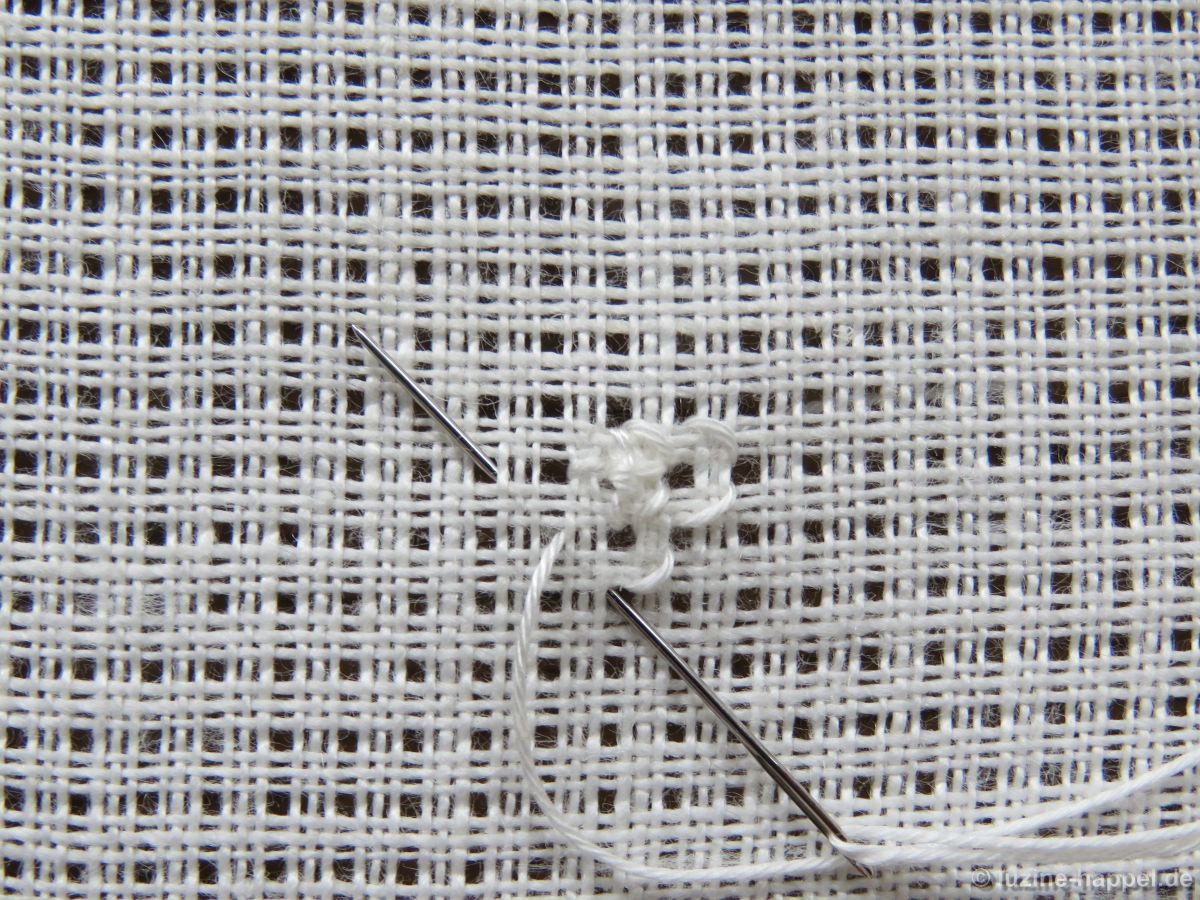
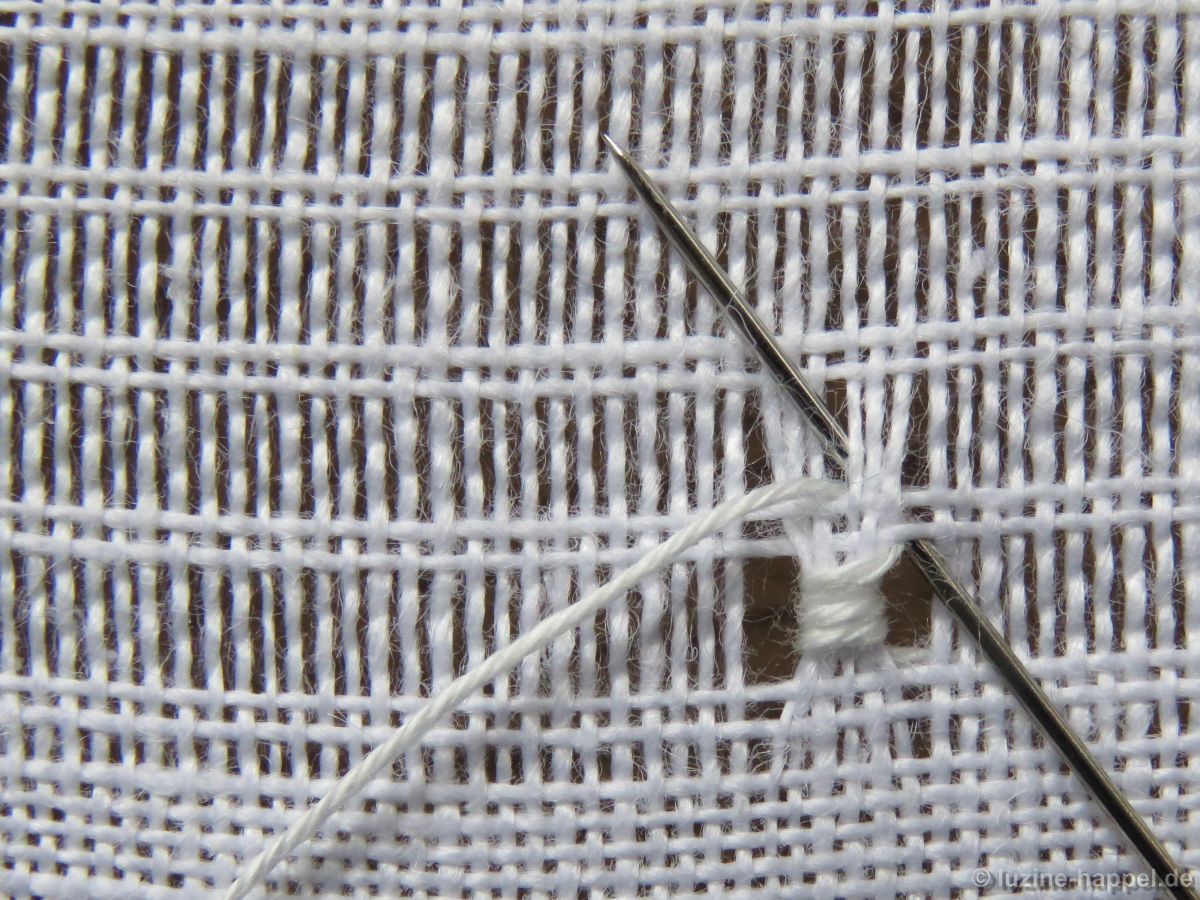
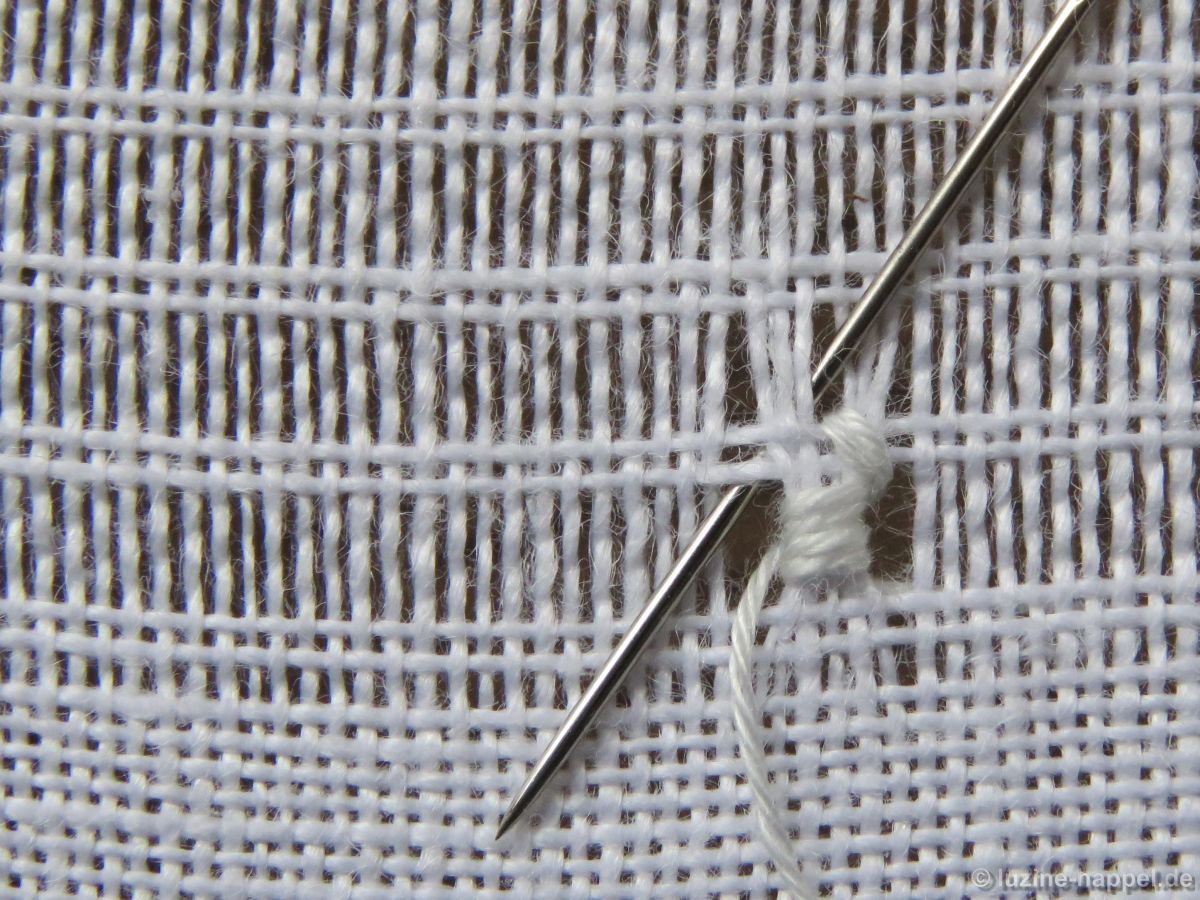
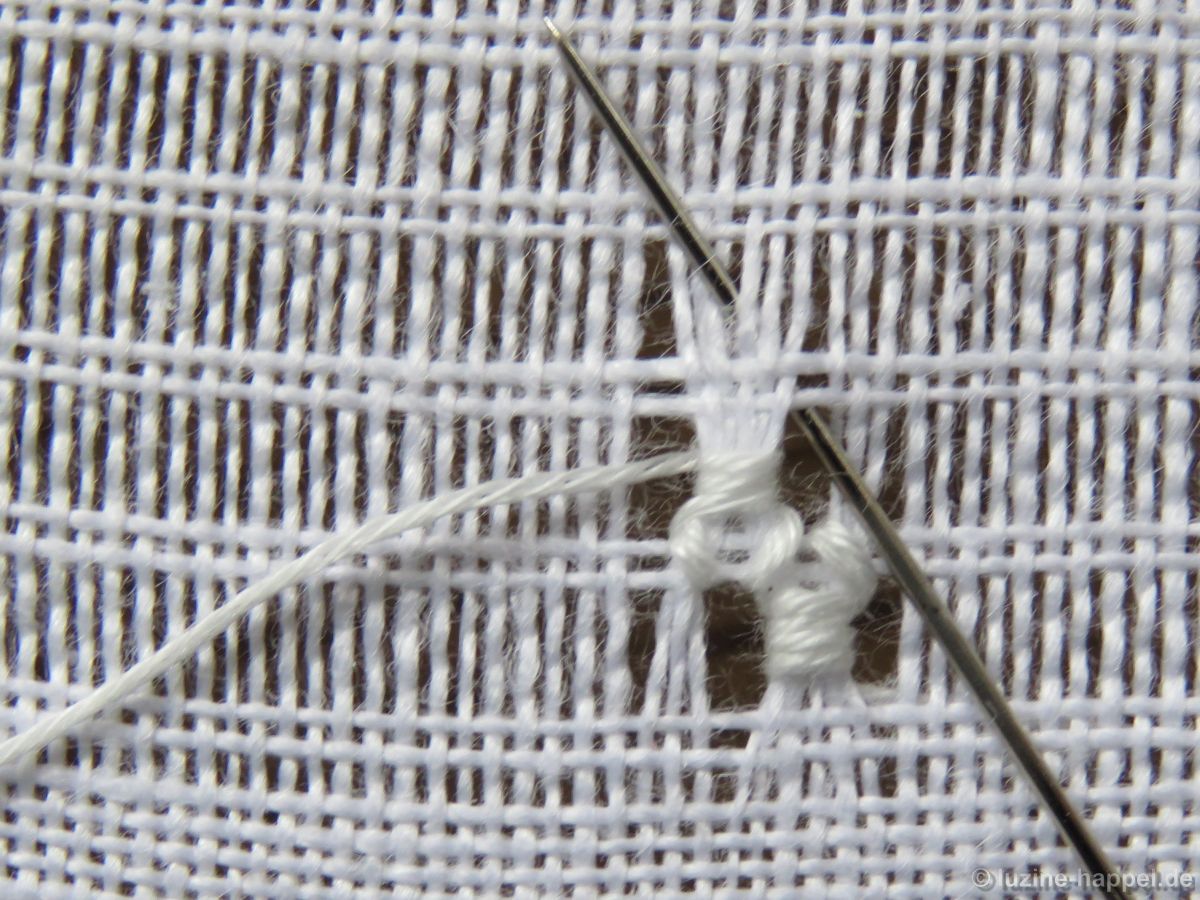
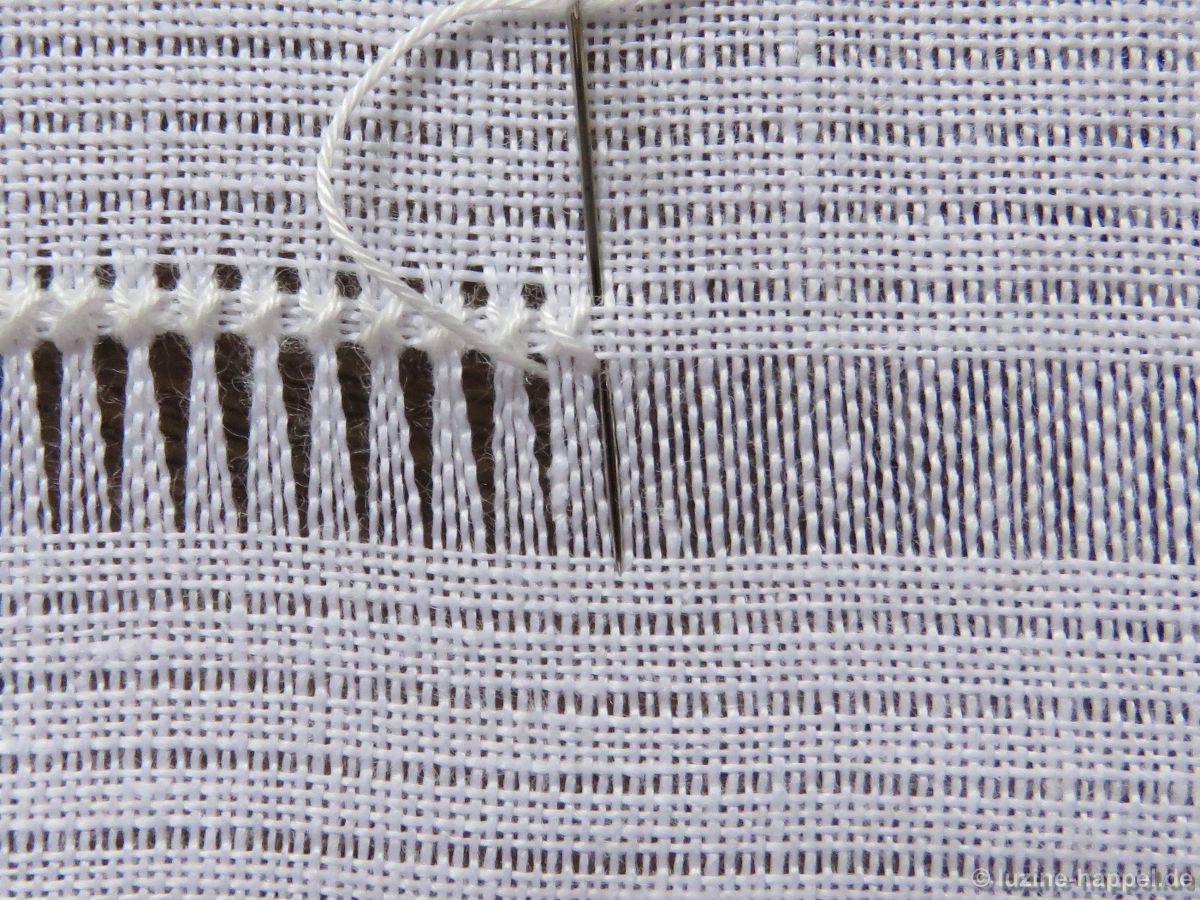
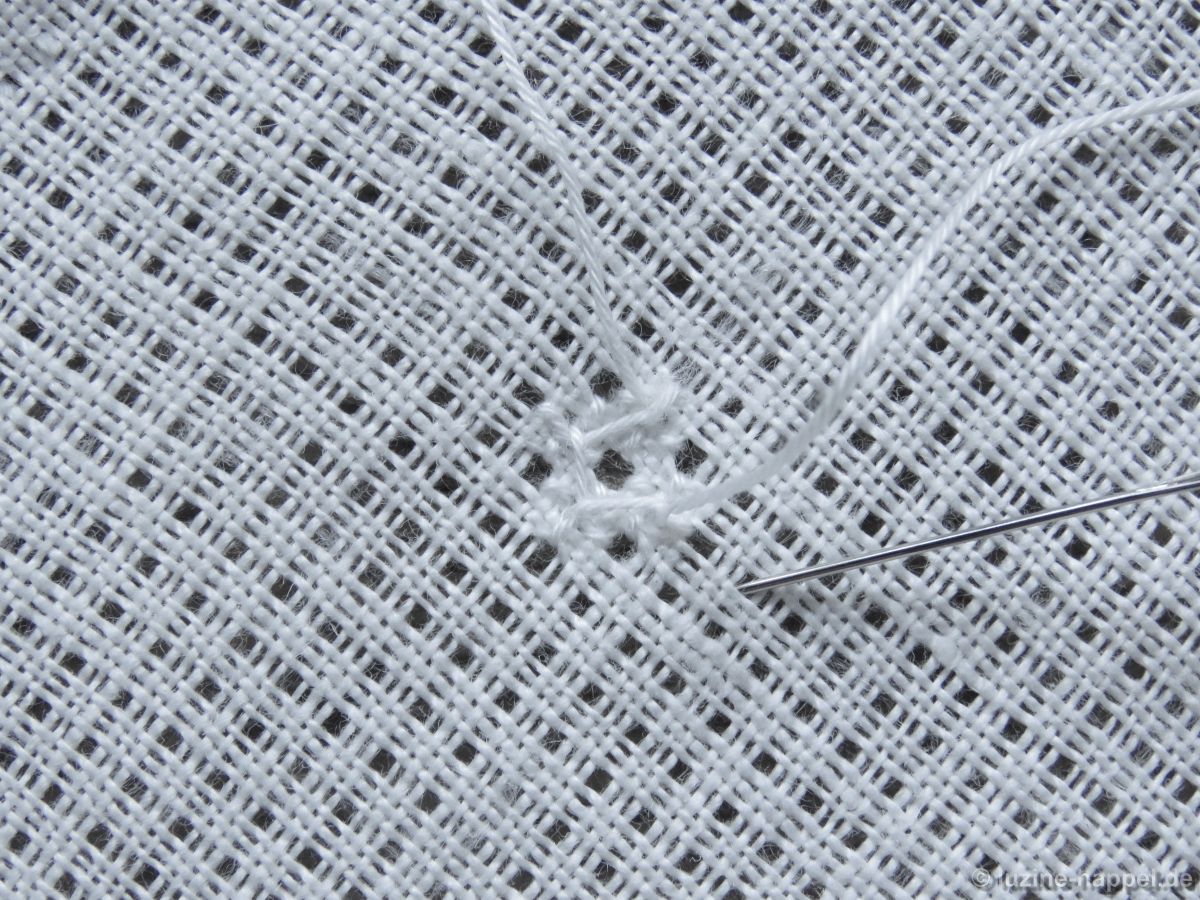
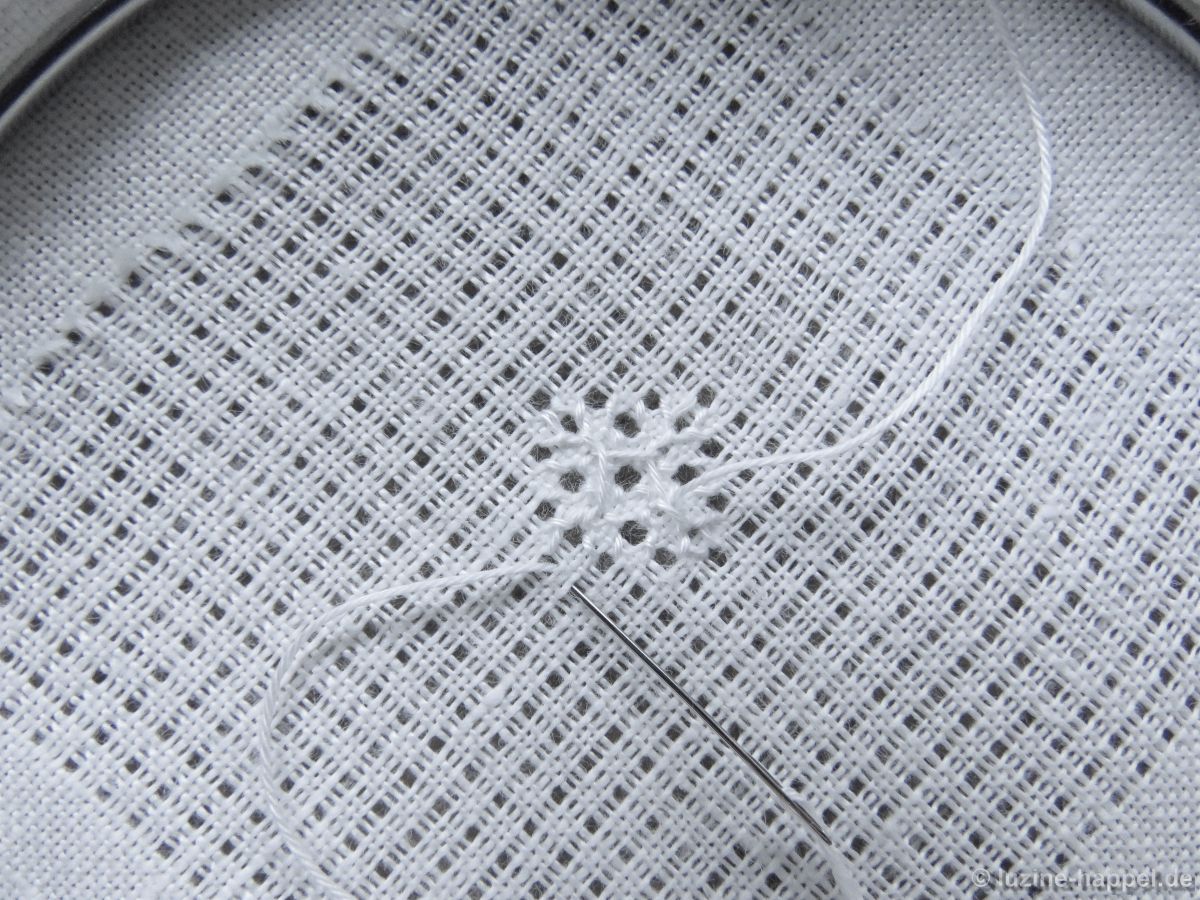
Zuerst erstellt man ein Limet-Fadengitter mit einer Kreuzung zweier Fadenrinnen im Zentrum, indem man sowohl horizontal als auch vertikal jeden vierten Faden auszieht.
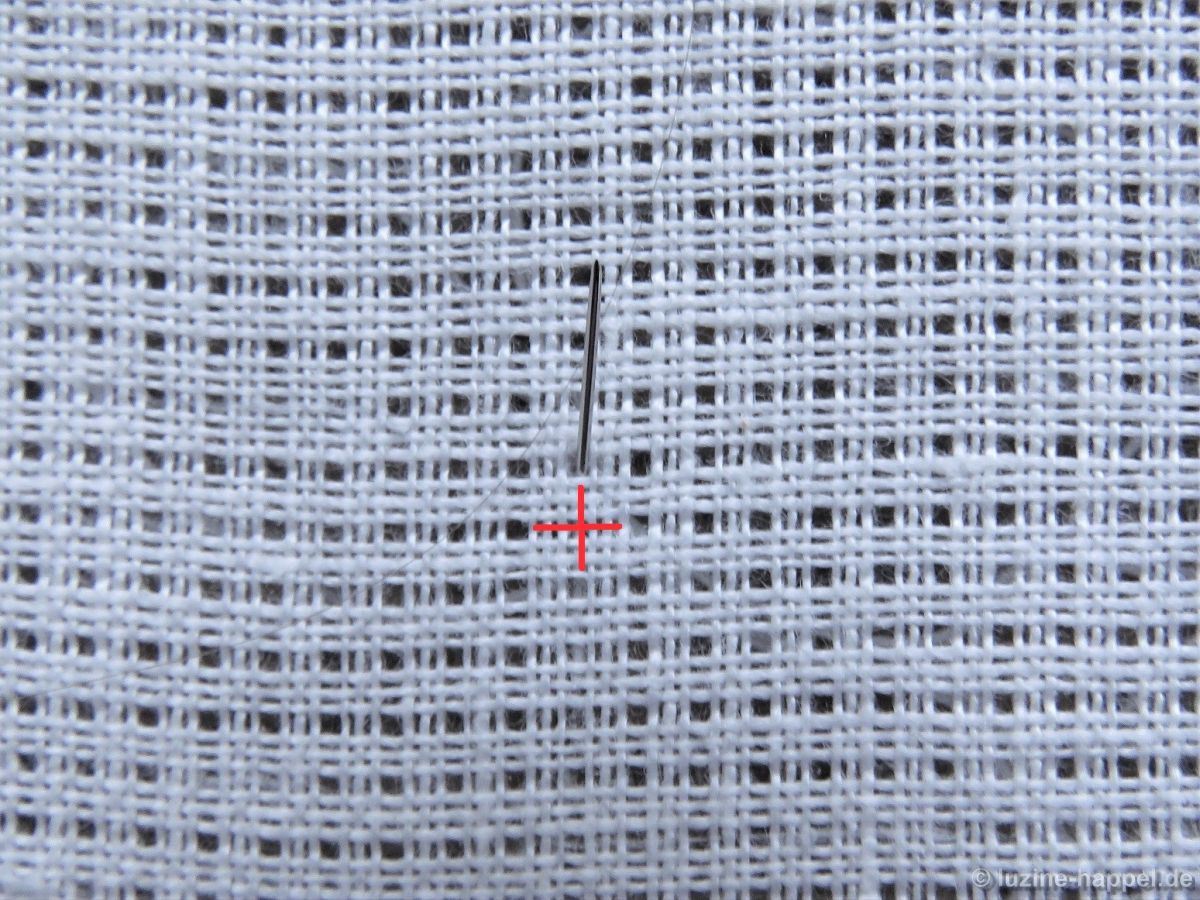
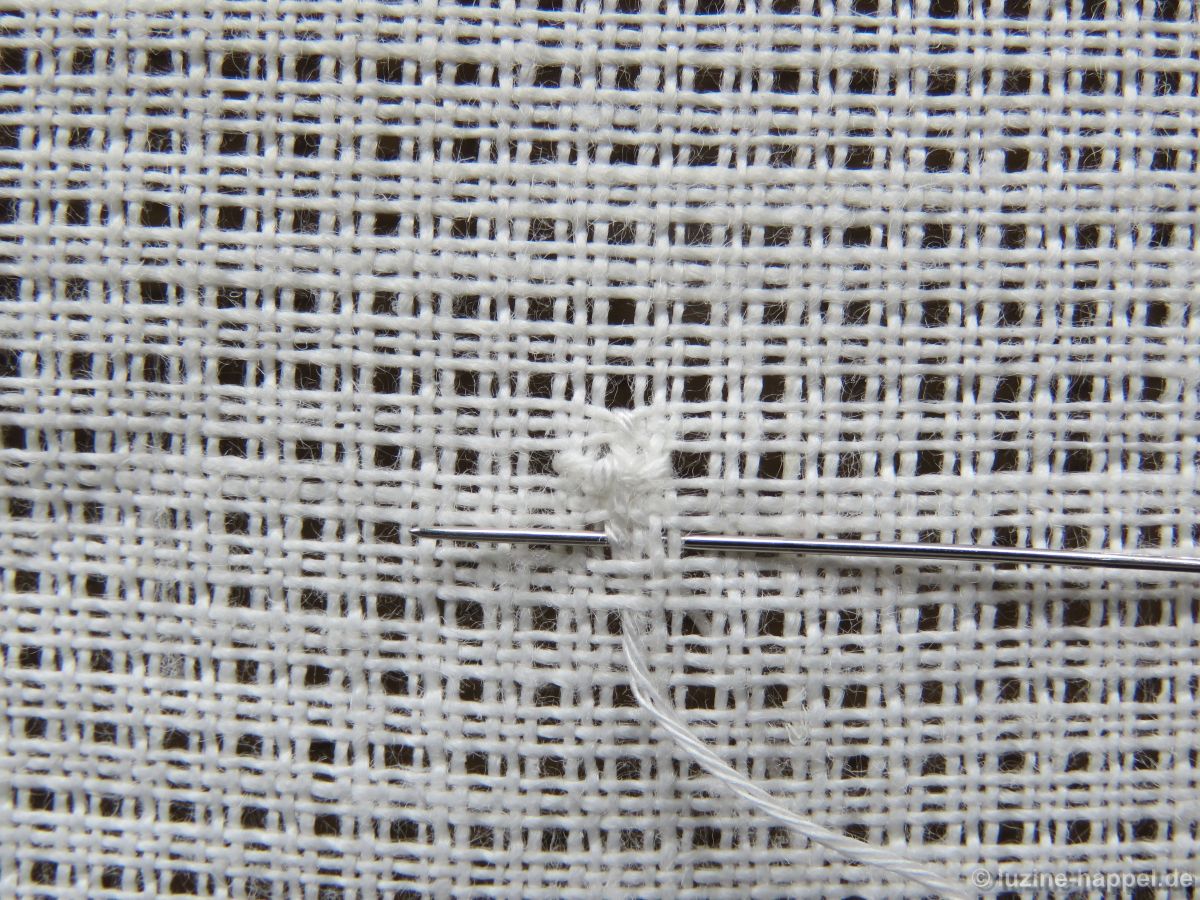
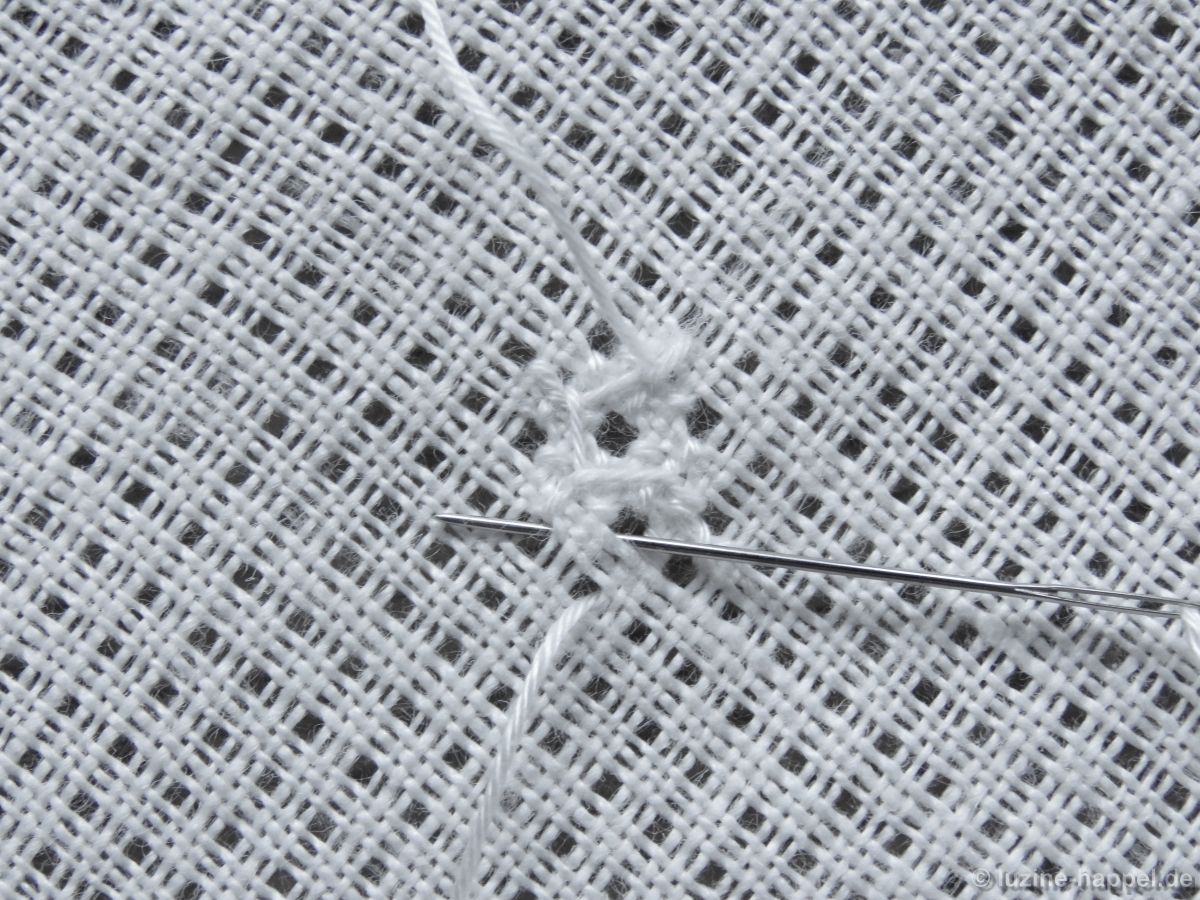
Man sticht ein Kästchen oberhalb des Mittelpunktes aus und arbeitet von dort aus einen Rosenstich. Drei weitere Rosenstiche, jeweils im gleichen Abstand, werden um den Mittelpunkt herum gearbeitet.

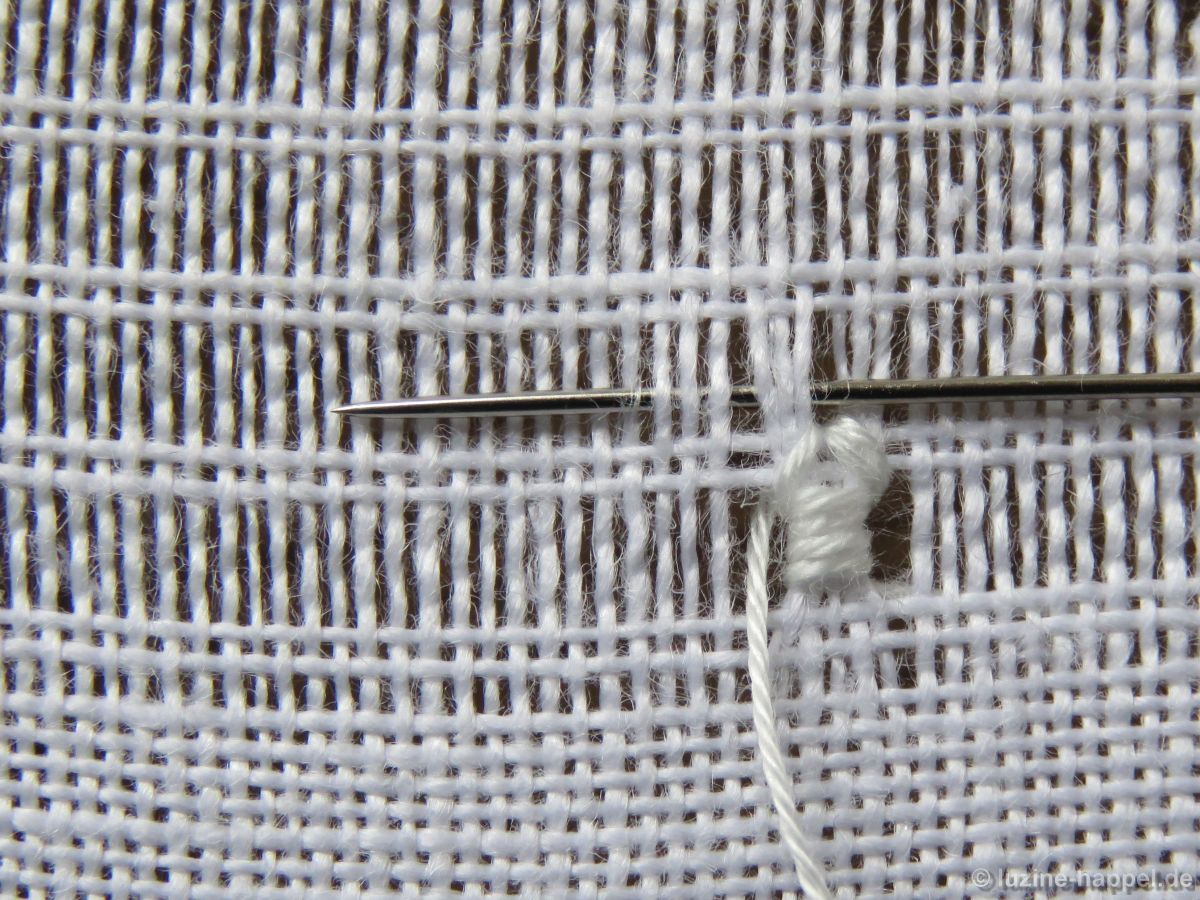
Nach Beendigung des vierten Rosenstiches verbleibt die Nadel auf der Rückseite.
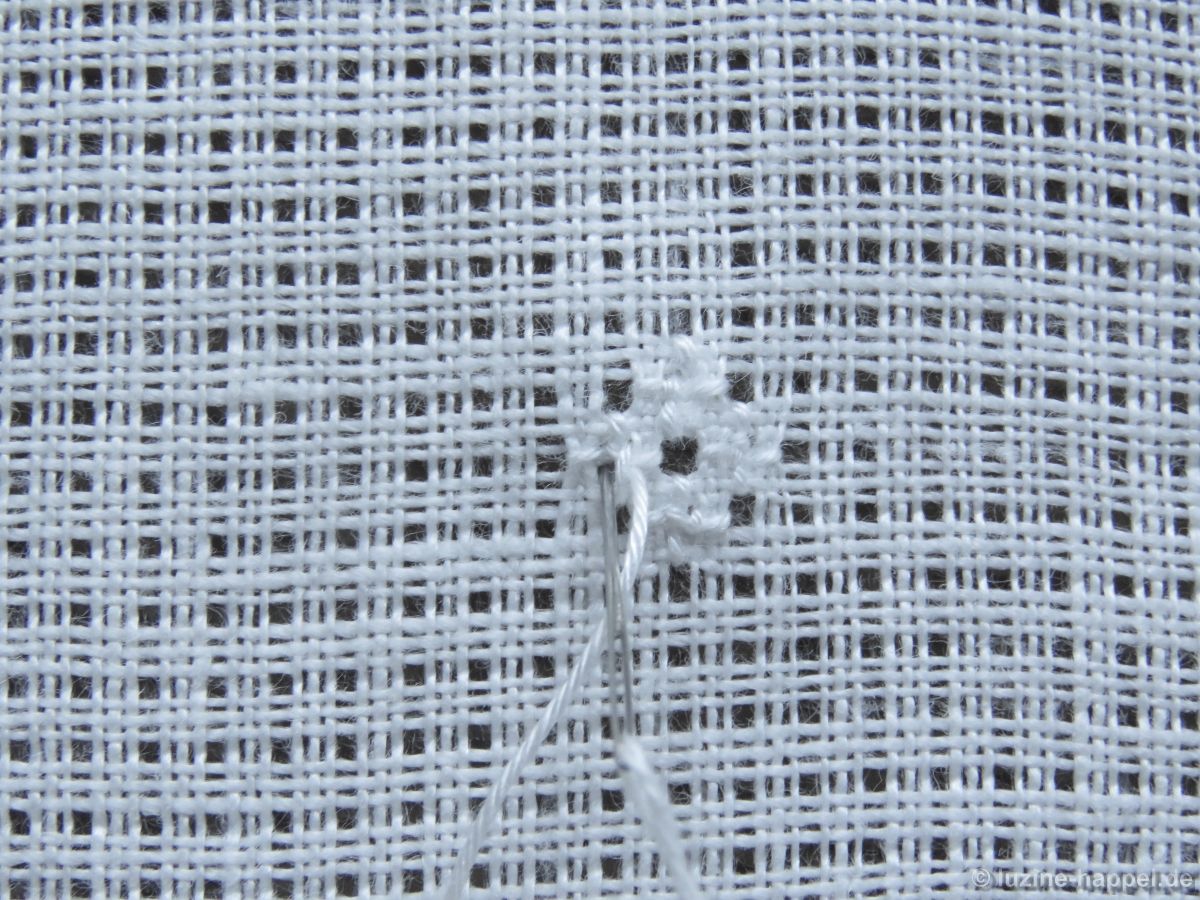
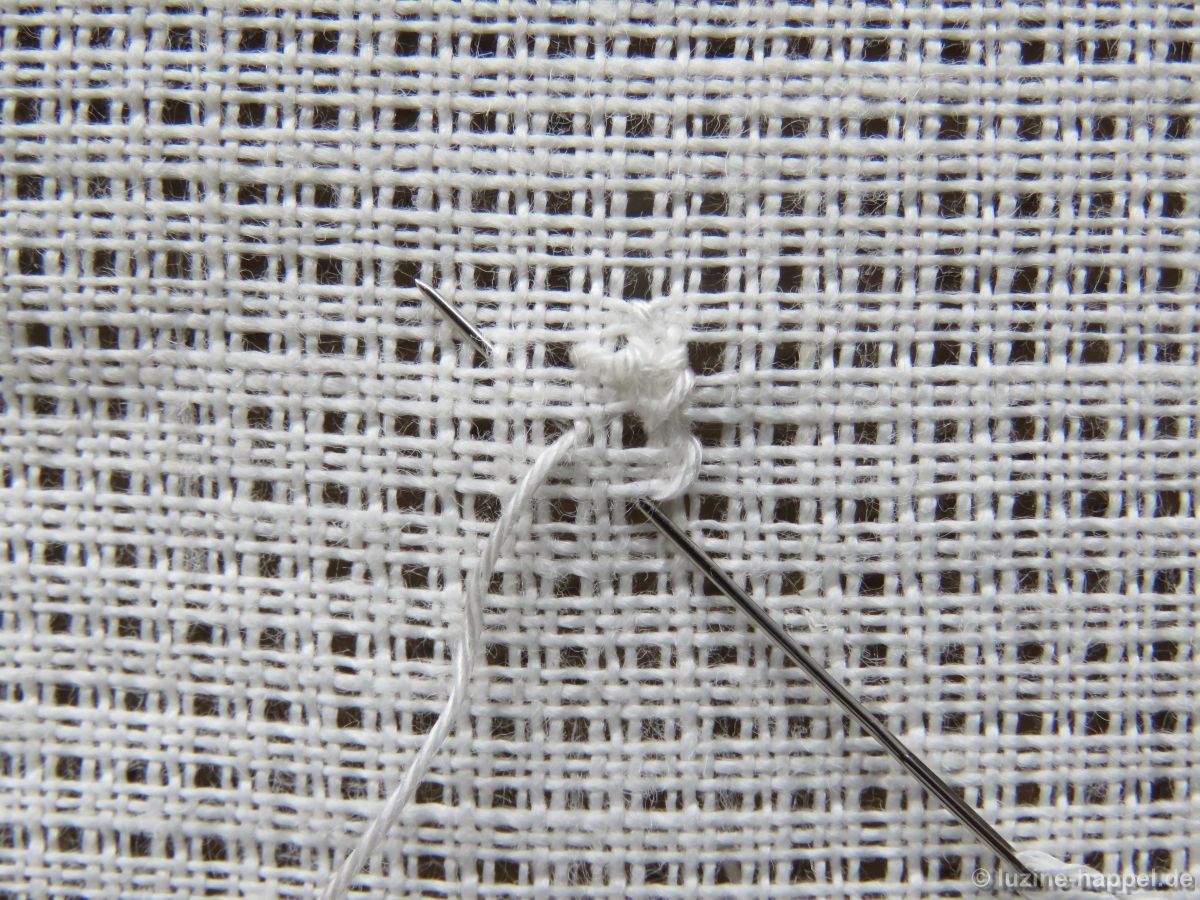
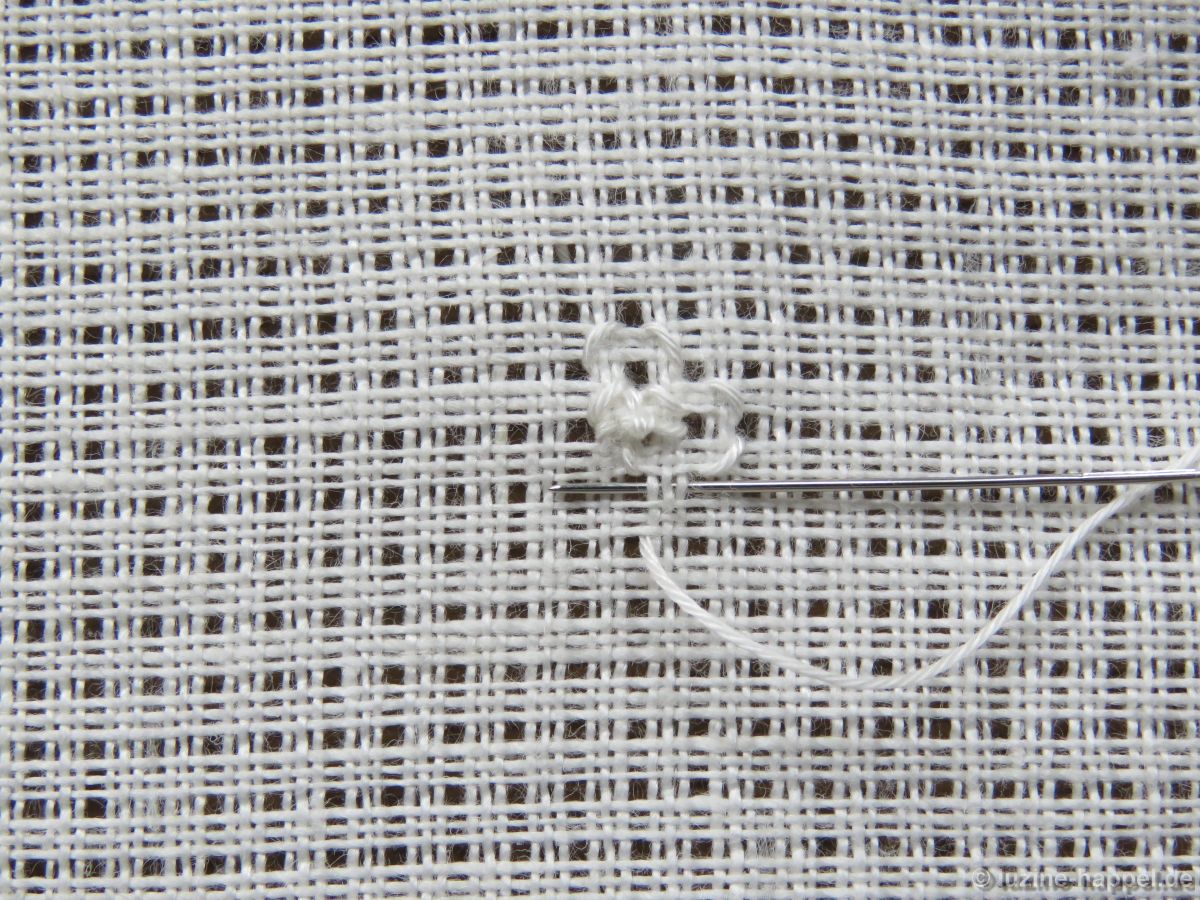
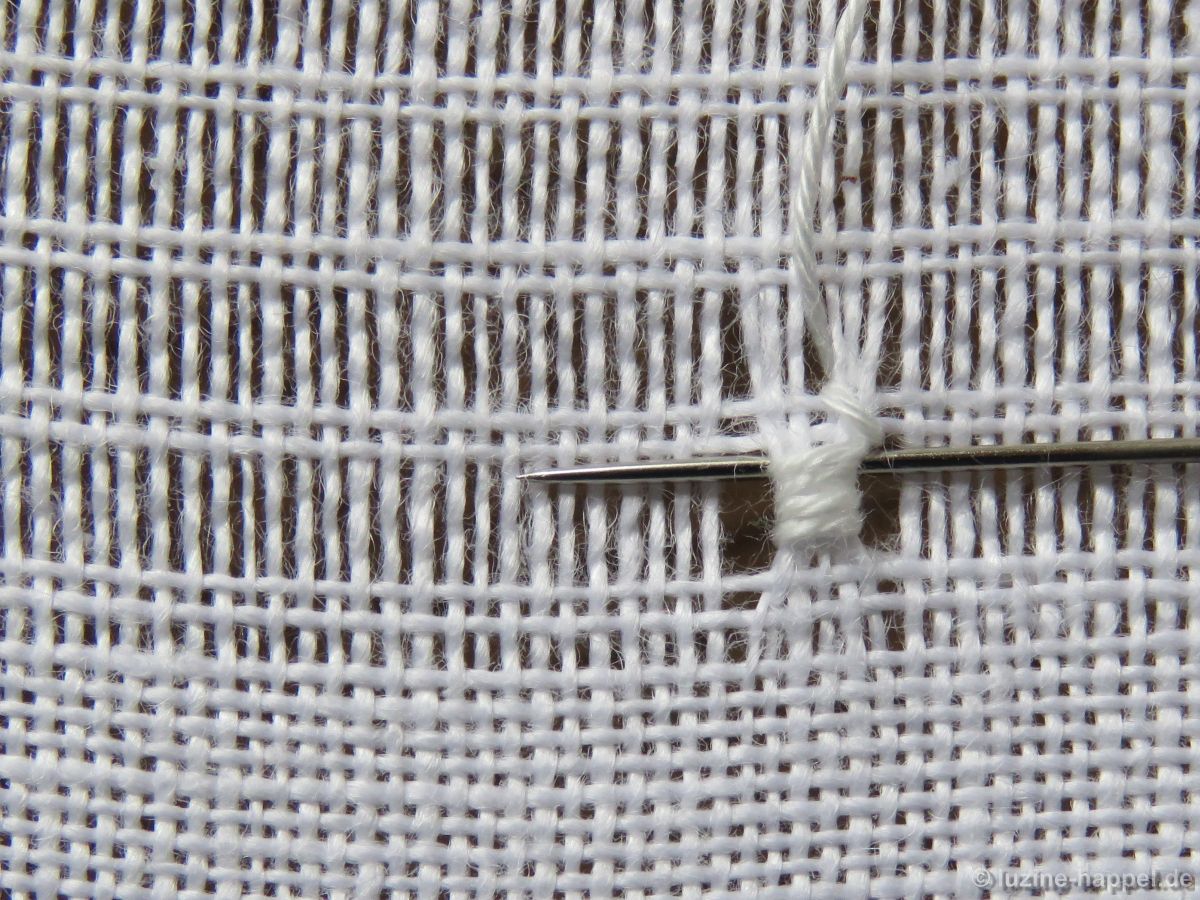
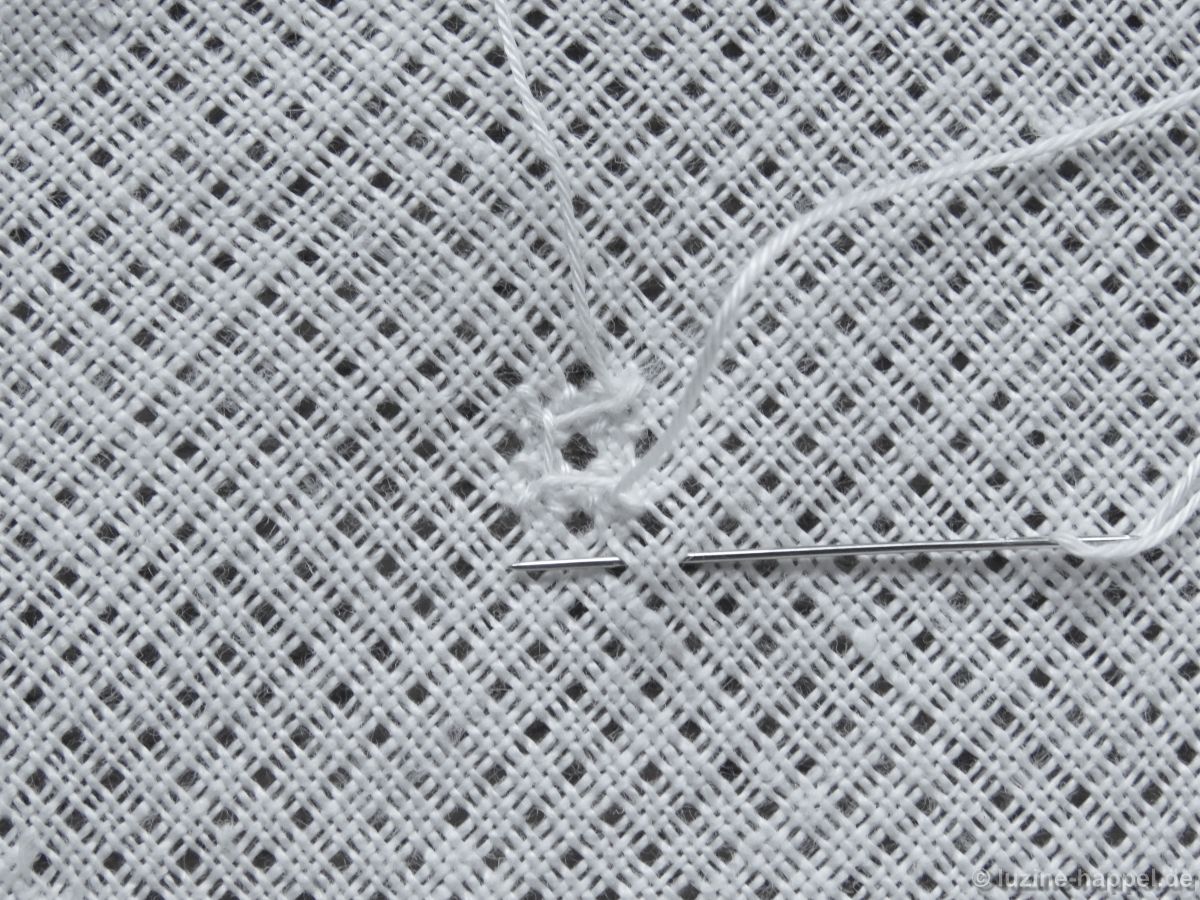
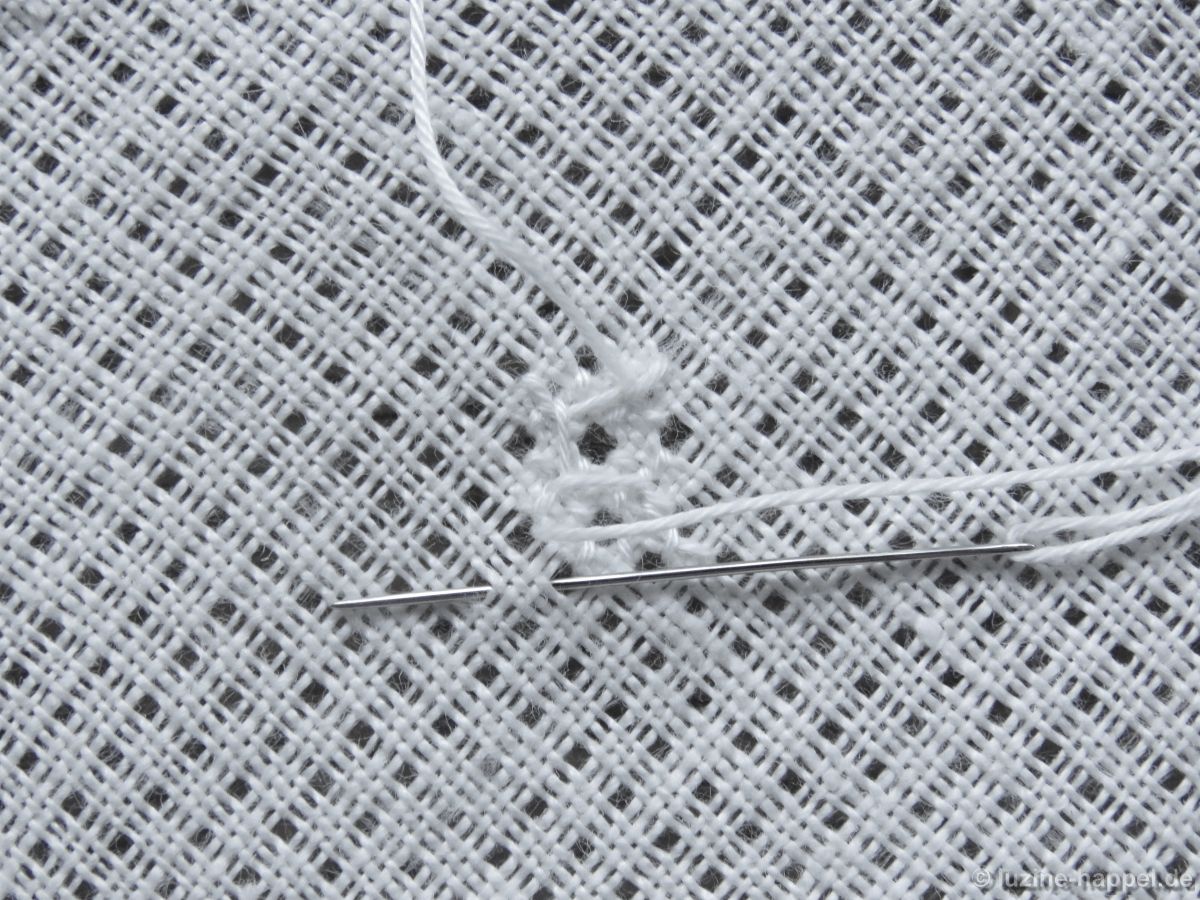
Die Arbeit wird gewendet. Vom letzten Rosenstich aus überquert man 1 Kästchen nach rechts, sticht ein
und dreht die Arbeit 45° im Uhrzeigersinn.
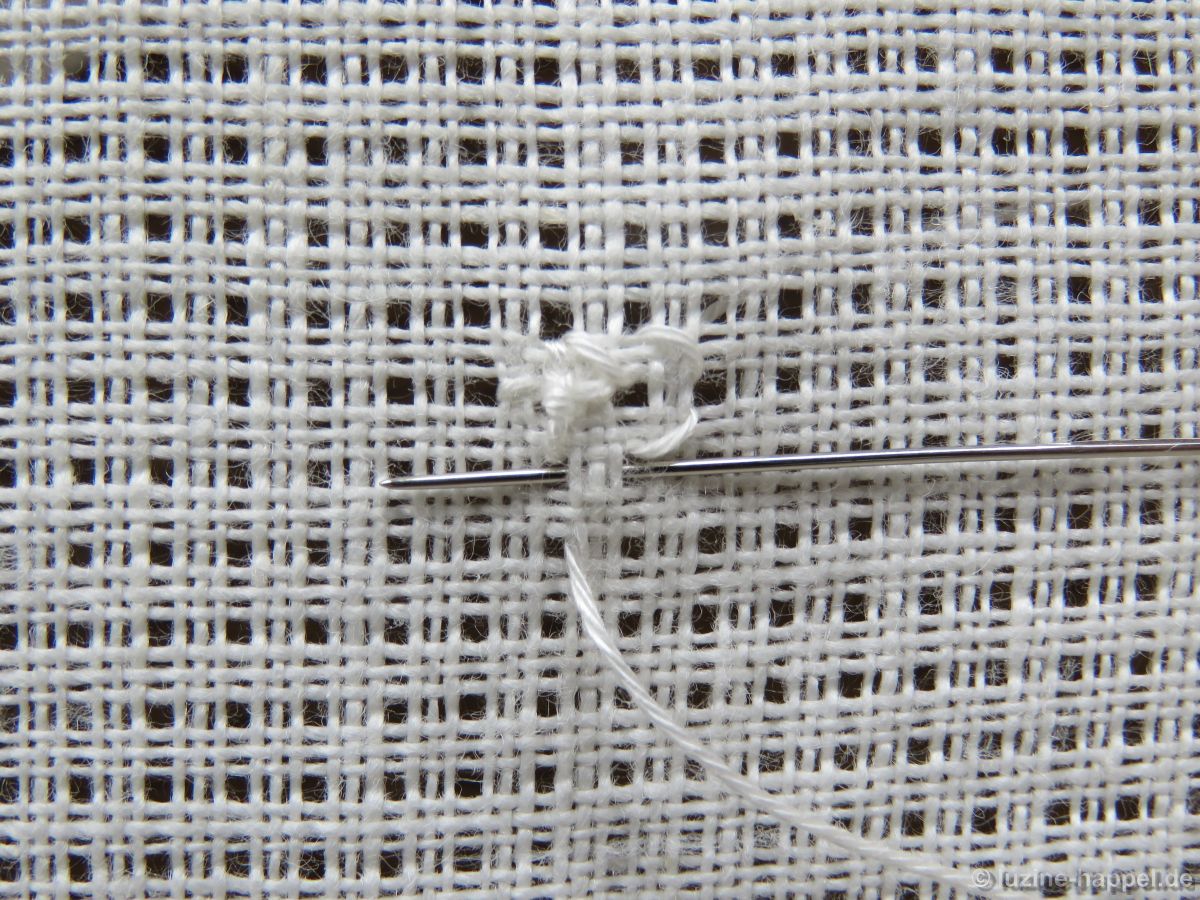
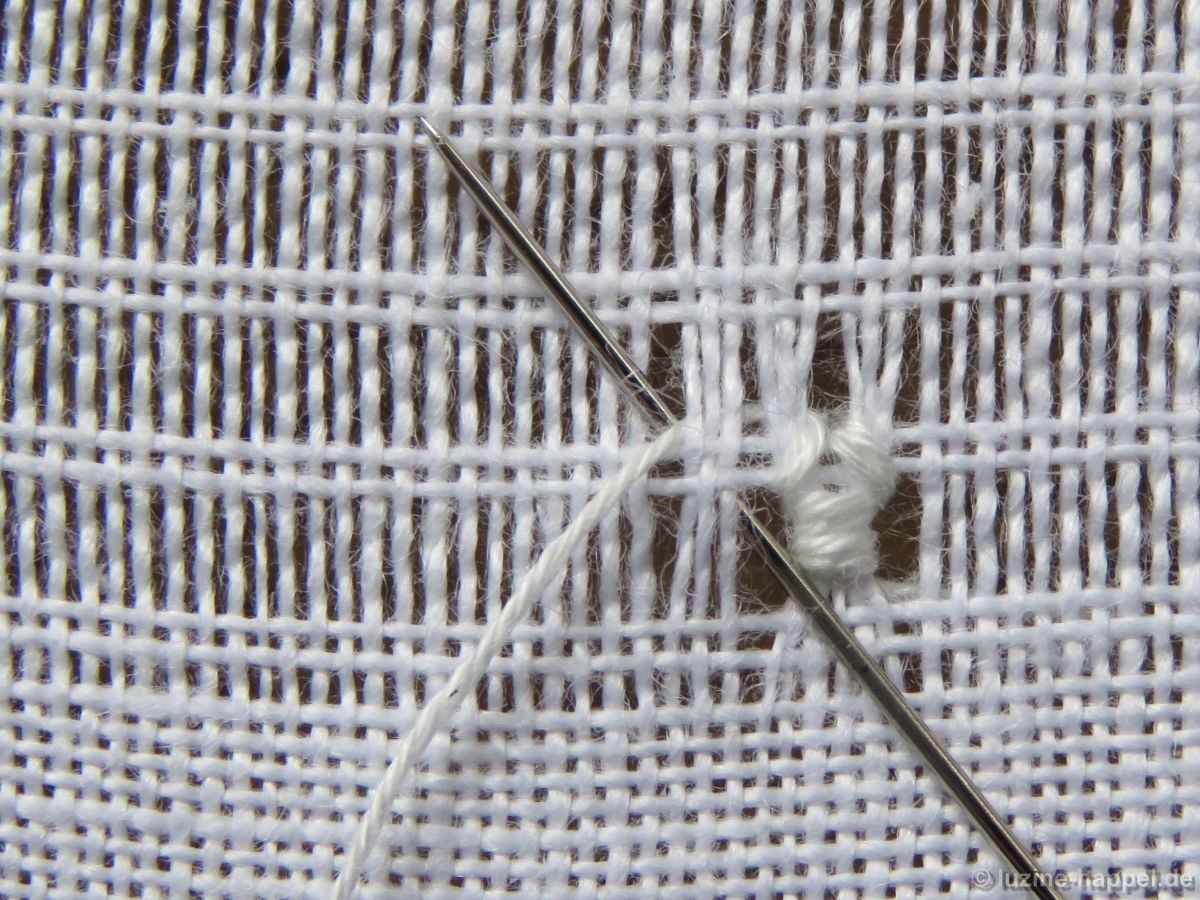
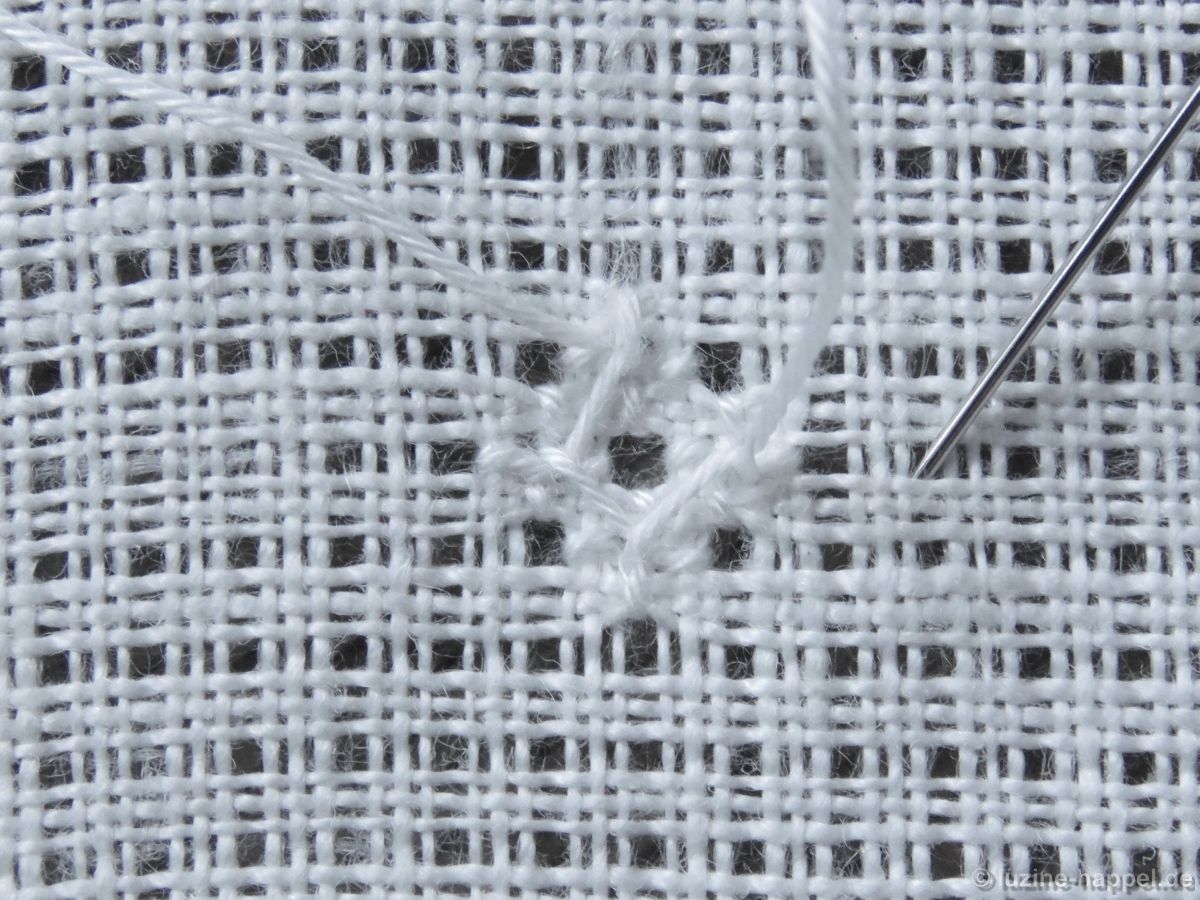
Die nächsten Stiche werden von der Rückseite aus gestickt.
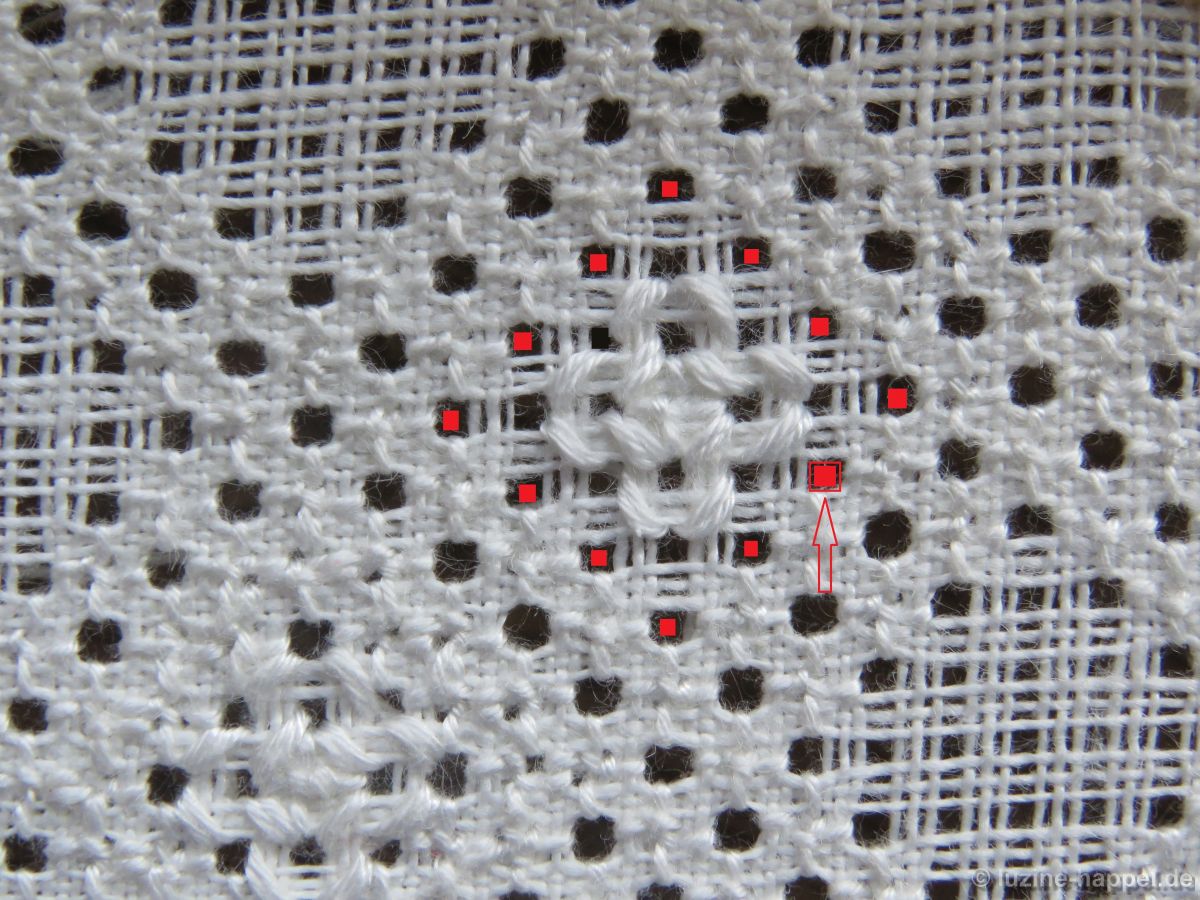
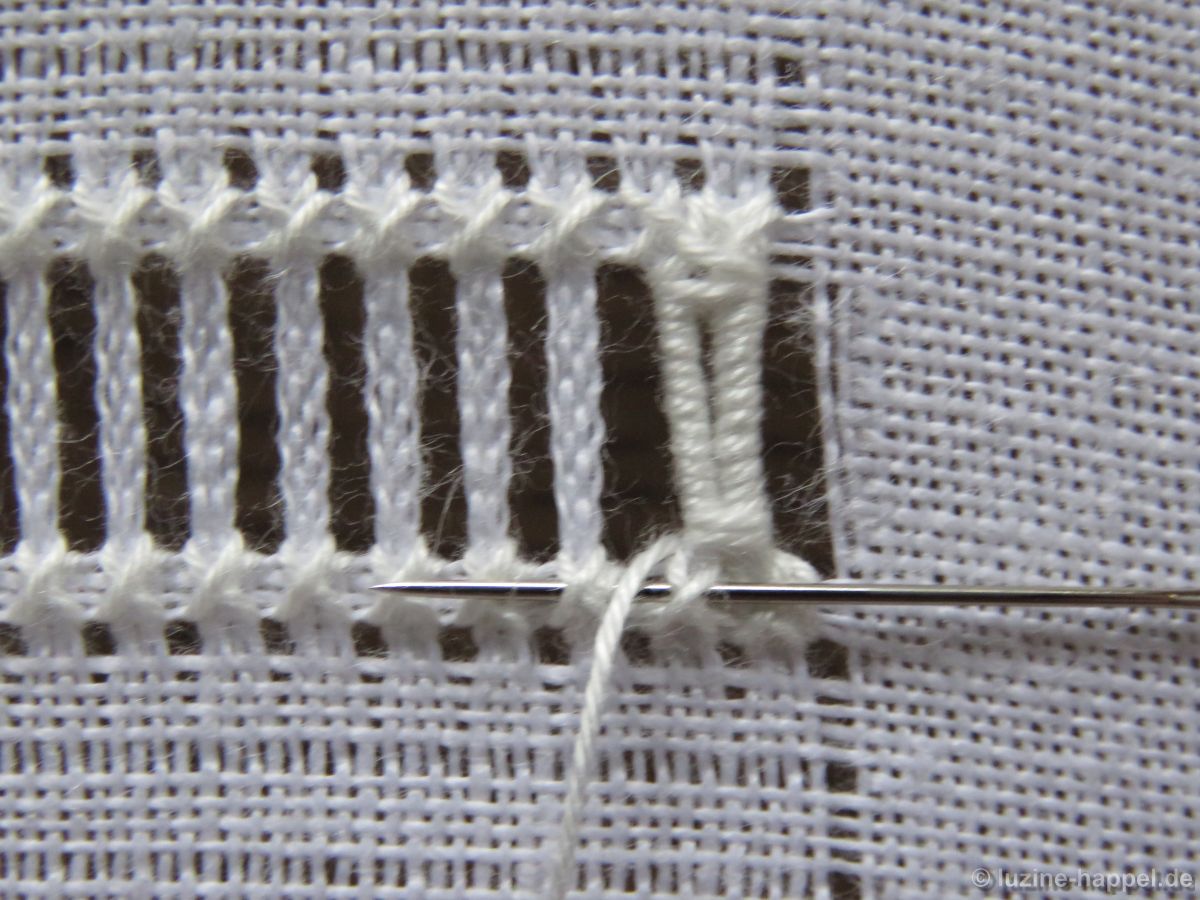
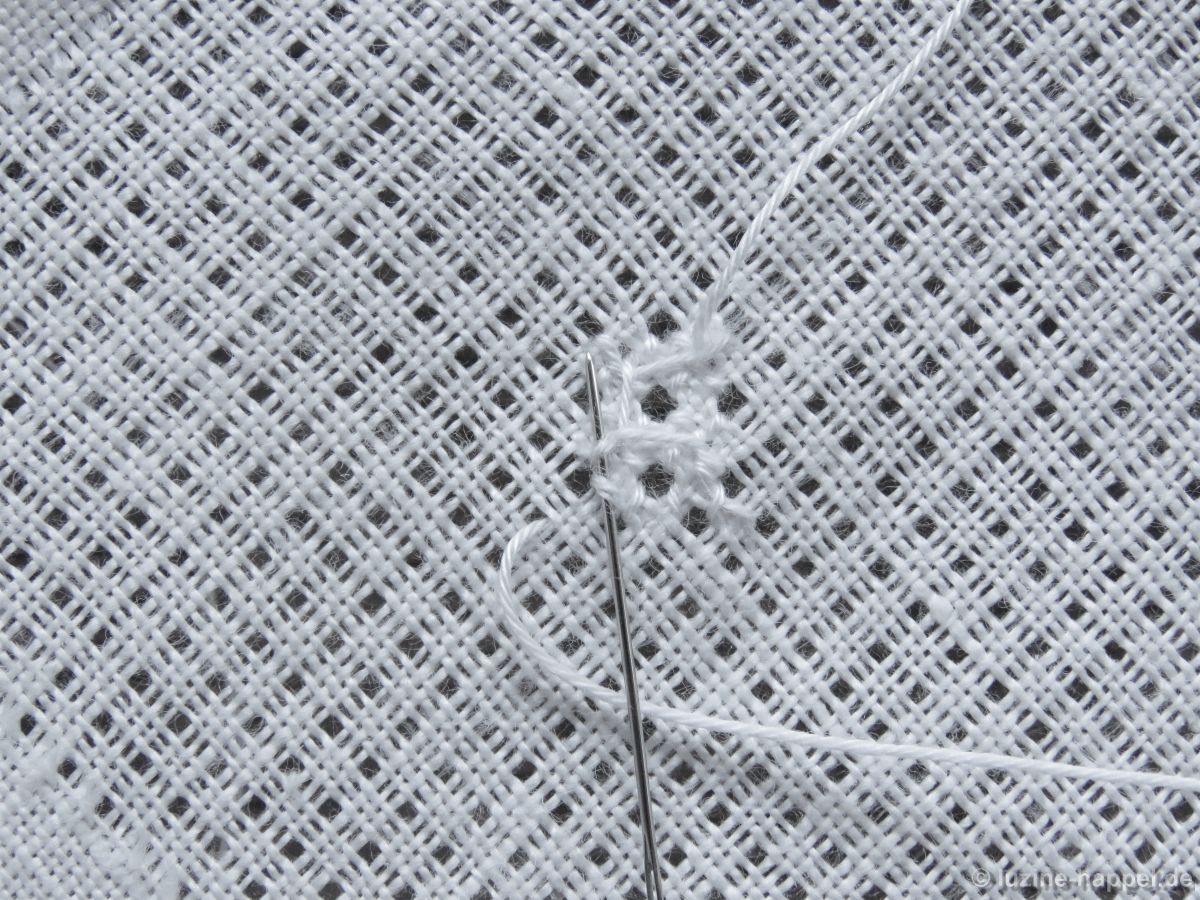
Nun arbeitet man 20 Grundstiche um die Rosenstiche herum – fünf auf jeder Seite. Dazu unterquert man 1 Kästchen diagonal nach links und sticht aus.
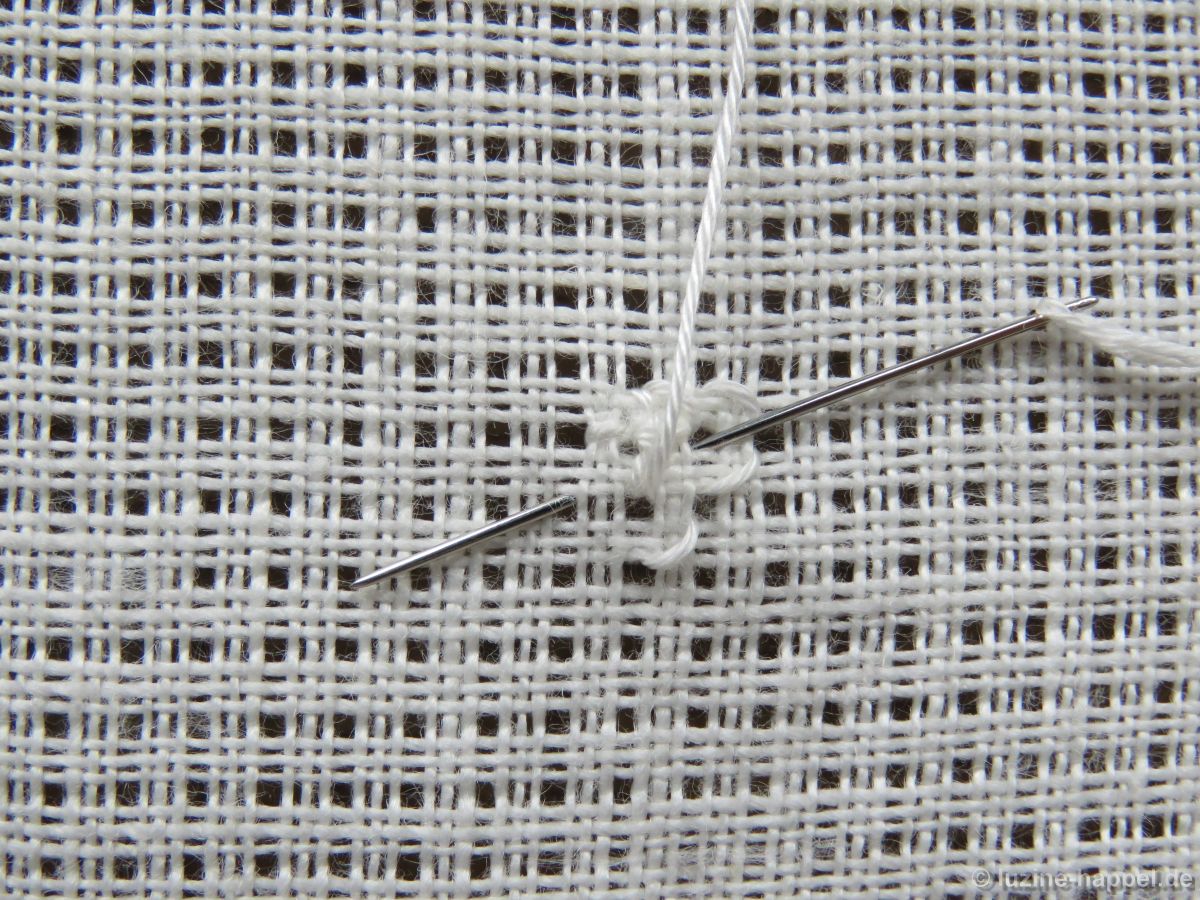
Vom Ausstichpunkt führt man die Nadel diagonal nach rechts oben, sticht im nächsten Loch ein und im links davon gelegenen wieder aus. Damit die Löcher klar abgegrenzt und offen bleiben, ist darauf zu achten, dass der Spannfaden mit aufgefasst wird.
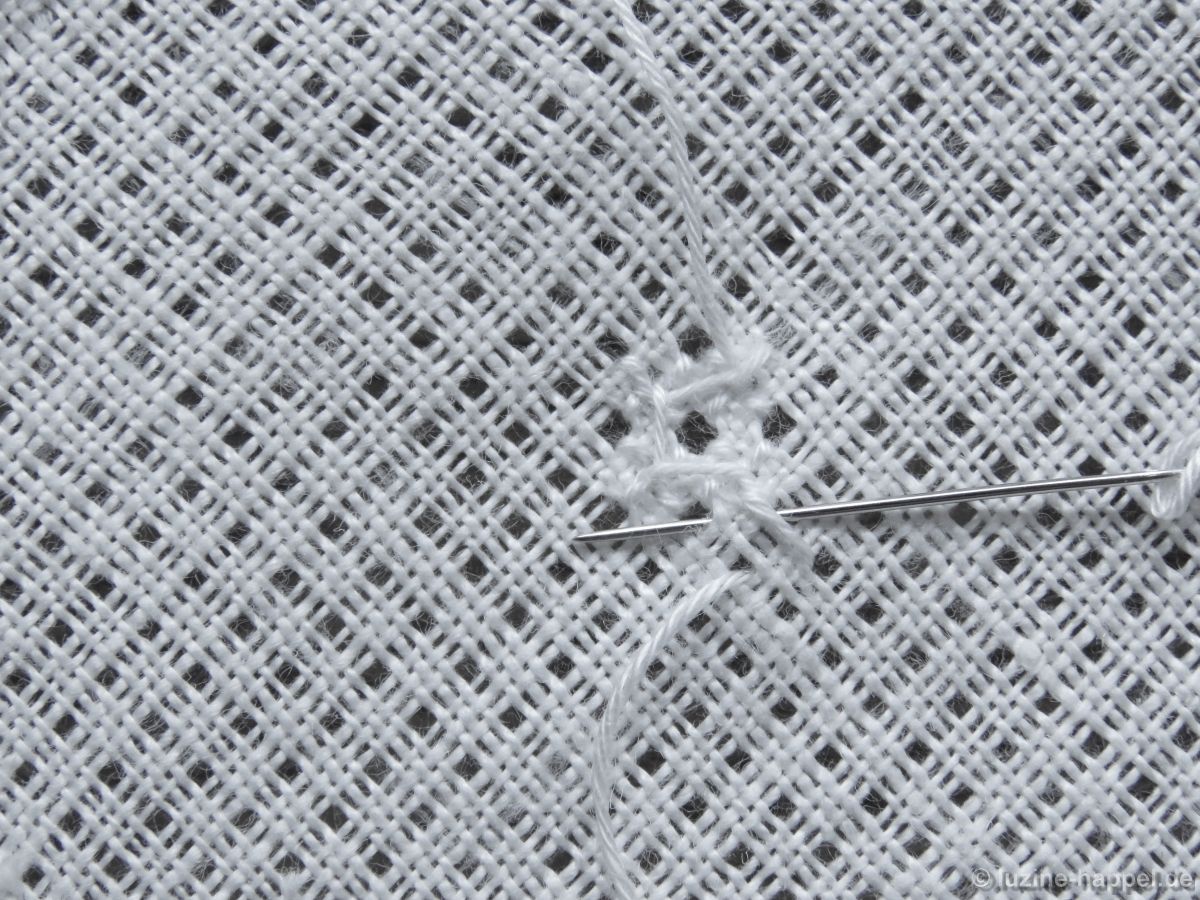
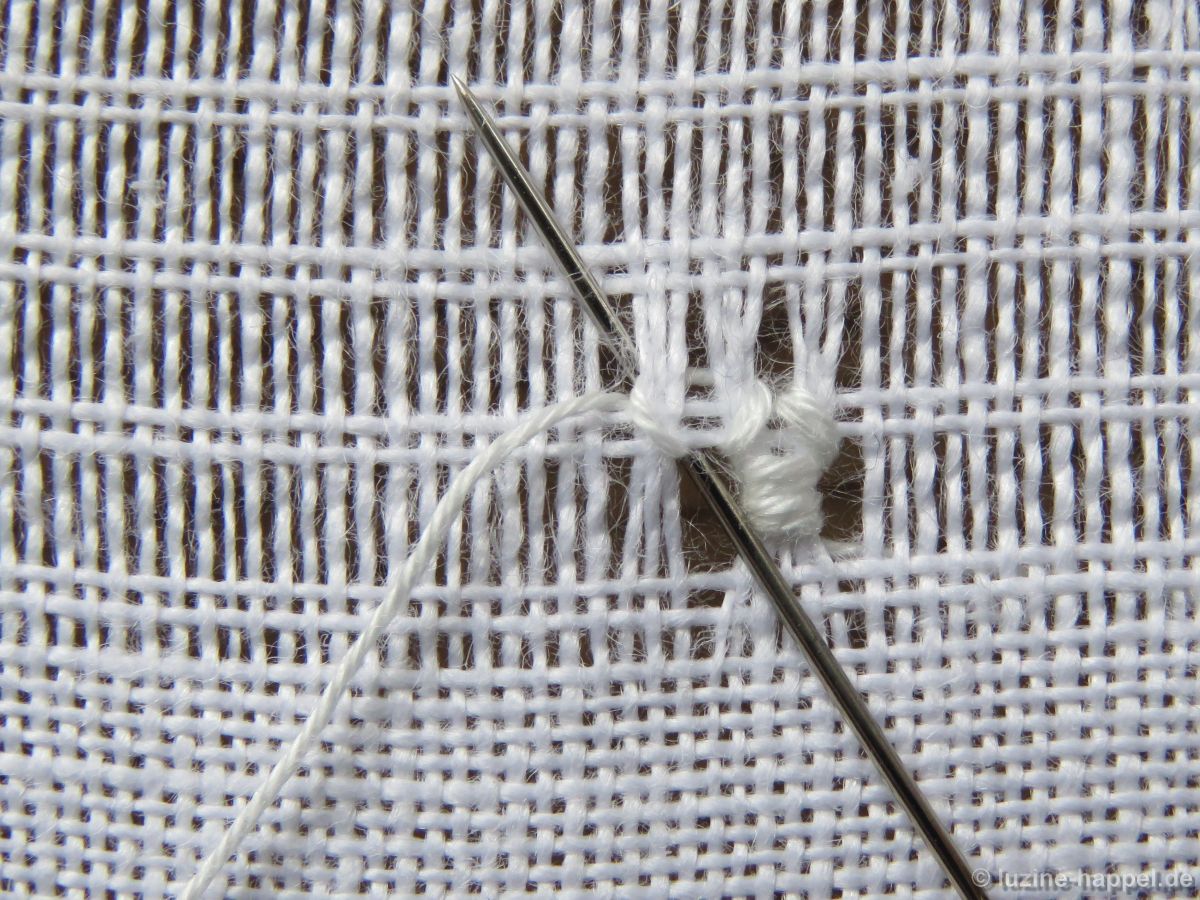
Vom Ausstichpunkt führt man die Nadel diagonal nach rechts unten, sticht im nächsten Loch ein und im links davon gelegenen wieder aus.
Vom Ausstichpunkt führt man die Nadel diagonal nach rechts oben, sticht im nächsten Loch ein und im links davon gelegenen wieder aus.
Vom Ausstichpunkt führt man die Nadel diagonal nach rechts unten, sticht im nächsten Loch ein und im links davon gelegenen wieder aus.
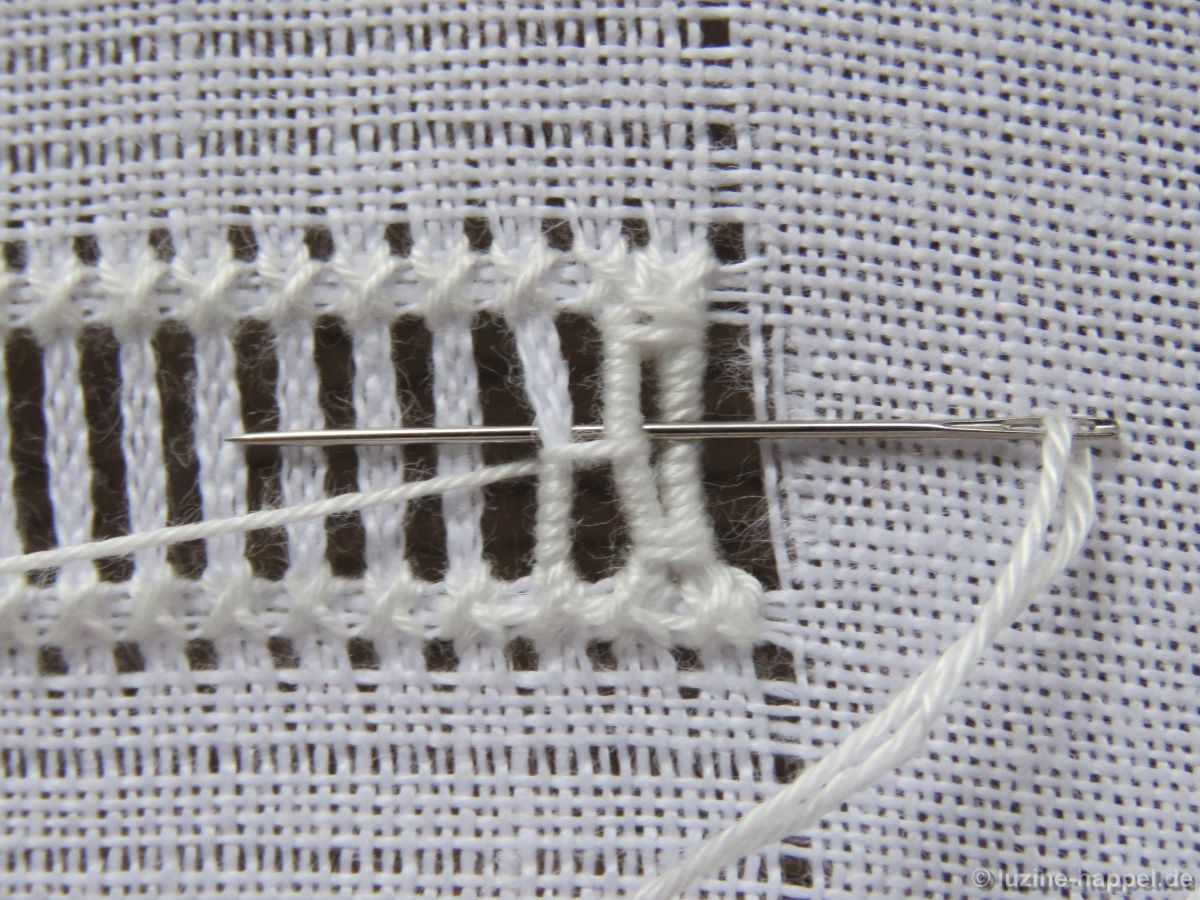
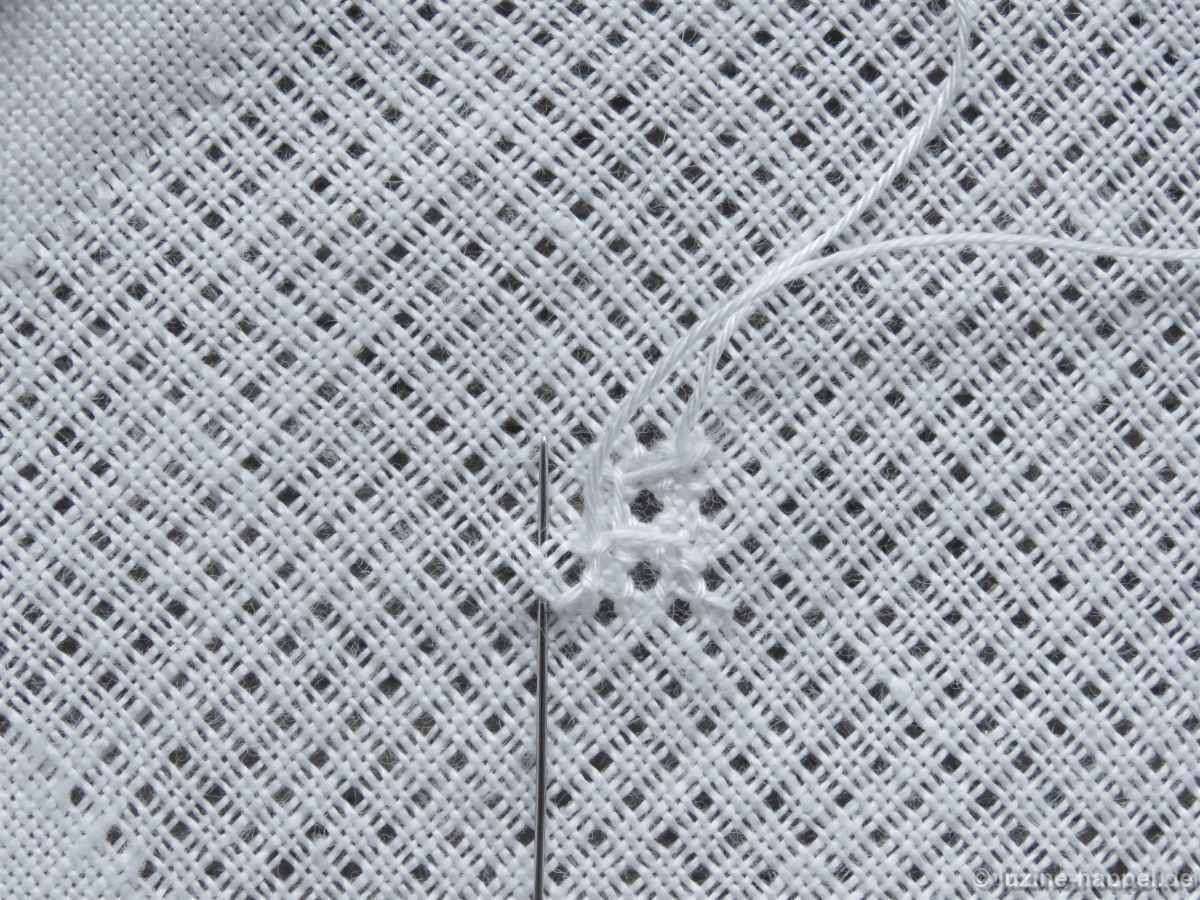
Die 5 Grundstiche der ersten Seite sind fertig gestellt. Auf den drei verbliebenen Seiten wird ähnlich verfahren. Da man dazu aber direkt im letzten Ausstichpunkt wieder einstechen muss, muss der Arbeitsfaden so unter den vorhandenen Stichen (dem Spannfaden vom vorletzten zum letzten Grundstich und einem Beinchen eines Rosenstiches) durch geführt werden, dass die Löcher frei bleiben.
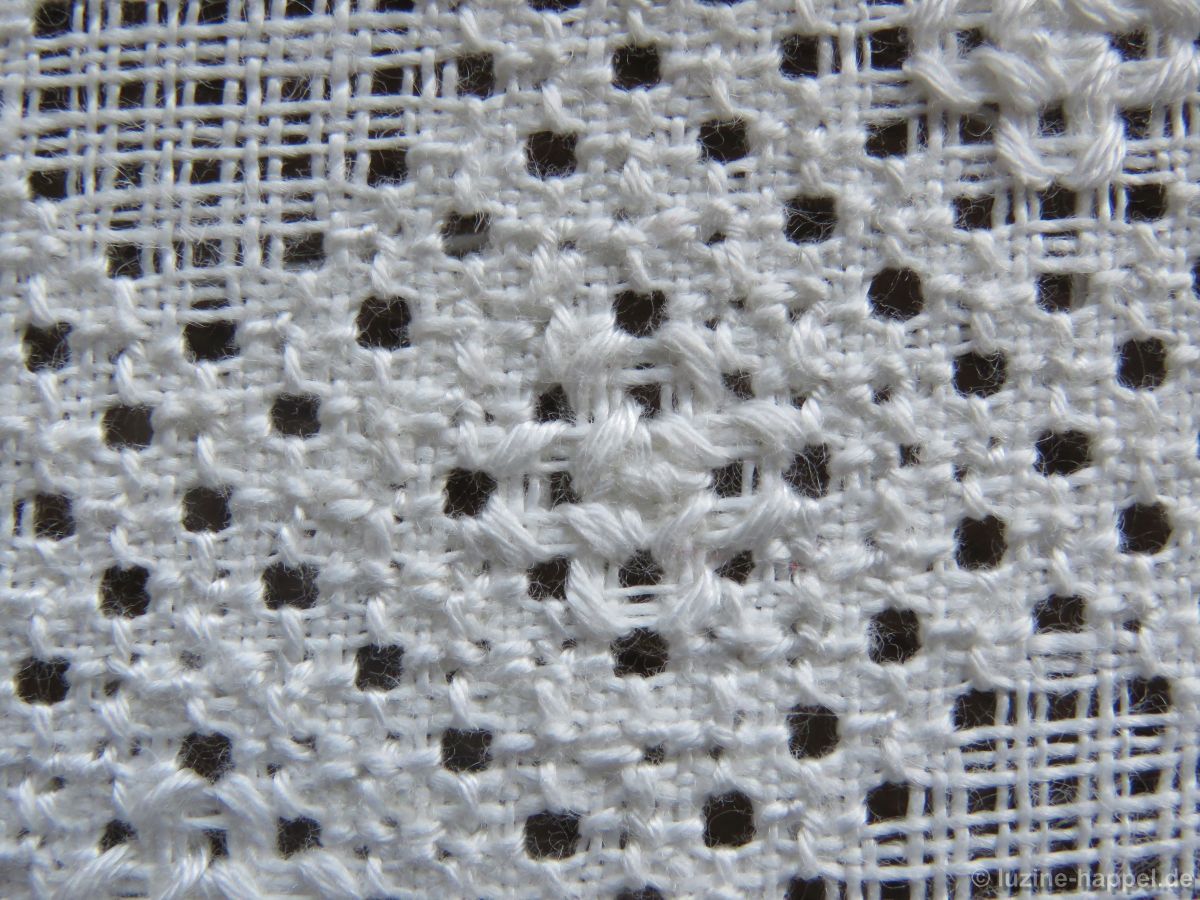
Danach kann man zum letzten Ausstichpunkt zurückkehren und von dort aus 5 Grundstiche in der vorher gezeigten Weise sticken. Es ist sinnvoll die Arbeit jeweils so zu drehen, dass man die Nadel waagerecht von rechts nach links führen kann.
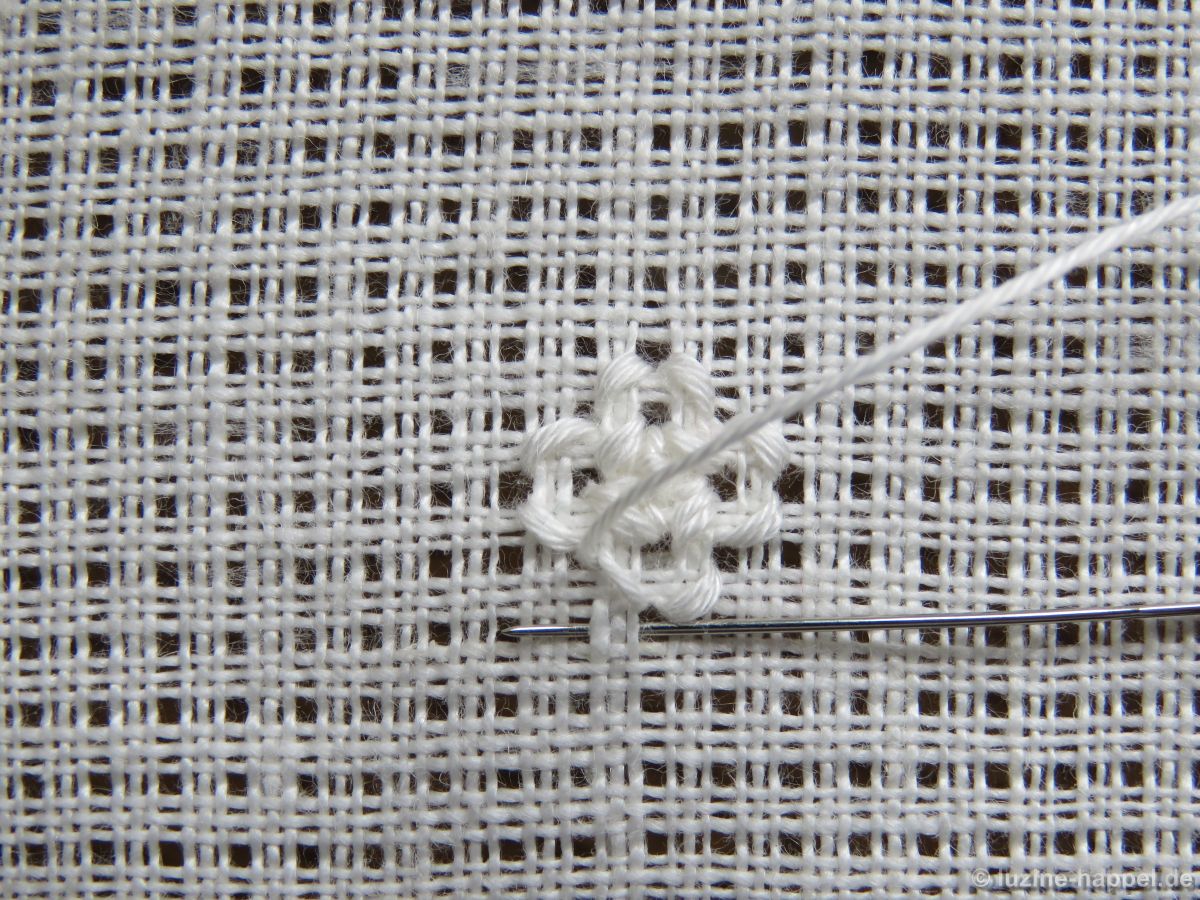
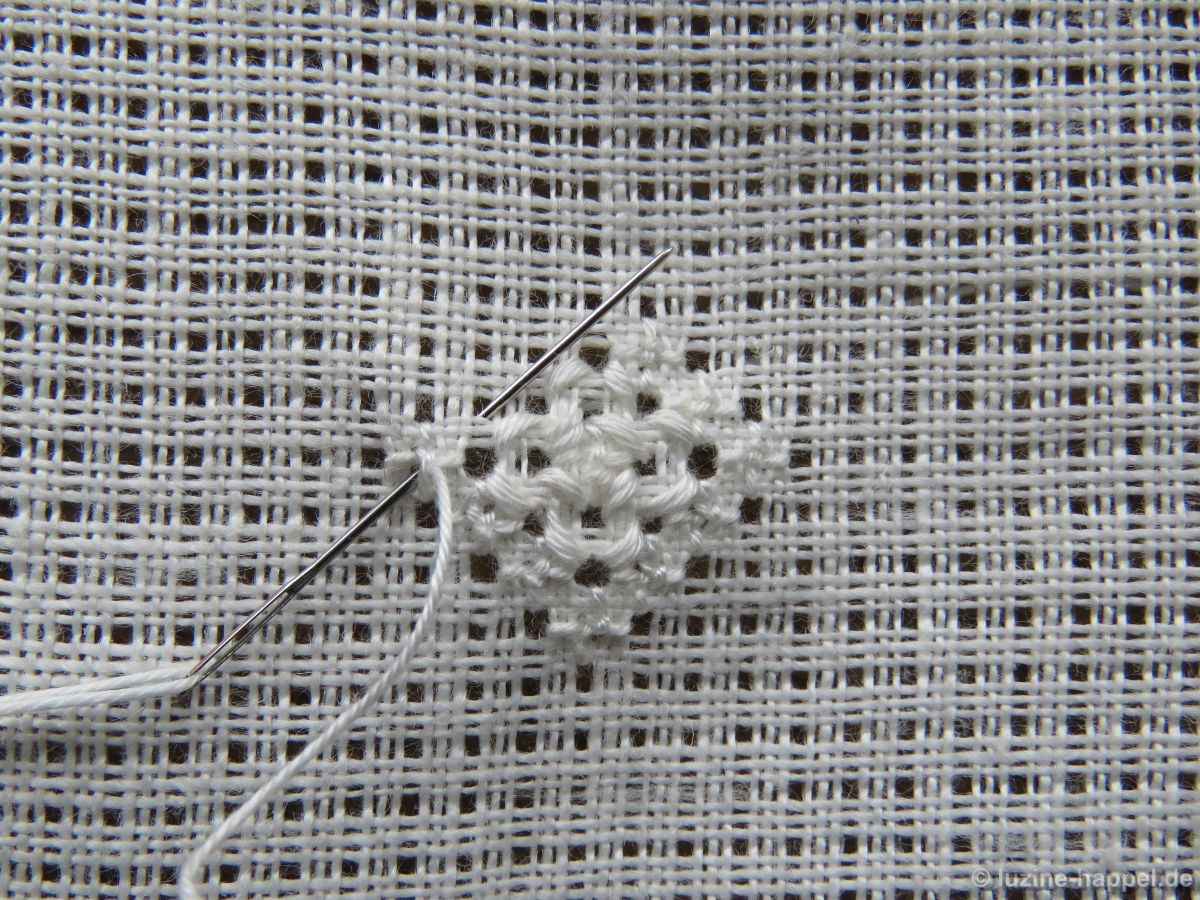
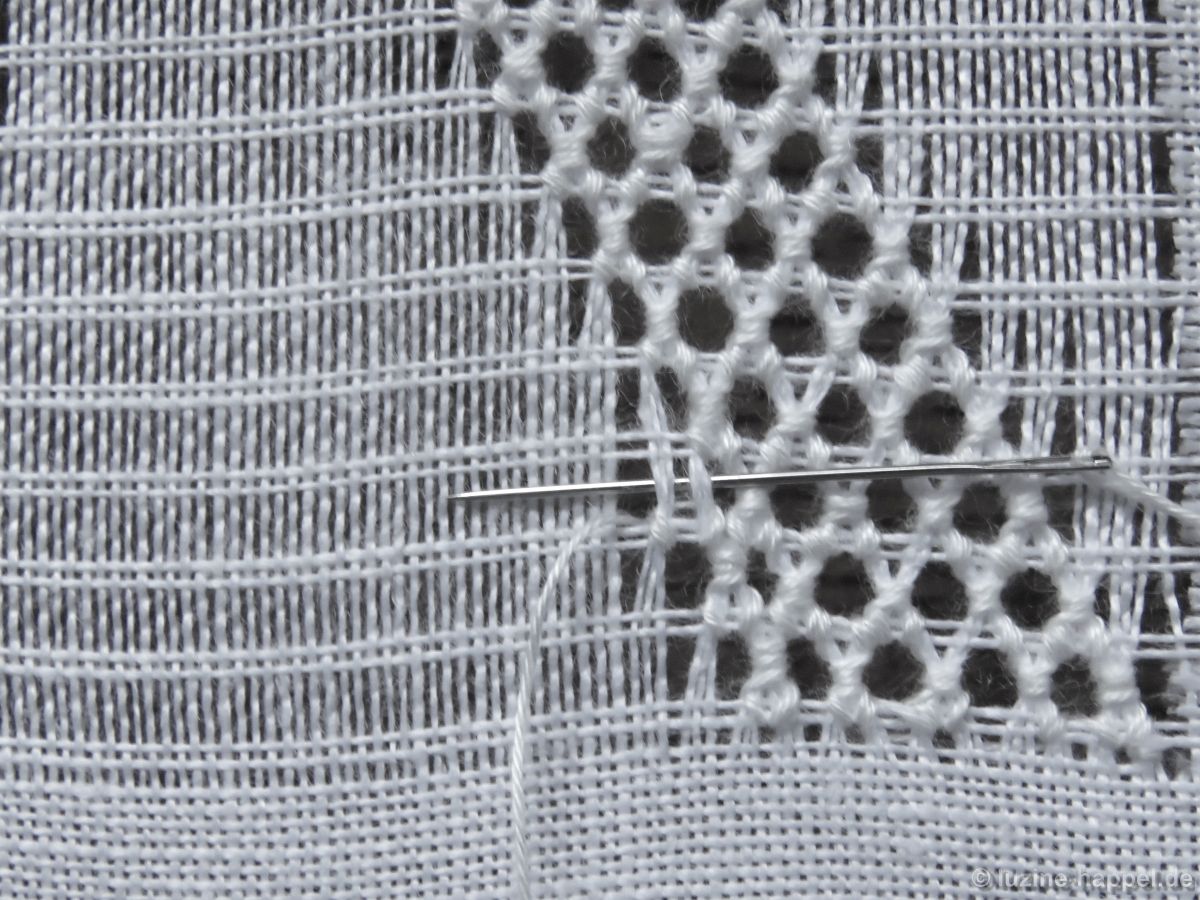
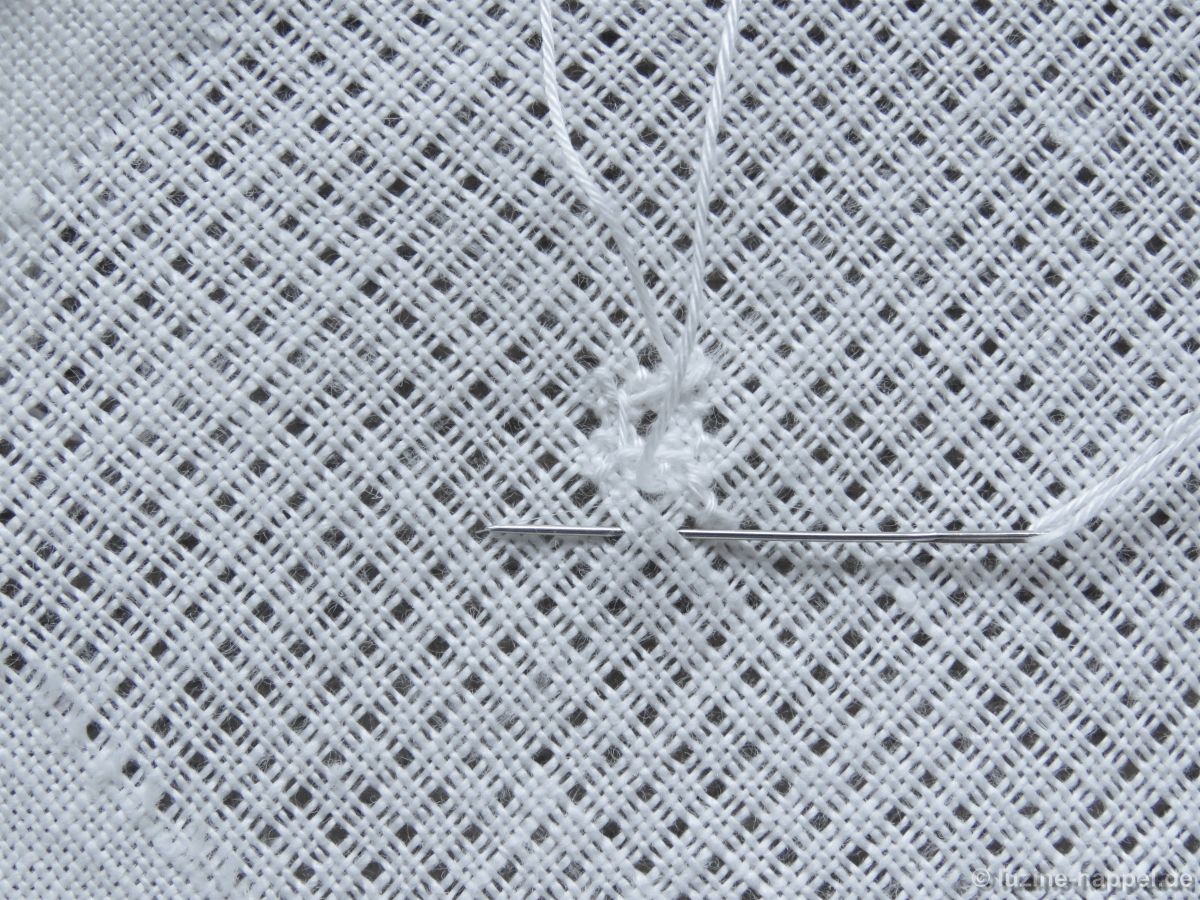
Nach Beendigung des zwanzigsten Grundstiches ist die Runde geschlossen. Vom Ausstichpunkt führt man die Nadel diagonal nach rechts unten, sticht dort im nächsten Loch ein,
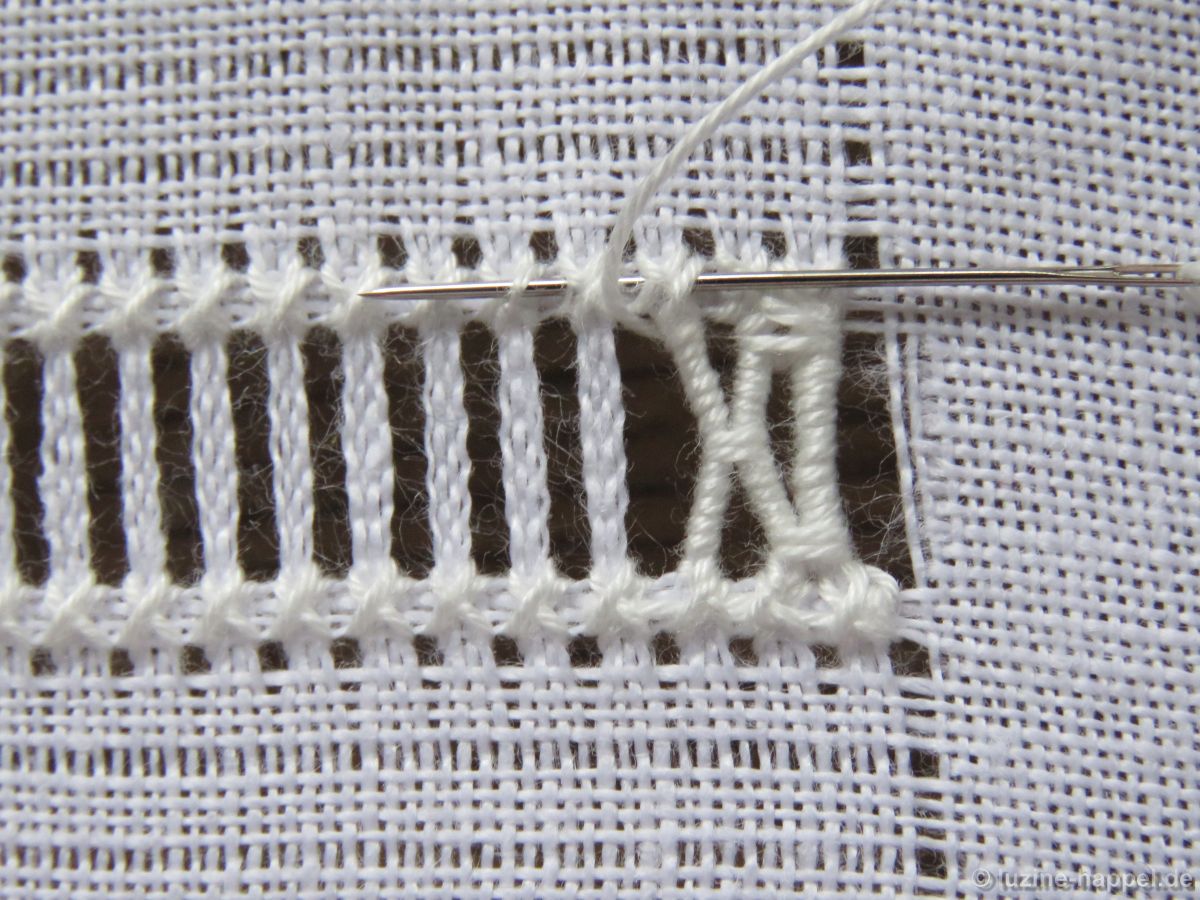
wendet die Arbeit und stickt wieder auf der Vorderseite weiter. Der jetzige Ausstichpunkt ist der Mittelpunkt des ersten Rosenstiches

Insgesamt werden 16 Rosenstiche um den Grundstichrhombus herum gearbeitet.

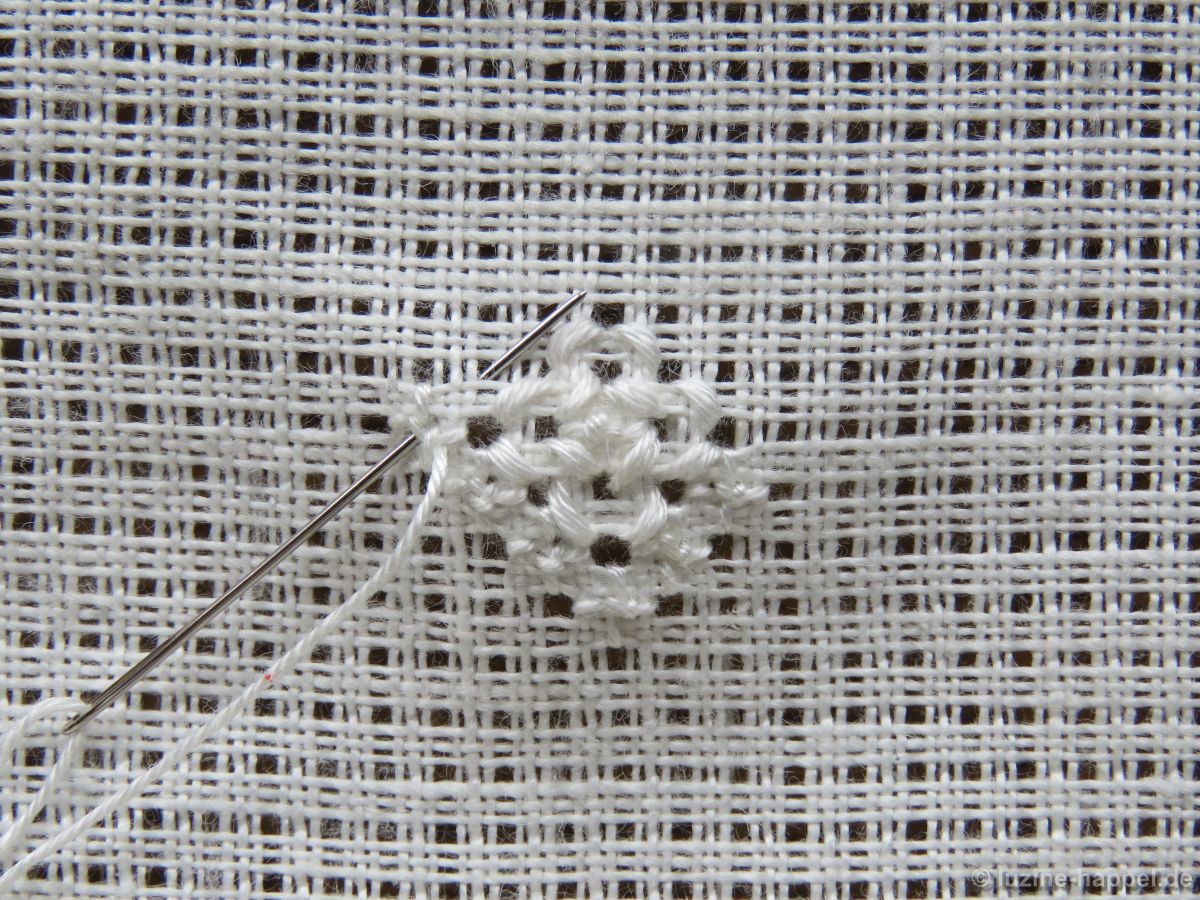
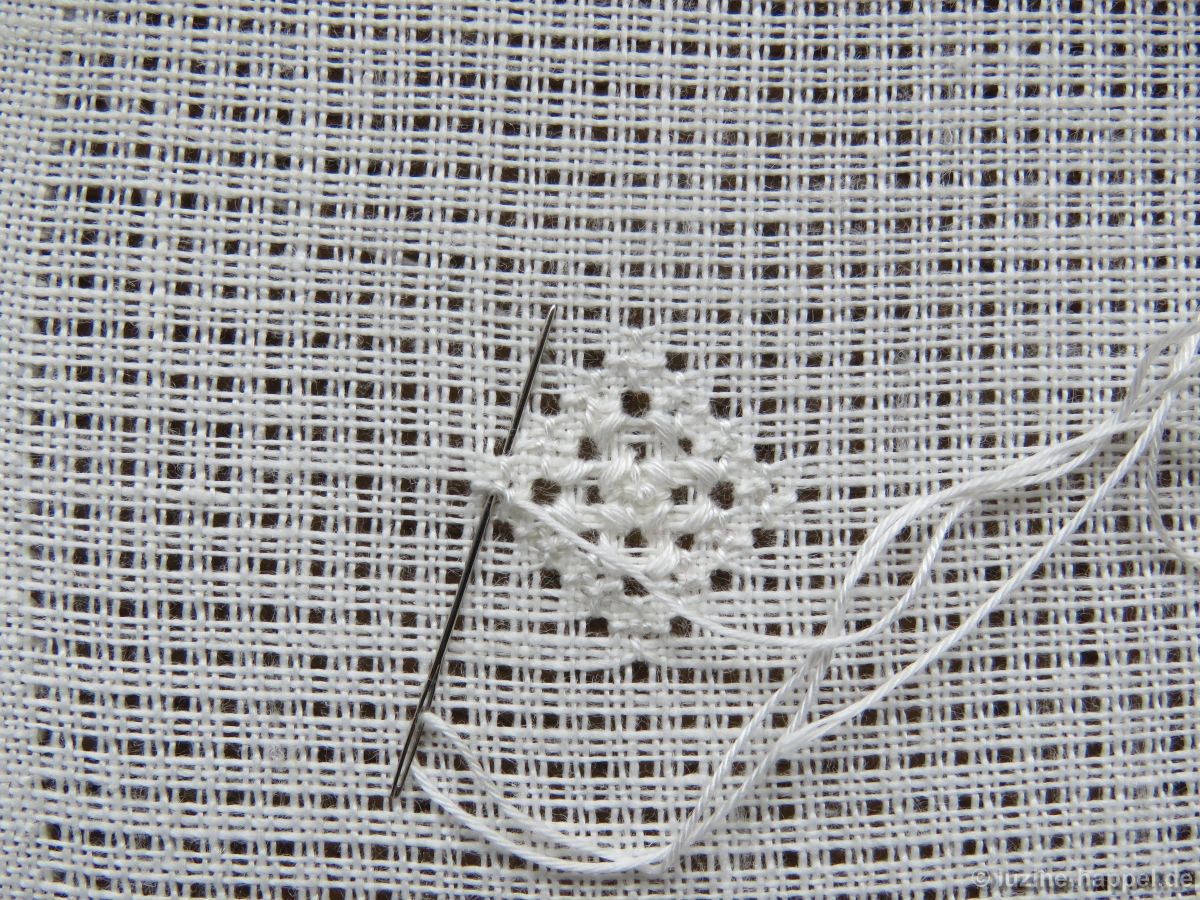
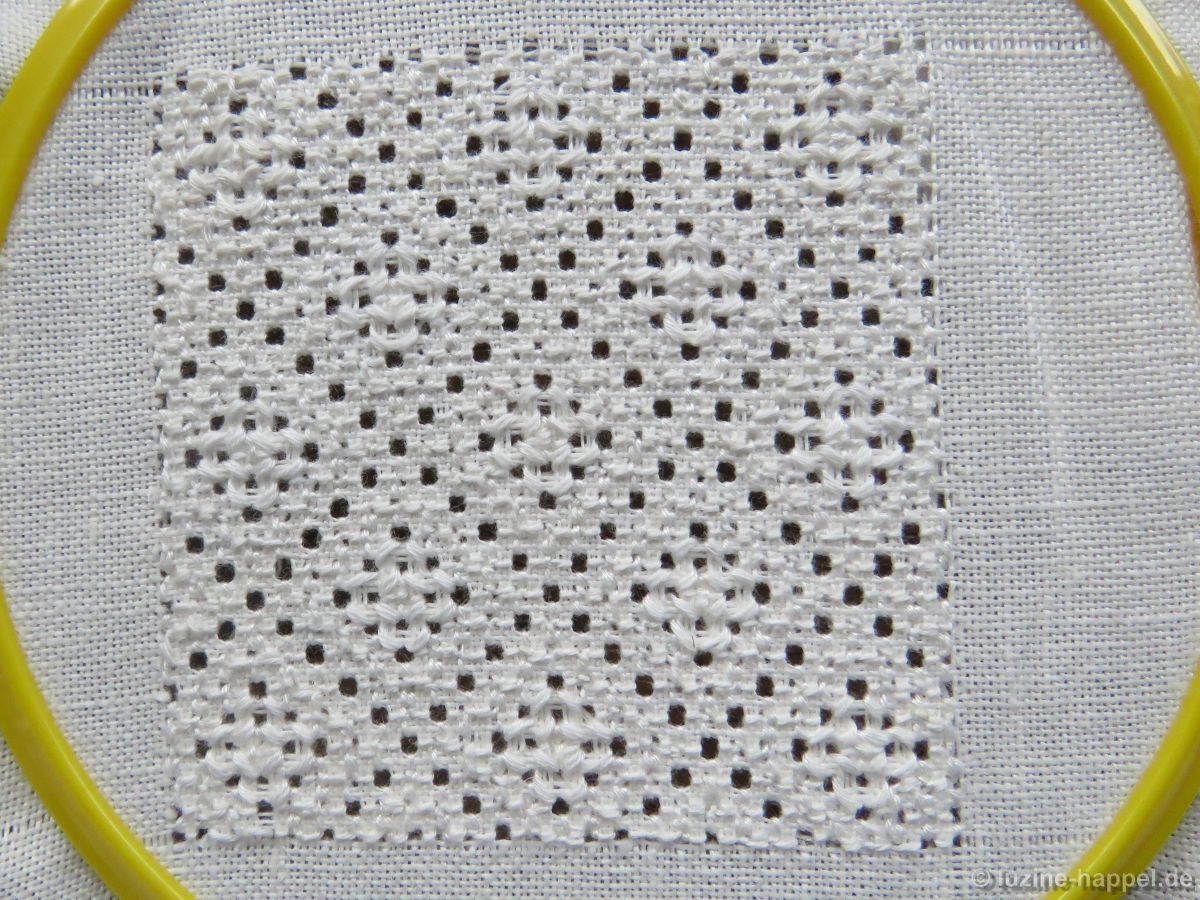
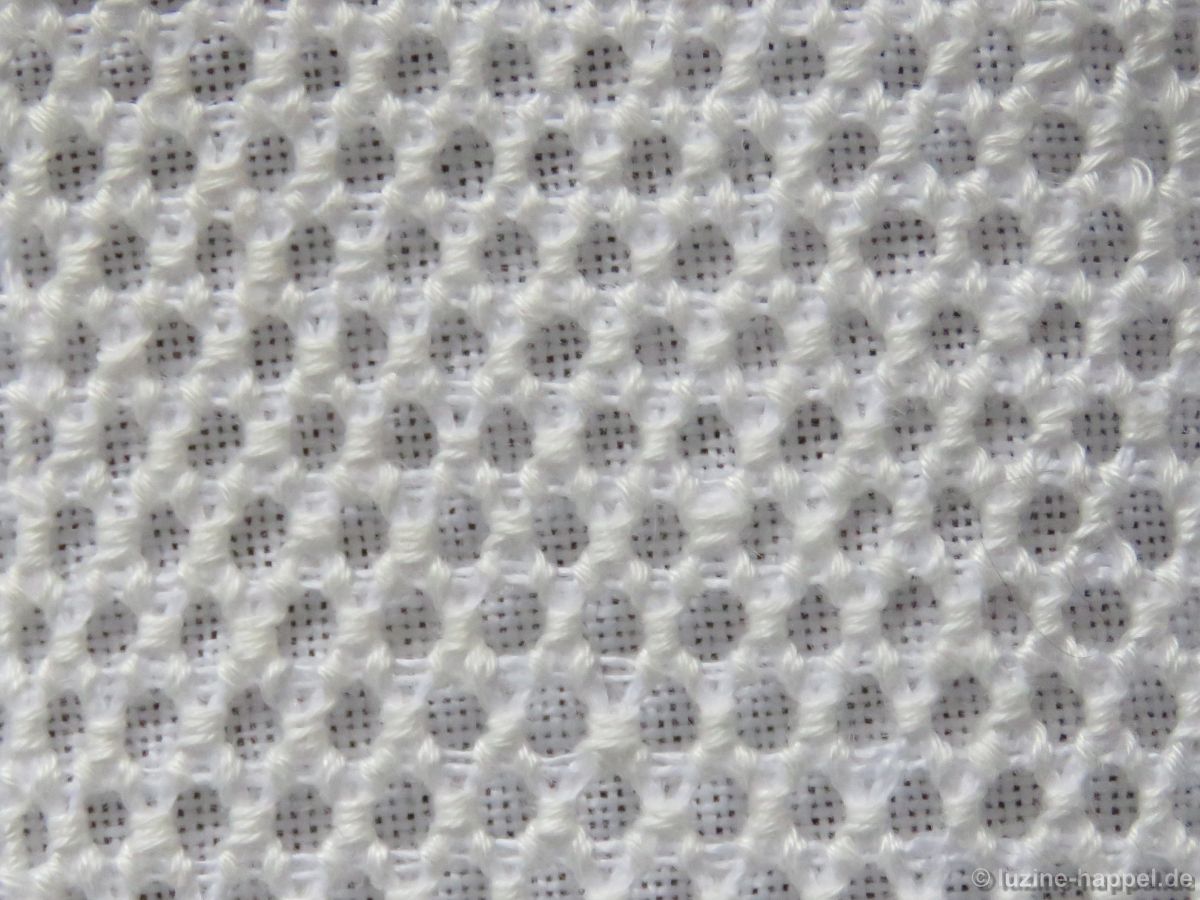
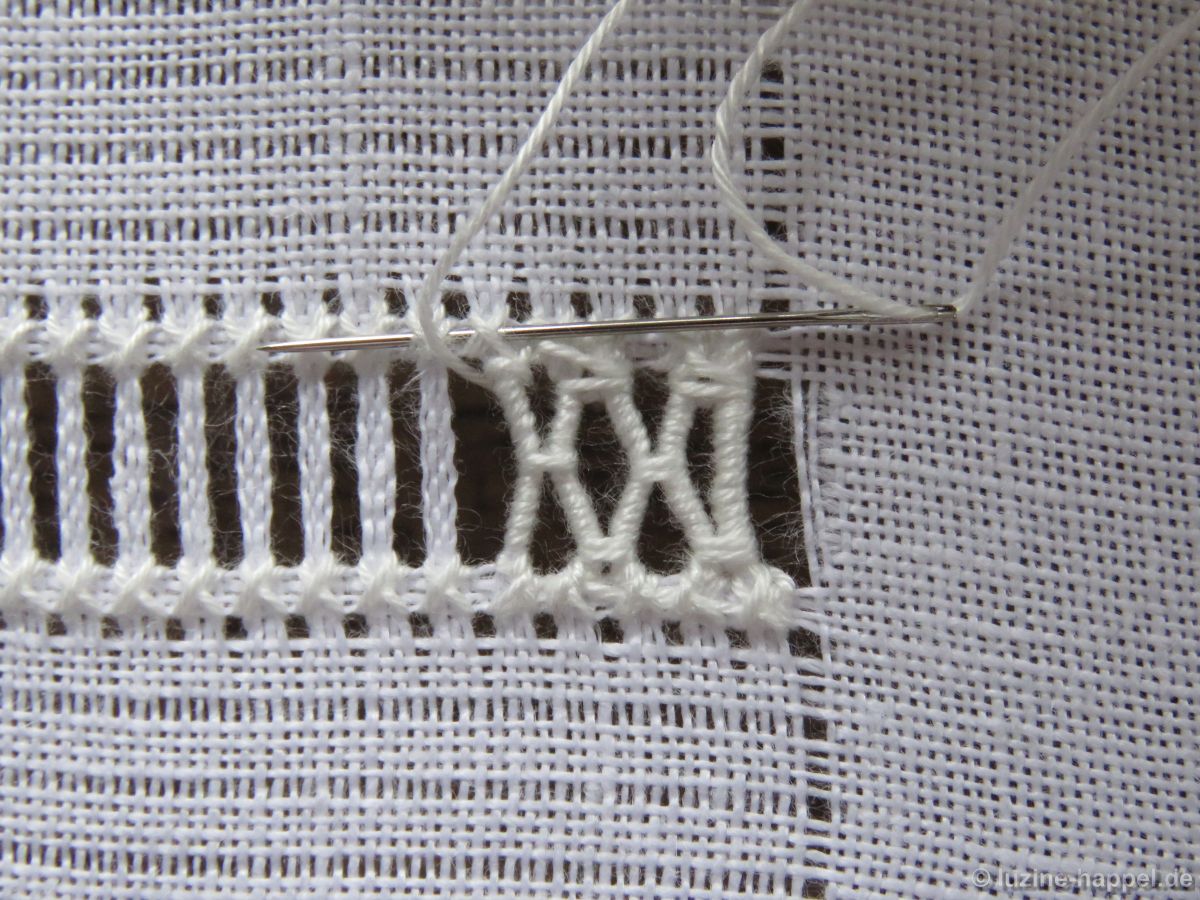
Nachdem das Mittelteil fertig gestellt ist, ist es nun sinnvoll, das Rosenstichraster für das gesamte Muster zu erstellen.
Vom Mittelpunkt des letzten Rosenstiches führt man die Nadel 1 Kästchen nach links, sticht aus und arbeitet von hier aus man eine diagonale Reihe Rosenstiche bis zum Rand. Diese greifen dabei in die Rosenstiche des Mittelteils.
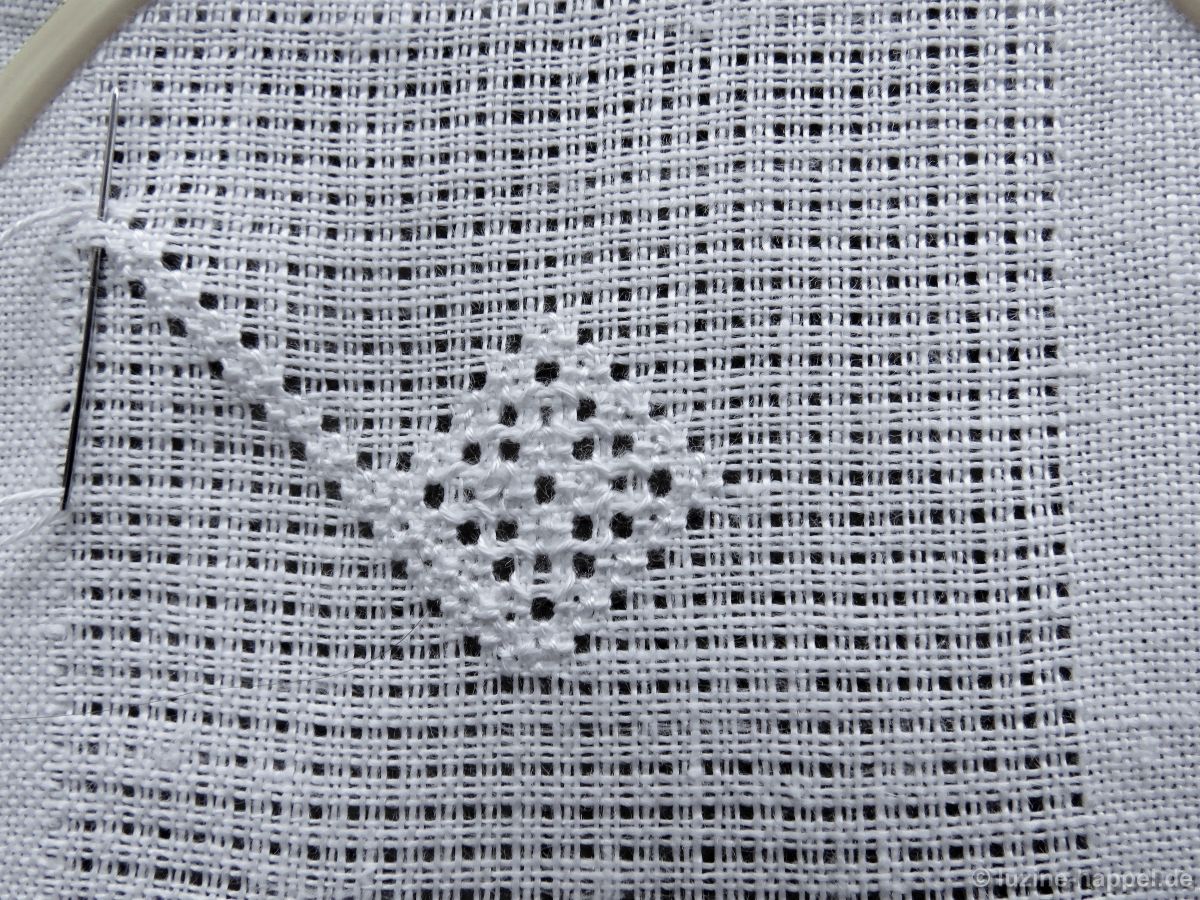
Parallel dazu und in Abstand von 9 freien Löchern – gesehen auf einer horizontalen Linie – zwischen den Mittelpunkten der Rosenstiche beider Reihen, wird eine weitere Rosenstichreihe entlang des Mittelteils gestickt.
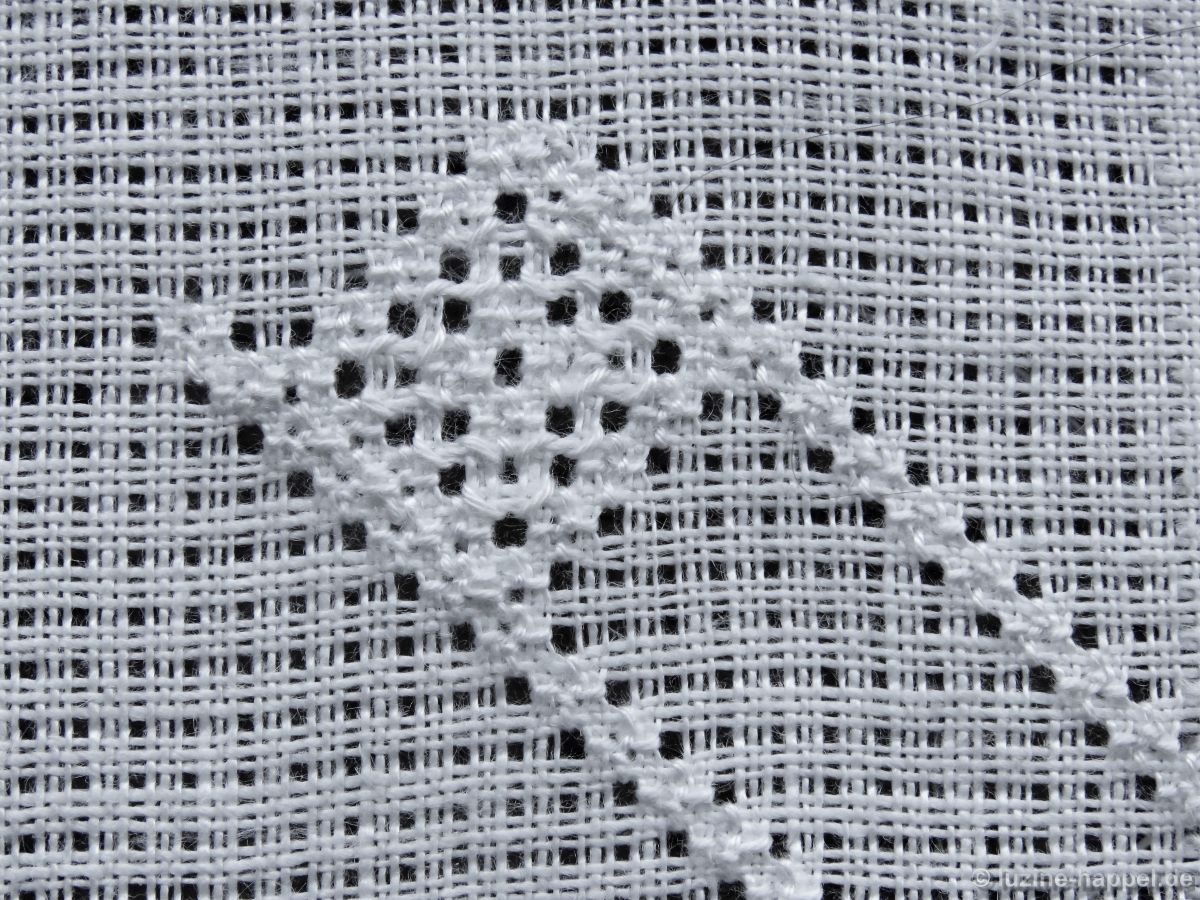
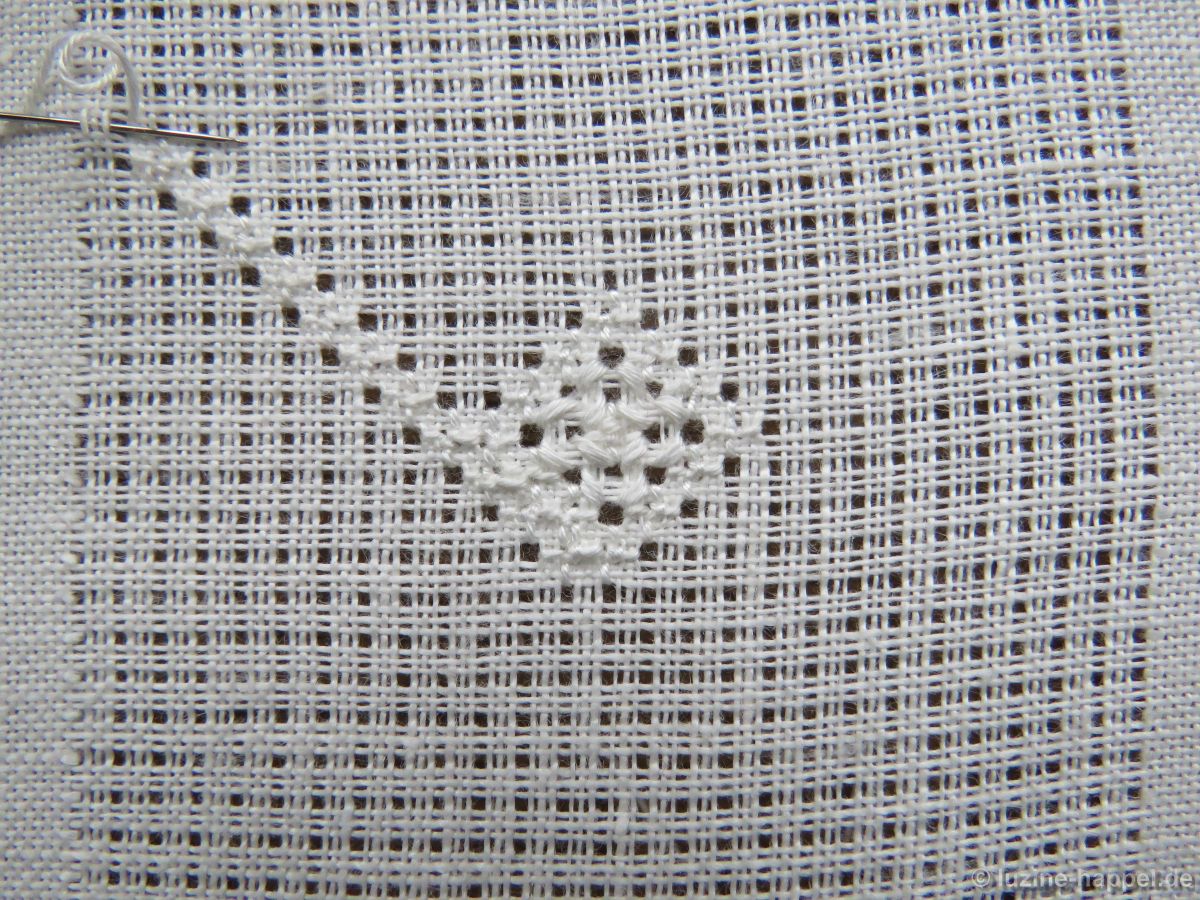
Kreuzweise dazu werden zwei weitere Rosenstichreihen gearbeitet.

Je eine weitere Rosenstichreihe wird neben die vorhandenen nach außen daneben gestickt.
Das Raster wird durch Doppelreihen von Rosenstiche über die gesamte Fläche vervollständigt.

In die entstehenden Freiräume werden zunächst die Kreuzformationen der 4 Rosenstich in der Mitte gestickt, dann von der Rückseite aus die Grundstiche und wieder von der Vorderseite aus die restlichen Rosenstiche.
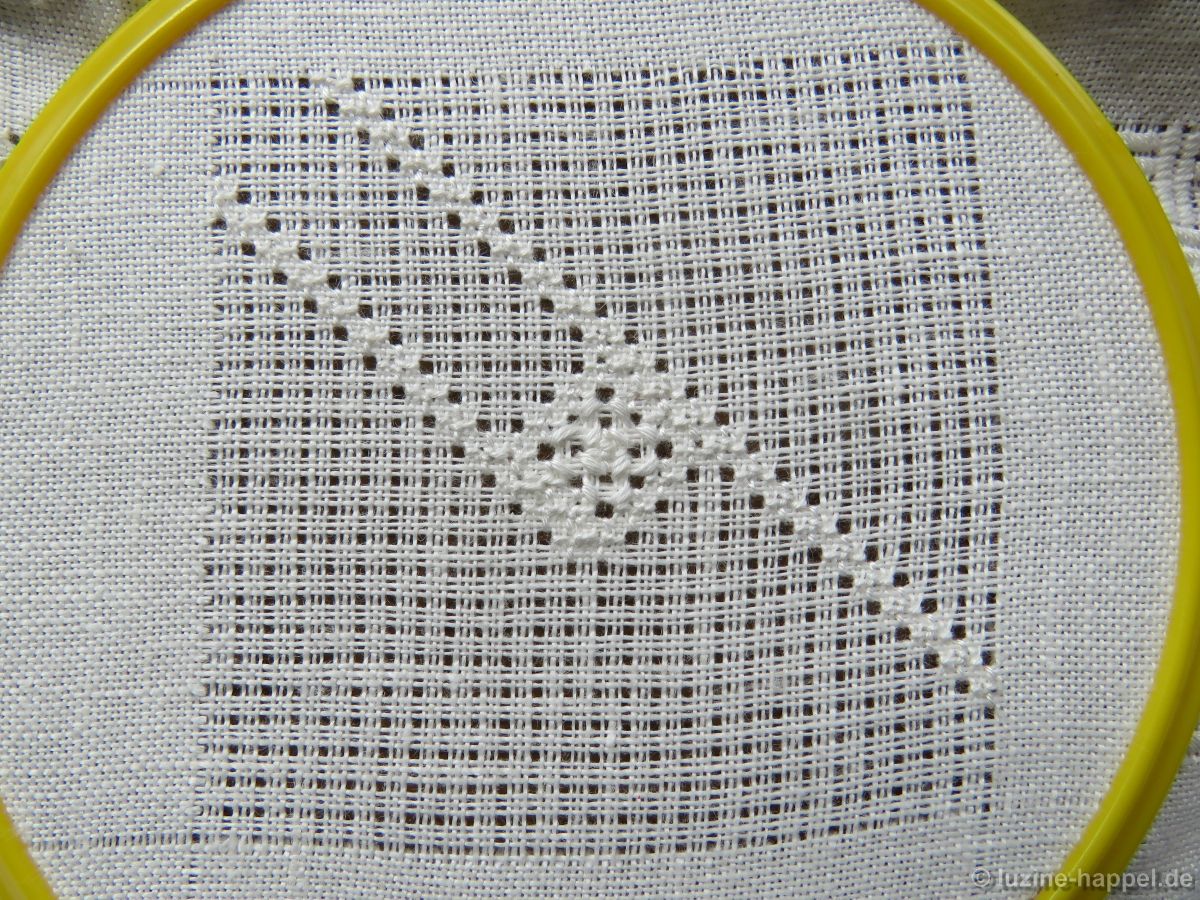
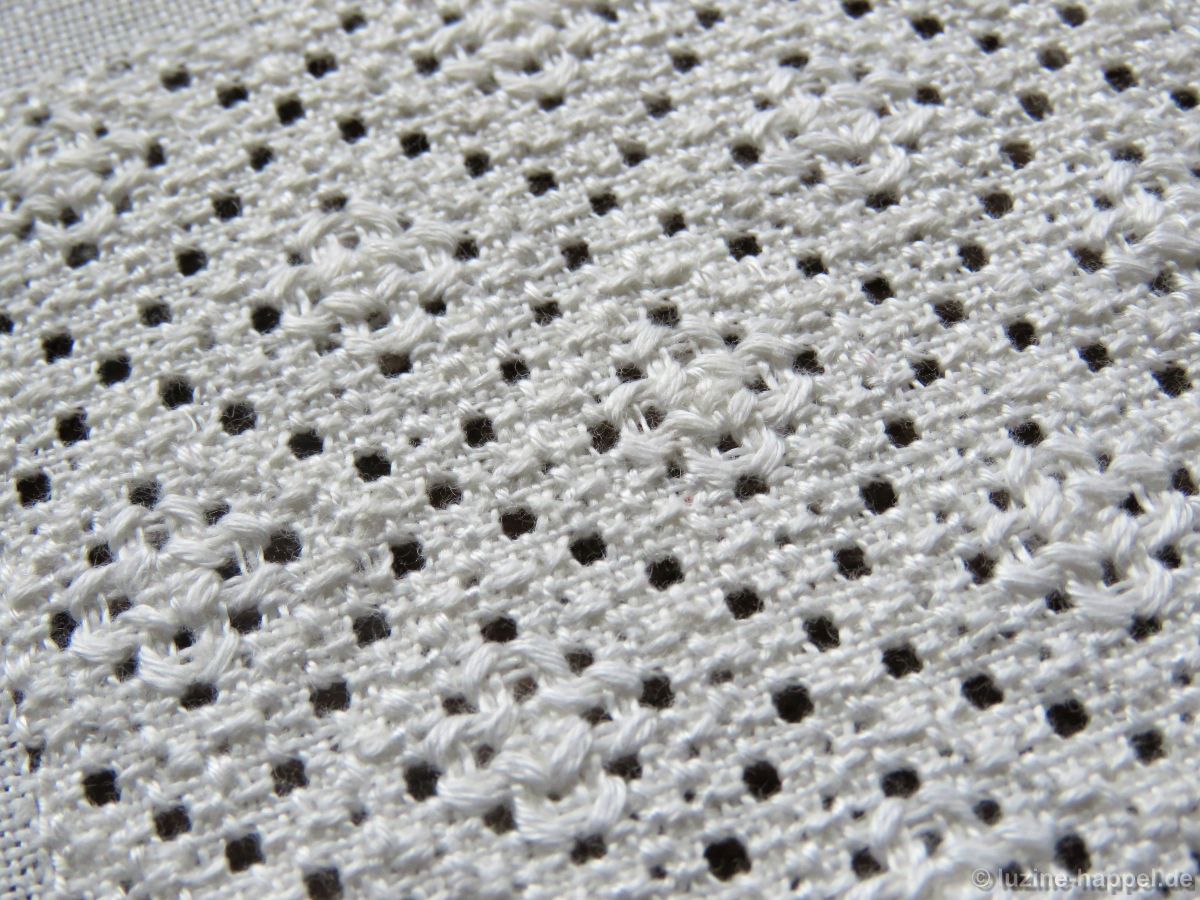
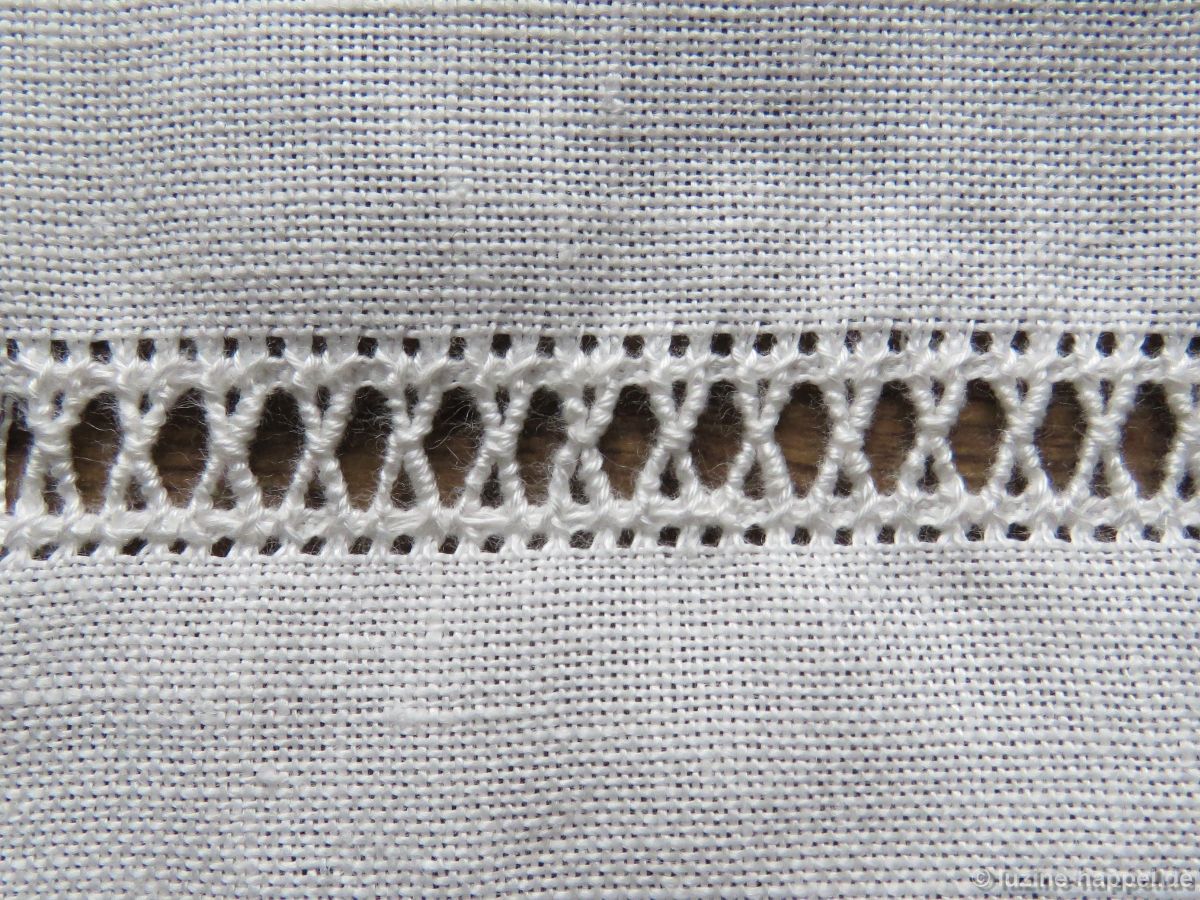
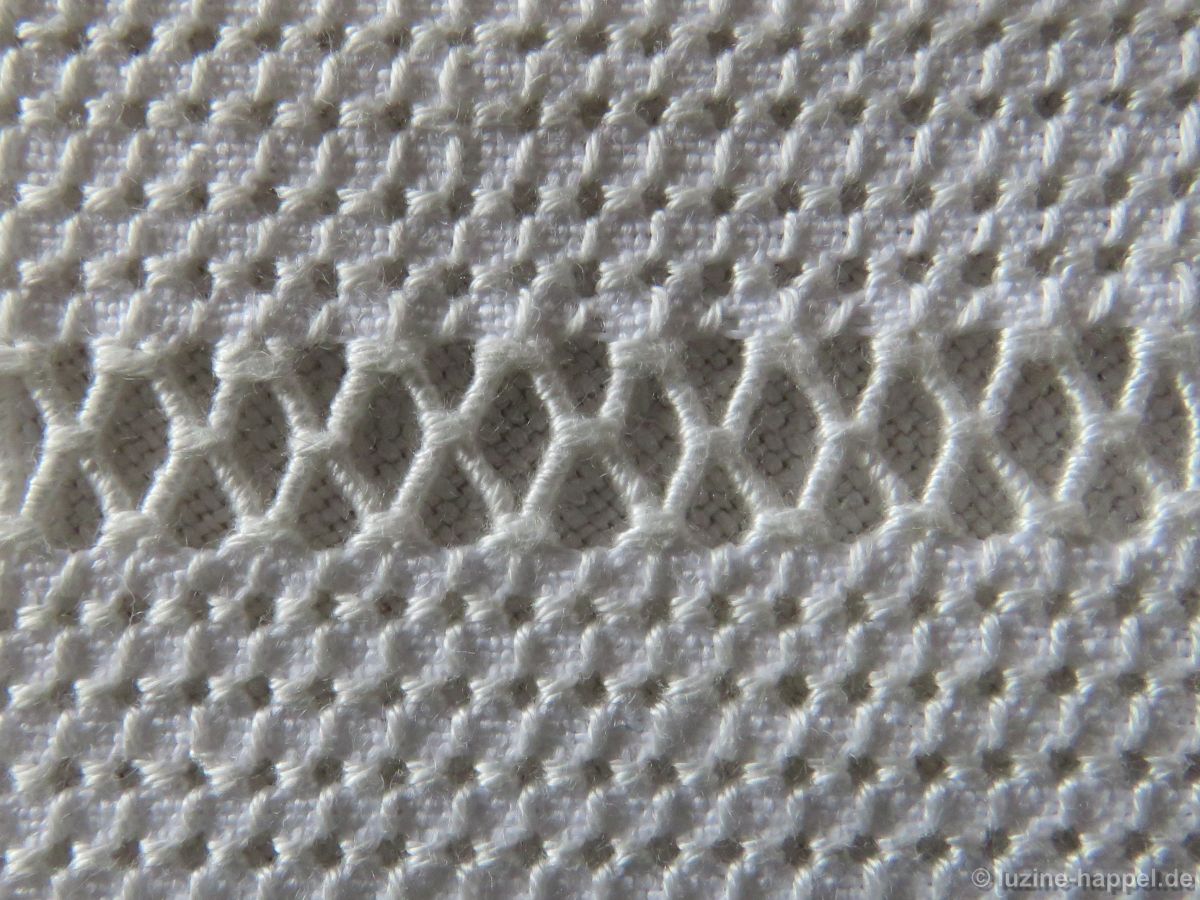
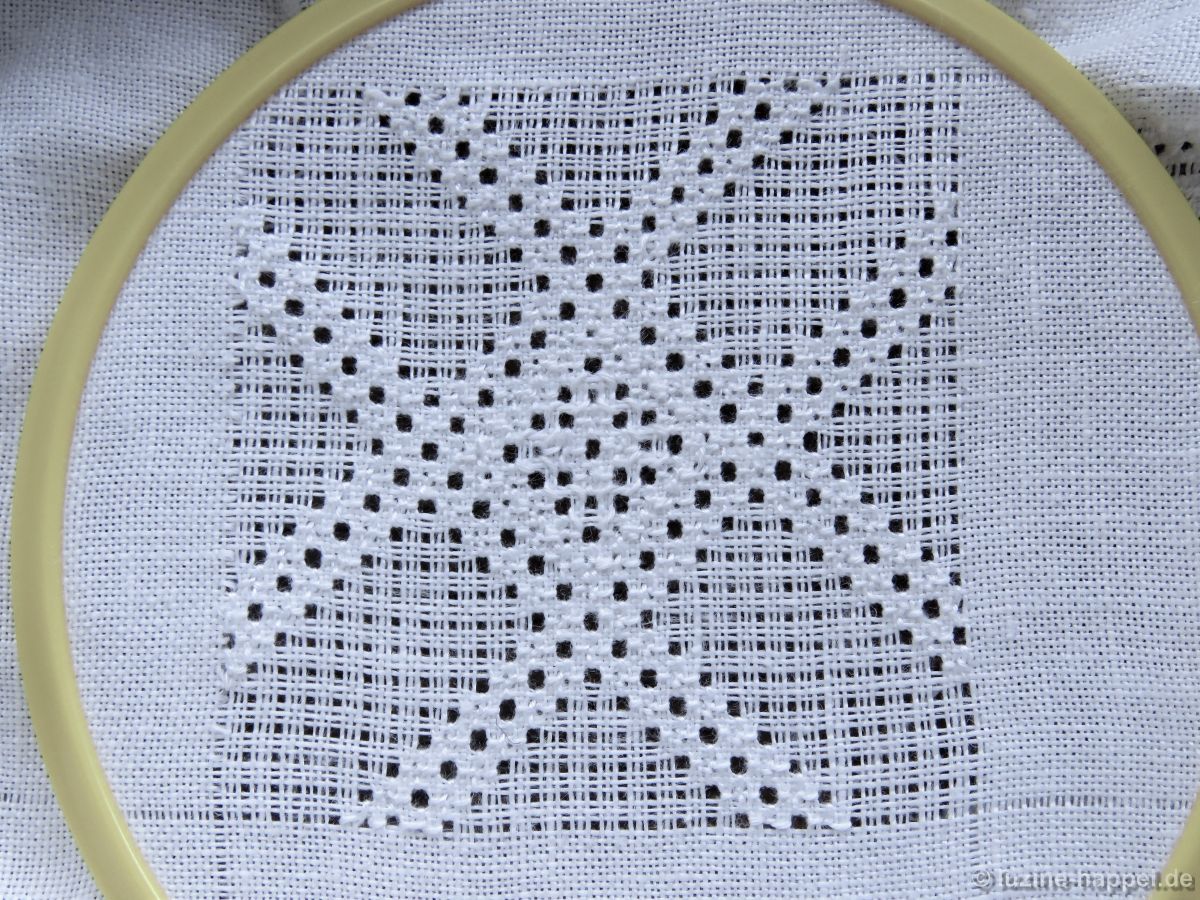
Sind alle Freiflächen des Rasters gefüllt, bietet sich folgendes Bild:

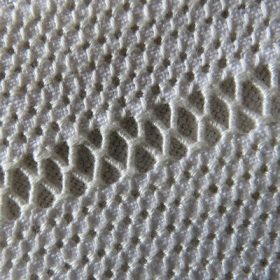
Mir erscheinen die Grundstiche zu wenig markant.
Daher habe ich beim Füllen der Tulpenfläche zwei Runden Grundstiche gearbeitet.
Nach der Wäsche tritt der Kontrast zwischen den flach liegenden Rosenstichen und den erhabenen Grundstichen klar zu Tage.