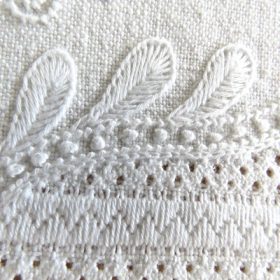
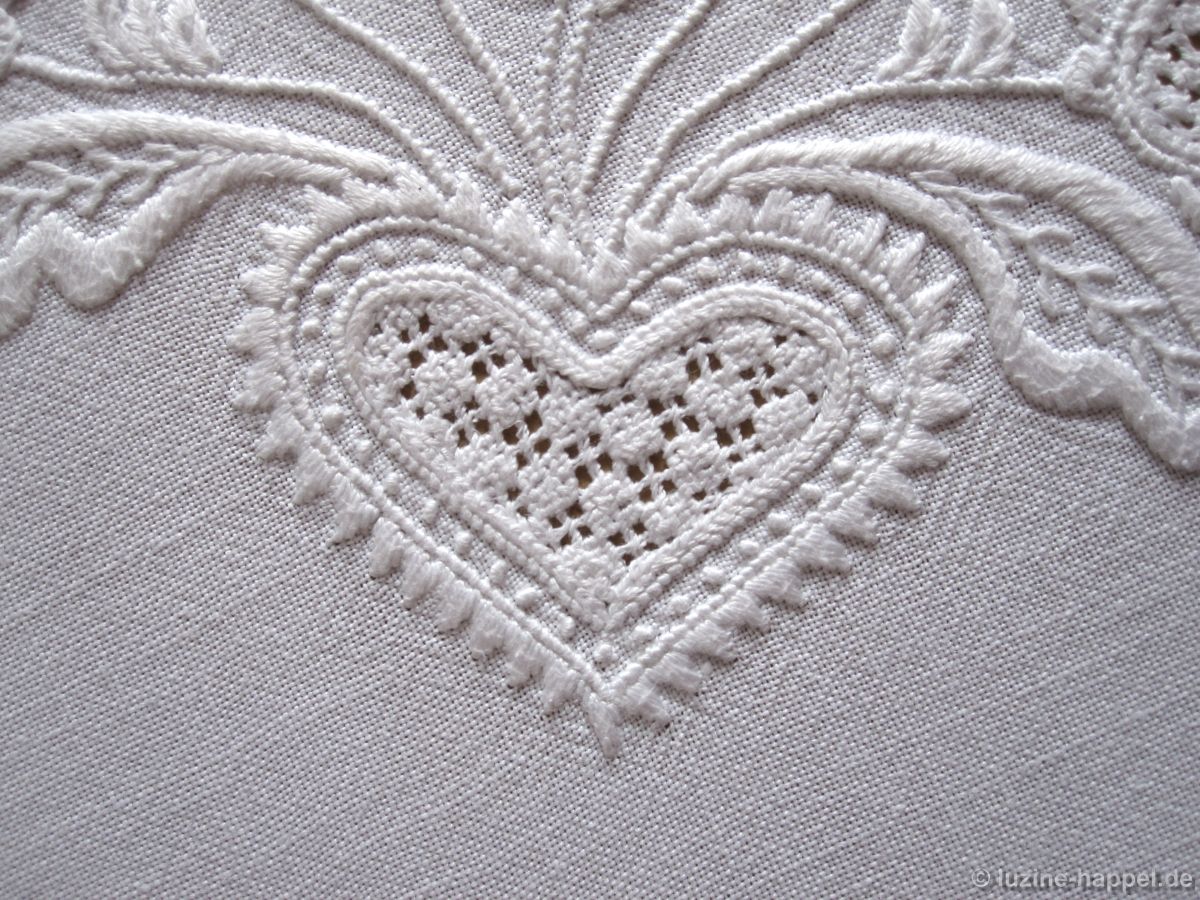
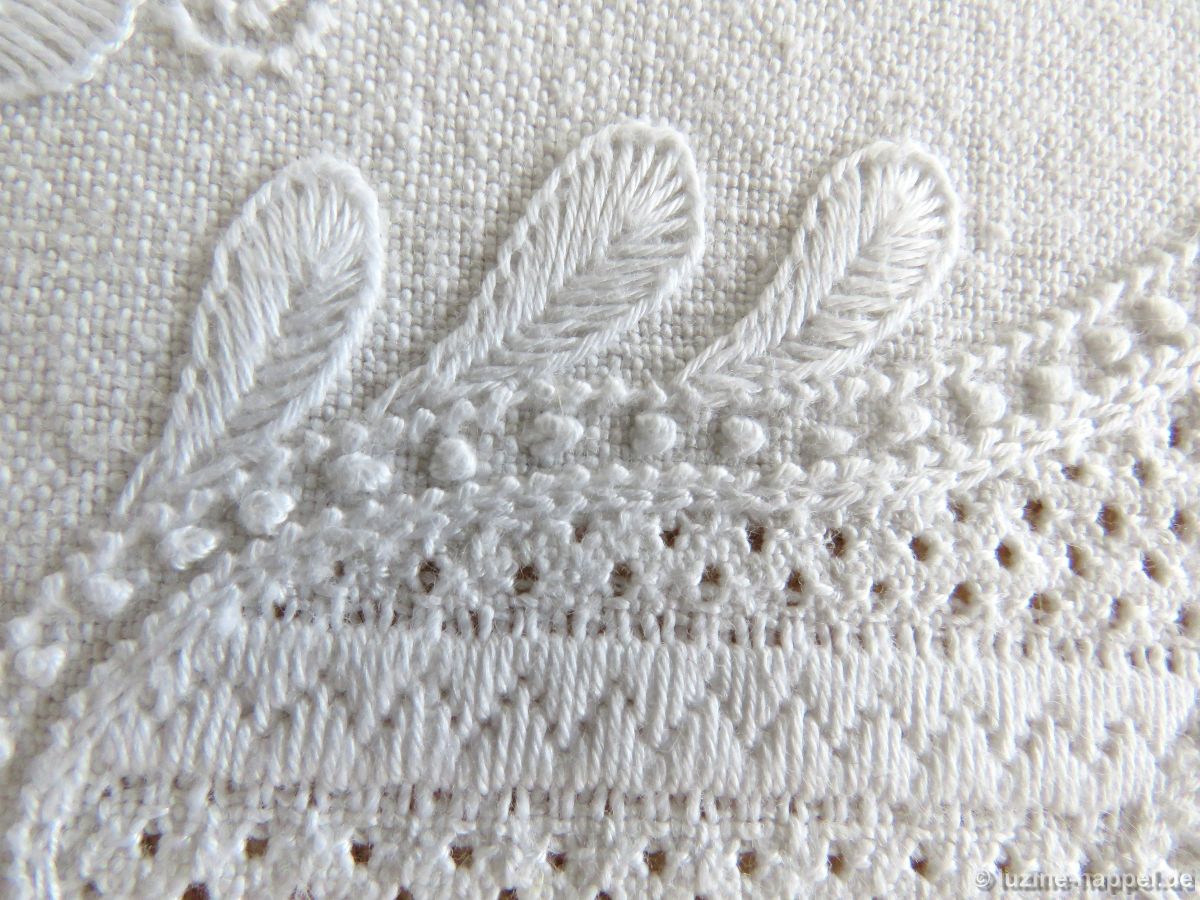
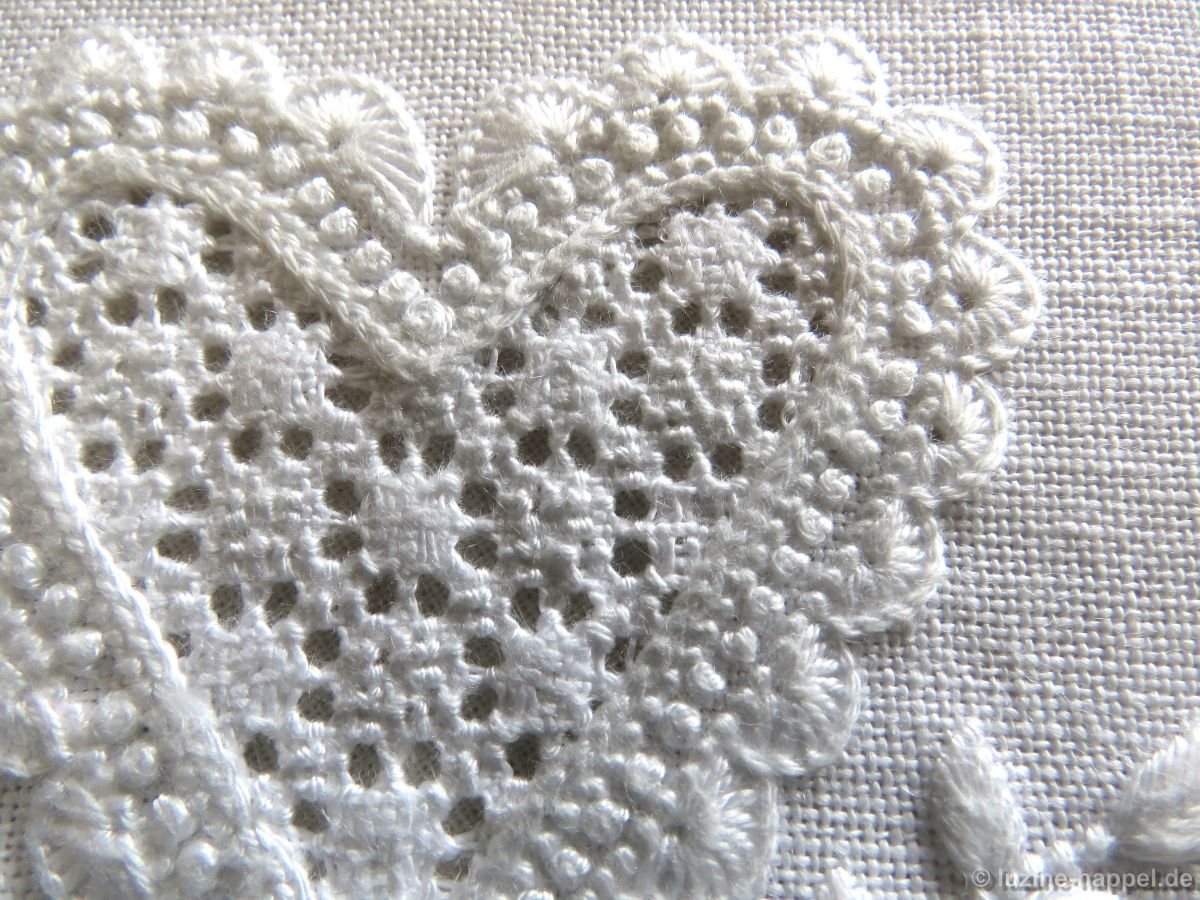
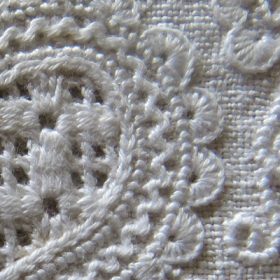
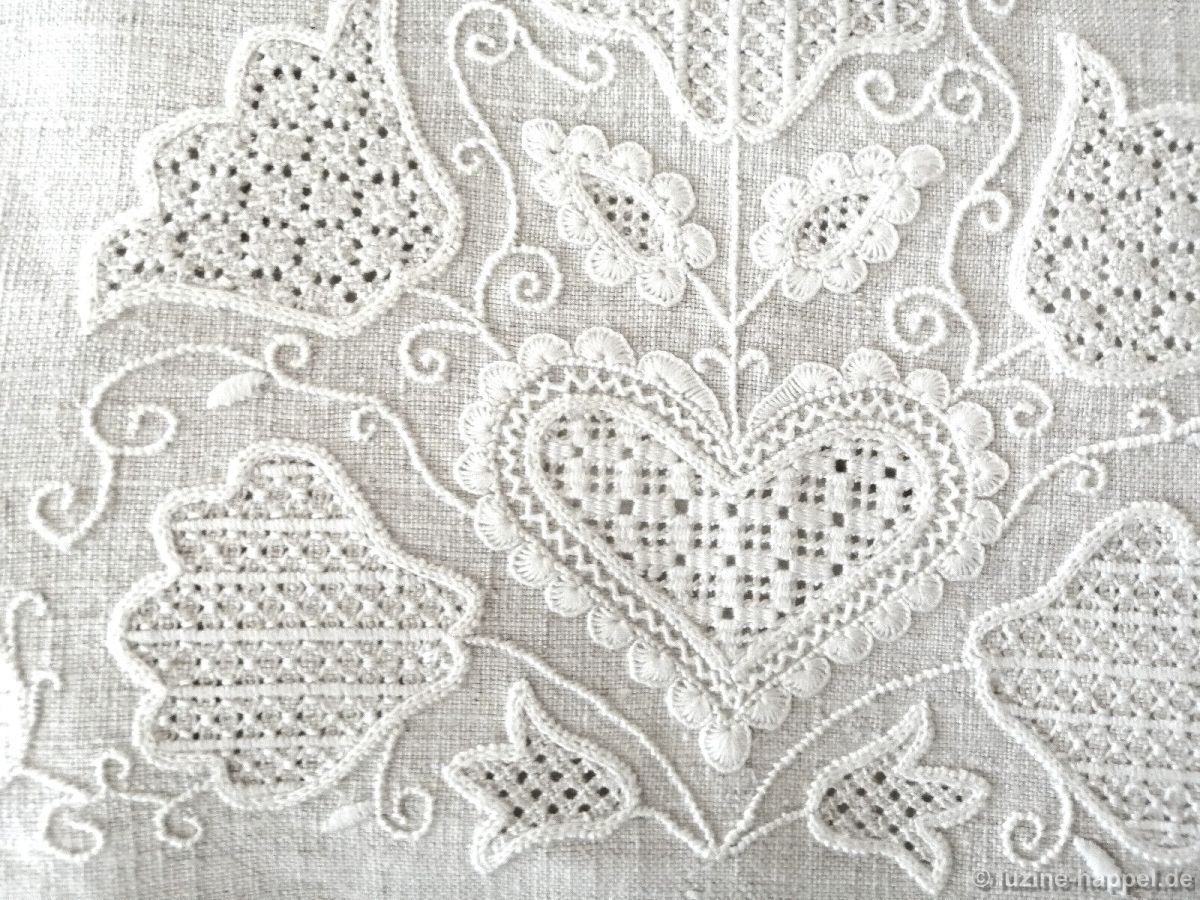
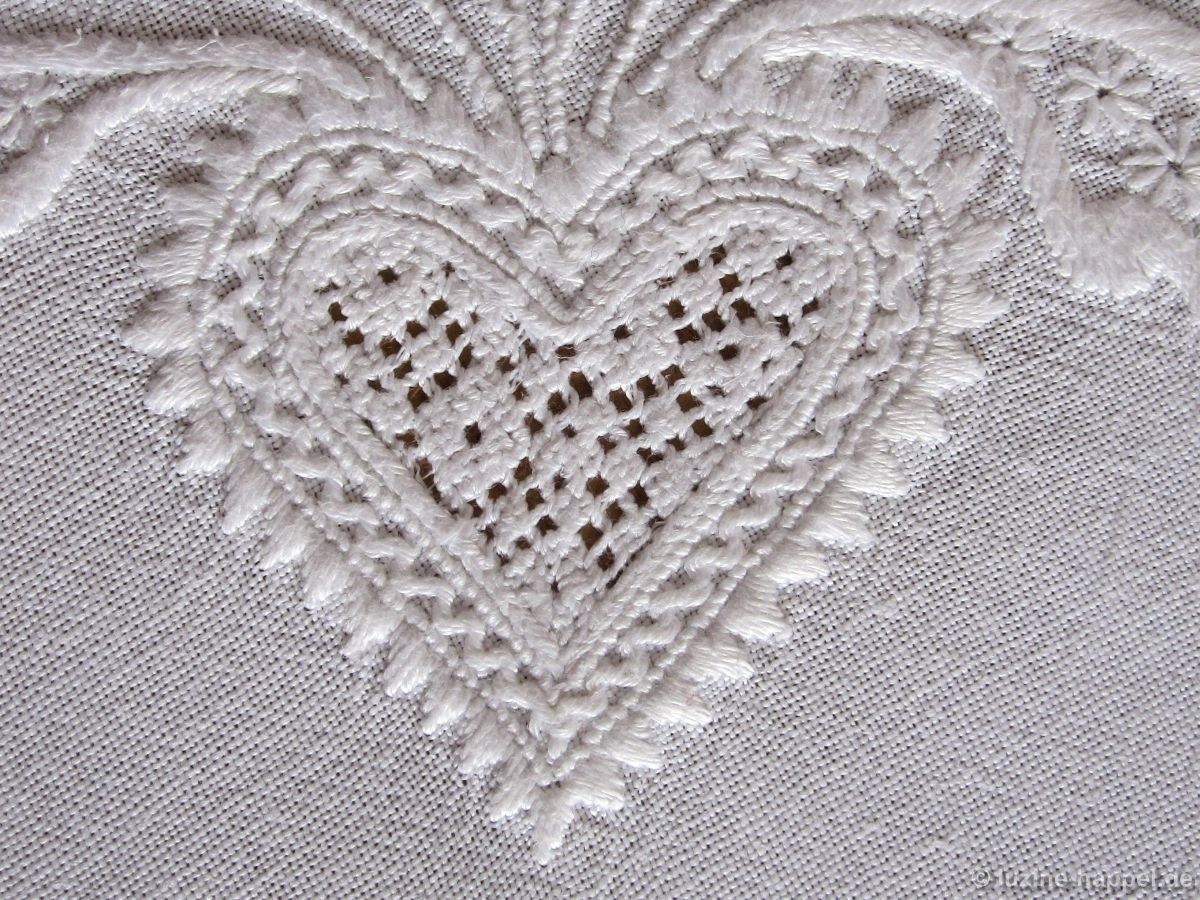
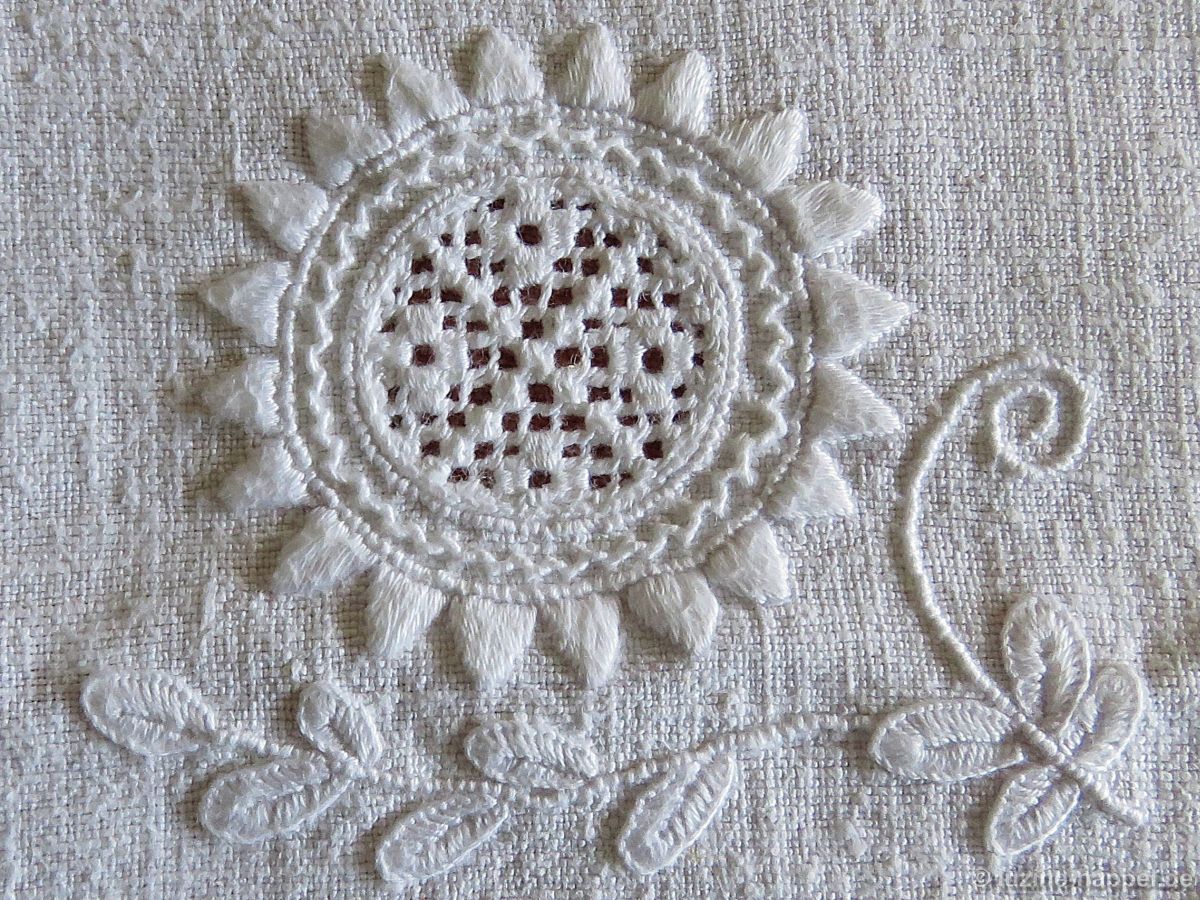
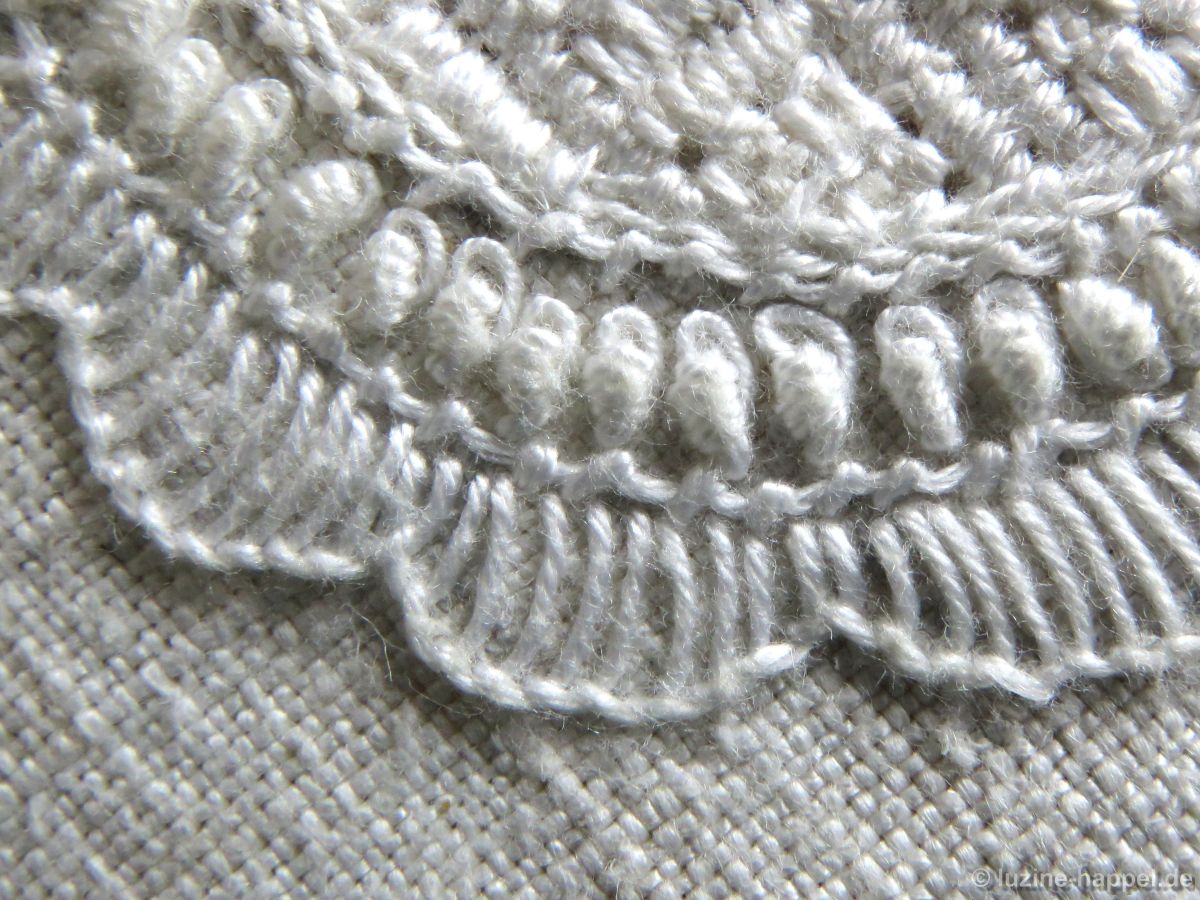
Bouillonstiche (nicht zu verwechseln mit Bouillonknoten) sind eine selten zu findende Gestaltung einer Fläche zwischen zwei Konturenlinien.
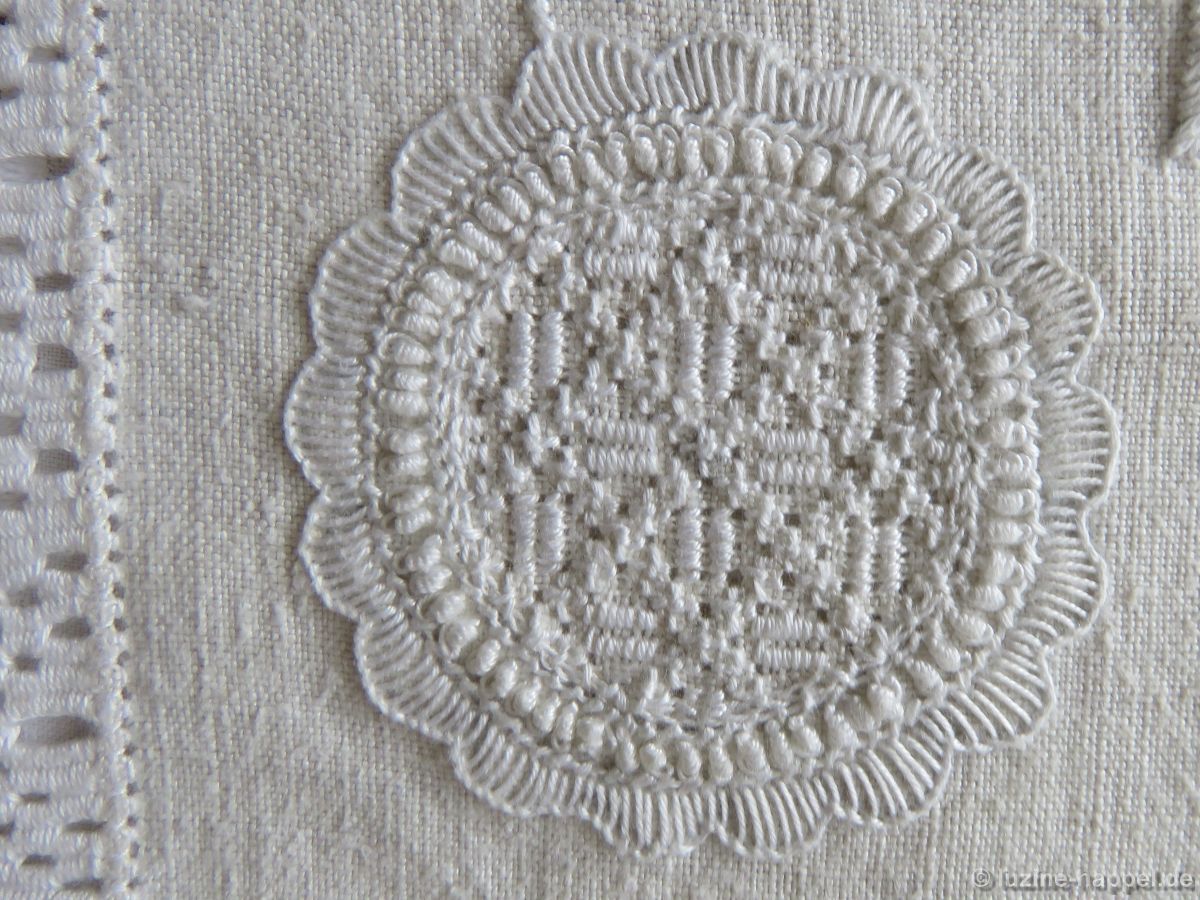
Sie fassen ein Motiv wirkungsvoll auf ganz besondere Weise ein. Besonders zu flachen Füllmustern bilden die erhabenen Stiche einen schönen Kontrast.

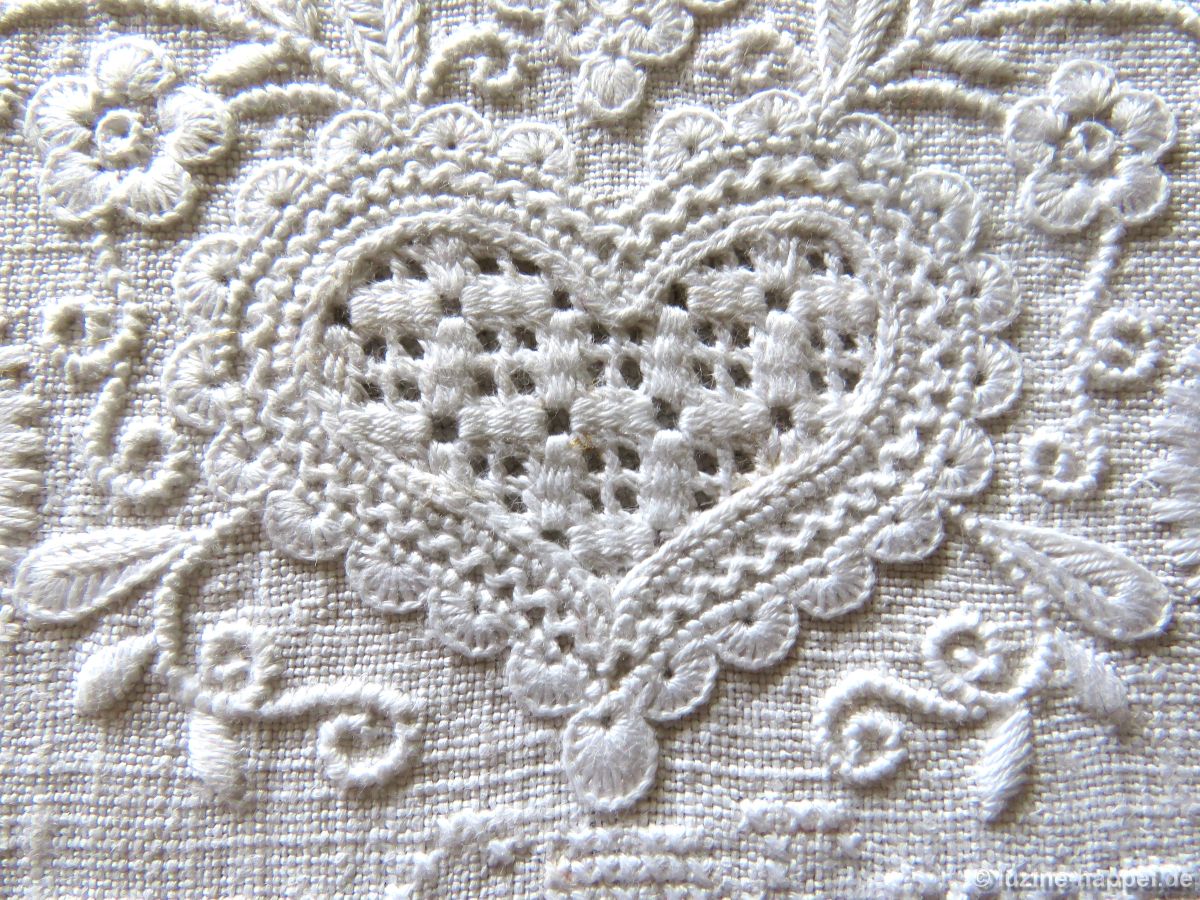
Bouillonstiche (Frühe Schwälmer Weißstickerei, Seiten 63 und 64) sind zur Umrandung fast aller Motive geeignet,
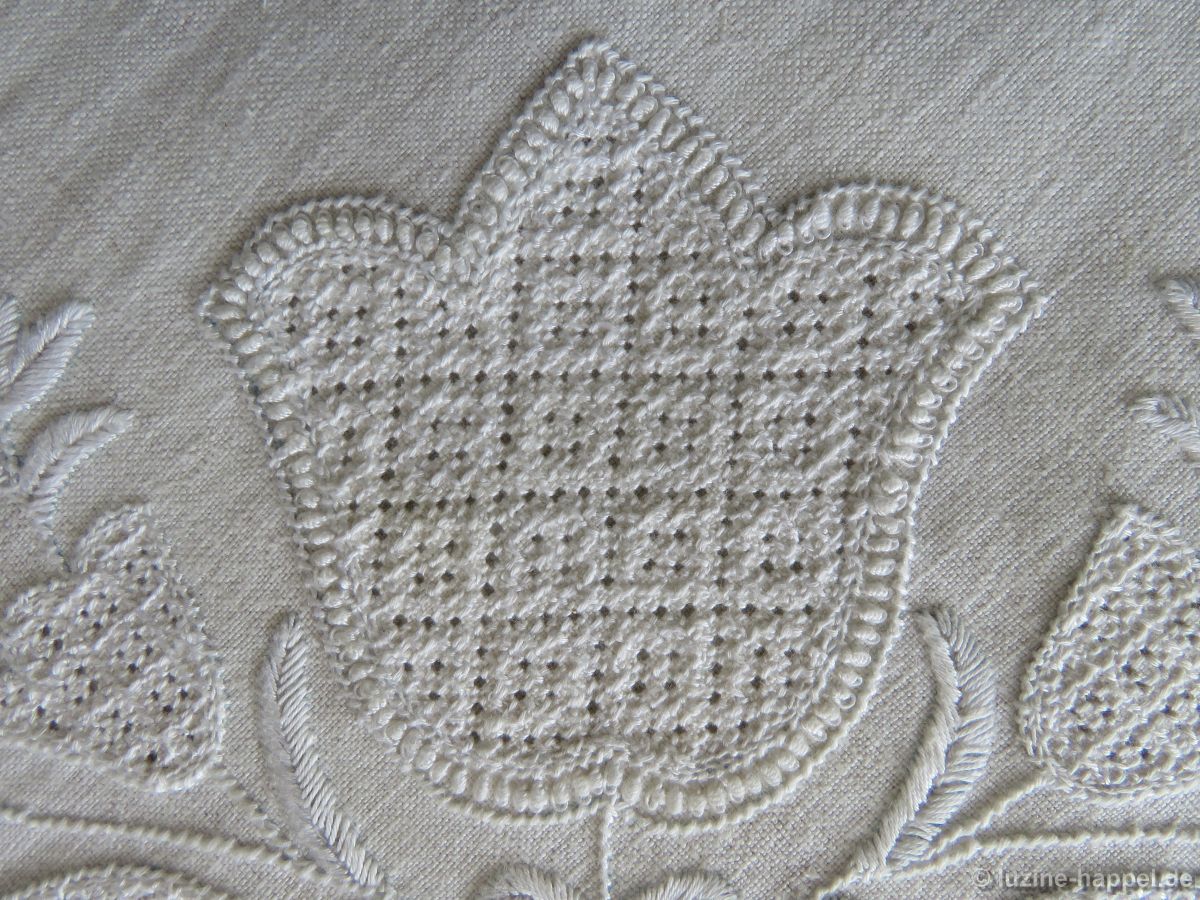
denn Reihen solcher Bouillonstiche passen sich flexibel an,
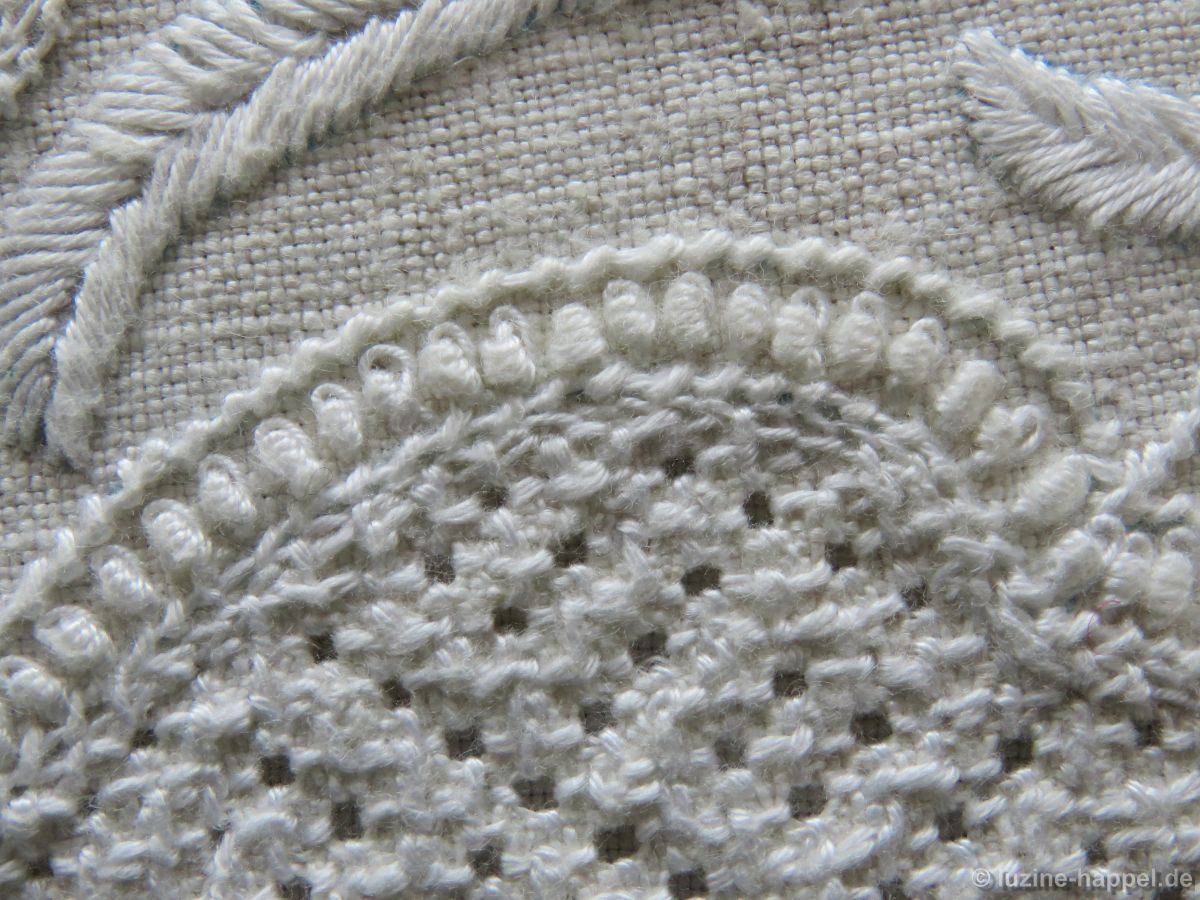
können auch enge Rundungen nehmen – sind also auch für kleine Motive geeignet –
und sind auch gut um Ecken herum weiterzuführen.
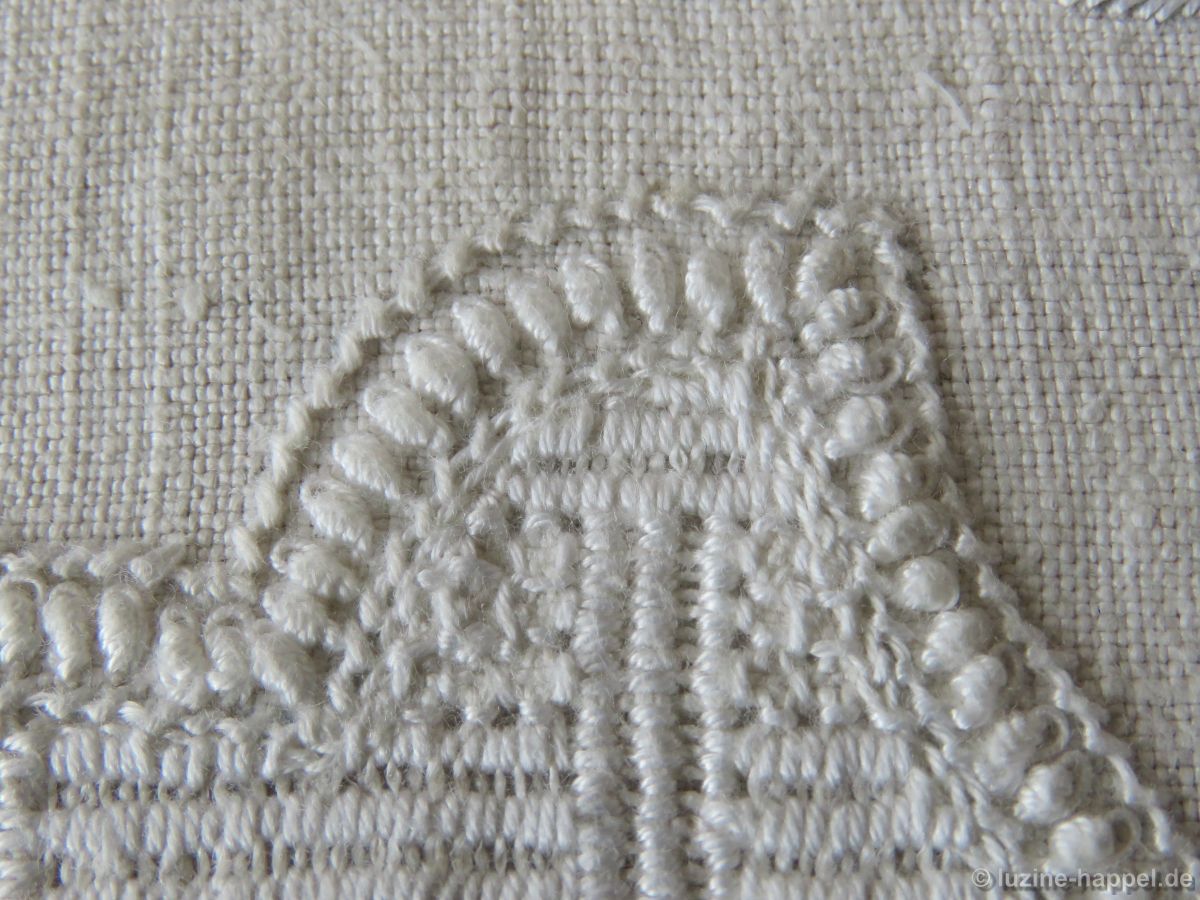
Bouillonstiche wirken am Besten, wenn sie relativ dicht nebeneinander gestickt sind.

Die Größe der Stiche kann durch die verwendete Garnstärke und durch die Anzahl der Wicklungen beeinflusst werden.
Siehe auch:
Doppelkonturen (1) – Freie Flächen
Doppelkonturen (2) – Umwickelte Spannstiche
Doppelkonturen (3) – Umwickelte Hexenstiche
Doppelkonturen (4) – Bouillonknoten